
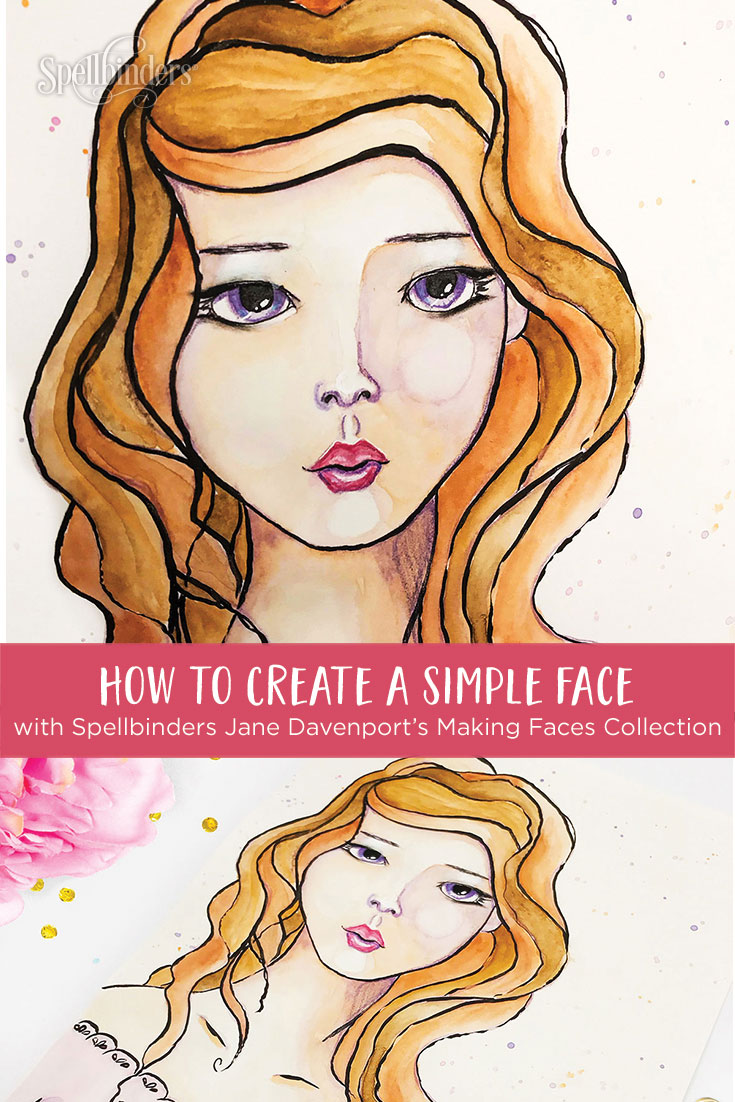
Create a Simple Face with Jane Davenport’s Making Faces Collection
Hi there – I hope your all as excited about the new Spellbinders range of Jane Davenport Making Faces goodies as I am – gotta say I’m swooning over the yummy rainbow of offerings. For those who don’t know me, I’m Kate Palmer, Aussie artist and craft supply addict, though I’m better known as Sparkle Tart online because I love all things sparkly! You can find me tapping away over on my blog or sharing snapshots over on Instagram (@k8palmer or @planningwithsparkletart ) – I love to share and I can’t wait to show you what I’ve created for today’s post!
Do you ever feel a bit blah, not sure what to create or just want to be able to make something pretty that doesn’t take hours or need oodles of skill or practicing? Well the page I’m about to show you is quick, simple and perfect for beginners because your mistakes and wonky lines actually make it look better. There are days I’d like to create but I don’t feel like drawing faces from scratch – so when I saw the newest face building stencils from Jane I was in heaven. Join me as I show you how to create this simple face perfect for your art journal.

Instructions:
Watch Kate create a face below or on Youtube:
Step 1: Use a pale colored watercolor pencil (I like lavender) and the Making Faces Foundation Layers Set to create a basic face, draw your design straight onto your page. This stencil set is particularly wonderful as there are different sets of eyes, hair, noses and lips that all fit perfectly within the face shape so you can create many different sets of features. I’ve added shoulders and a very basic dress to complete the image.
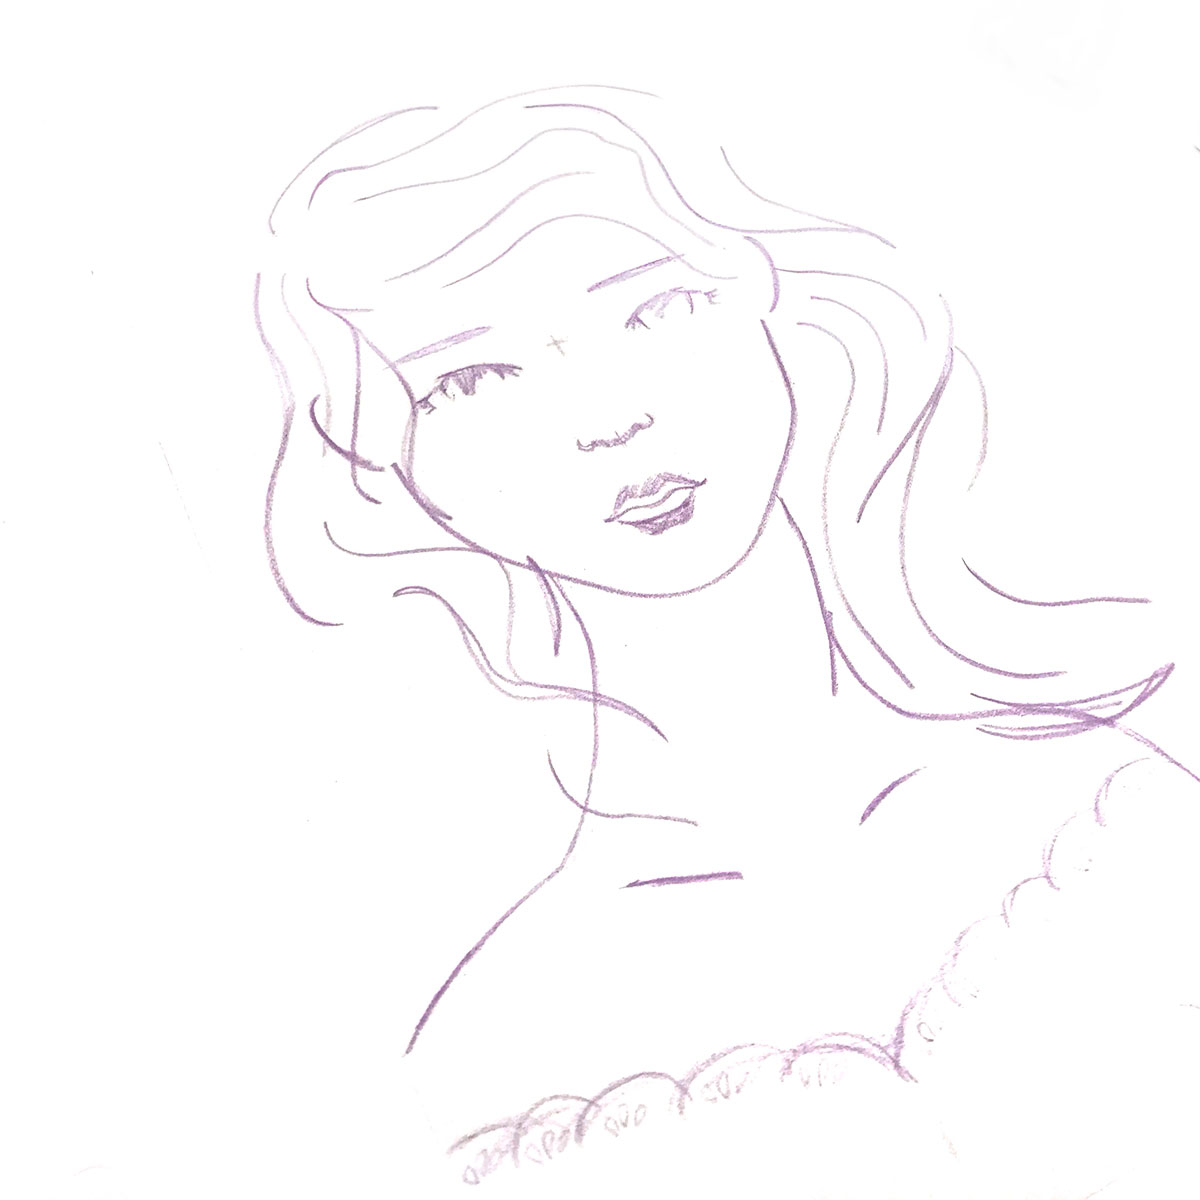
Step 2: Time to commit! Using the Black Lace Ultimate Pen – outline your drawing. This is brilliant as it does not bleed and is waterproof, once the pen work is dry, use the same watercolor pencil to sketch in some details, I’ve fleshed out the lips added the position of shadows and the cheeks. You can mix the watercolor pencil into the ColorSticks. Begin by adding color to the hair, I’ve used a fine tip waterbrush and grabbed color straight from the Silky Skin ColorSticks. Overlap the colors, add fine and thick lines, don’t be too concerned about how you add the color – as you can see I’ve just added it in sections. The more variation you have the better it looks so any little wiggles or mistakes actually make it look better.
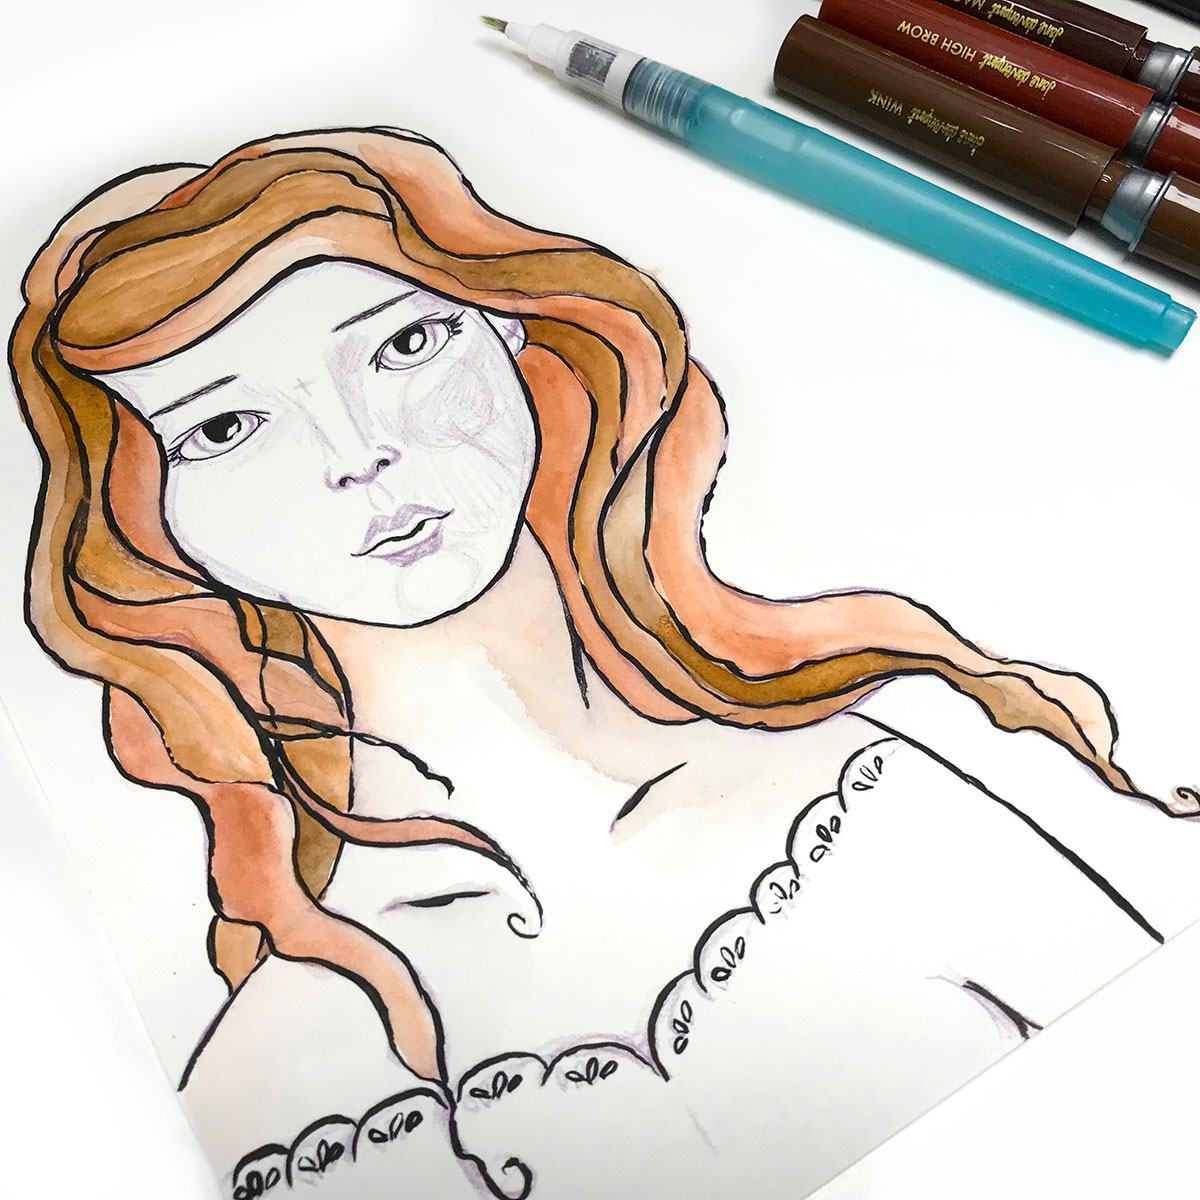
Step 3: Once the previous layers of ink have dried color the face, neck and dress using colors from the Silky Skin ColorSticks set. Start with the lightest color and before each color dries, add the next – it’s easier to blend the colors this way. Pick up the color direct from the ColorStick using a waterbrush. A little trick is to leave the T-zone of the face (center of the forehead, nose and chin) lighter than the rest for a more natural look. Each time you add a new color splatter a little of the same color over the background to create a unified page and fill in some of the blank space.

Step 4: Add a word stamp to your page using Cave Black Squid Ink, I love this little Wild and Free stamp from the Mad Confetti Clear Stamp set. Then use Jane’s Magic Wand pencils to add definition to your image, just add a little here and there to crisp up the edges and enhance the eyes and lips.
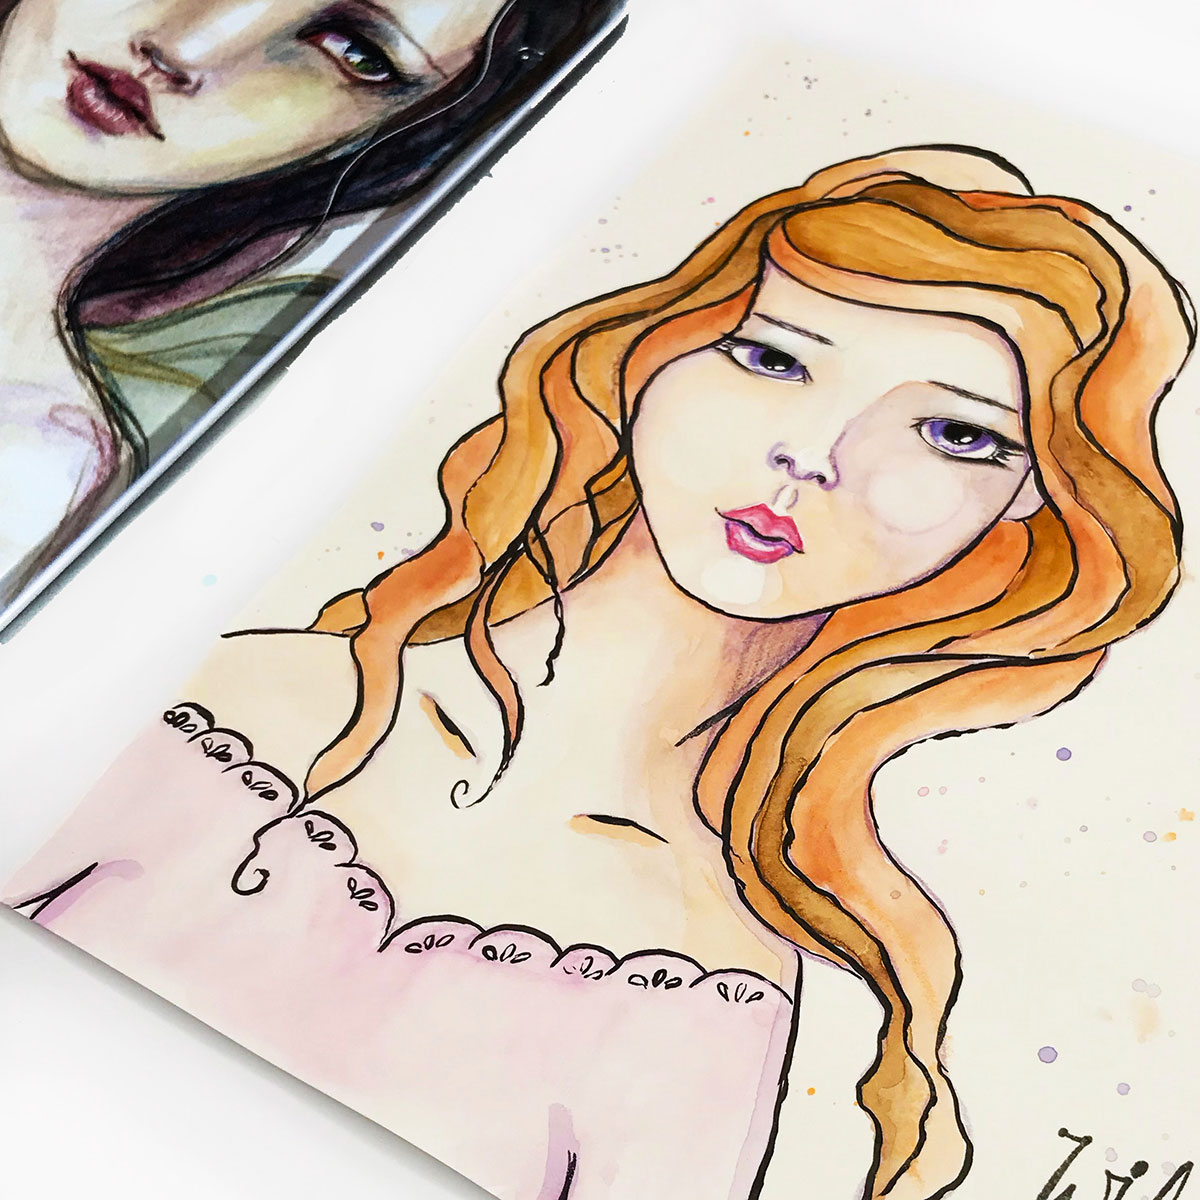
Step 5: Lucky last – add a little drama using the gloriously smudgy black DramaStick. Just like you would with eyeliner, apply a thin line of black to the lash lines upper and lower and then use what looks exactly like an eyeshadow applicator (Baton Blenders) to smudge the line and create a beautiful smoky eye look. You can see how much this looks like a real smoky eye, go on and make it as dramatic as you like!

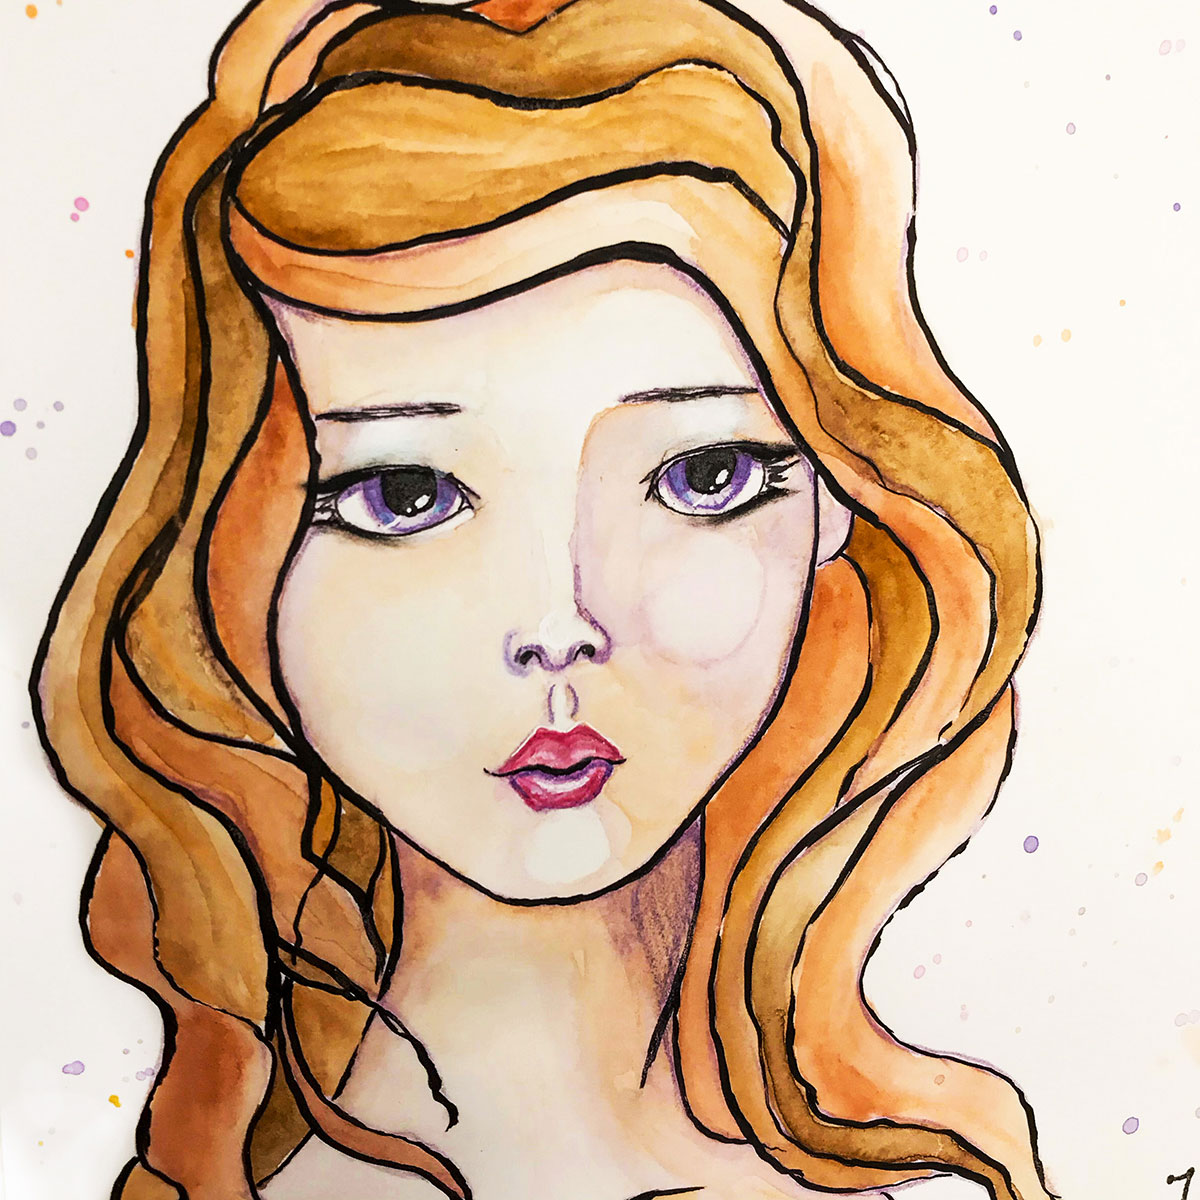
And your page is finished!
Spellbinders Supplies (available later):
Other supplies:
Arches Smooth Watercolor Paper 185gsm, Fine Tip Waterbrush, Caran D’Arche Watercolor Pencil, Heat tool, Jane Davenport Magic Wand Pencils and Sharpie White extra fine paint pen.

Thank you so much for being here for my very first Spellbinders post, I hope it gives you a little confidence to try making a face of your very own! Remember to search the Spellbinders blog for other great ideas using Jane Davenport supplies, my fellow teamies share the most amazing ideas!
oxox
Kate
3 Comments
Tricia A Podmore
Loved watching you create her face. The super instructions were so informative and easy to follow. Thank you so much for sharing.
Kate Palmer (Sparkle Tart)
Thanks so much Tricia oxox
Dianna Lantz
I Love the Face! My faces are all on the Negative side. Wonderful info on how to. Thank You.