Bold Type Inspiration | Clean & Simple Cards with Yasmin
Hello, Spellbinders’ and FSJ friends! Yasmin here sharing with you another 3 clean & simple inspiration cards showcasing the new Bold Type Sentiments Collection. If you’re a crafter that loves die-sentiments this is it. You’re going to fall in love with this collection as, each set comes with 2 dies which are slightly offset to create a shadow layer, besides that, one of the dies creates lines to add detail while the other is just a plain die, yet each set was designed to be layered to create the shadowing layer. Therefore, there’s no right or wrong in which way you layer the up as they can be use in both ways just like I did on today’s blog. So, without further ado, let’s jump to the step by step on how to make them.
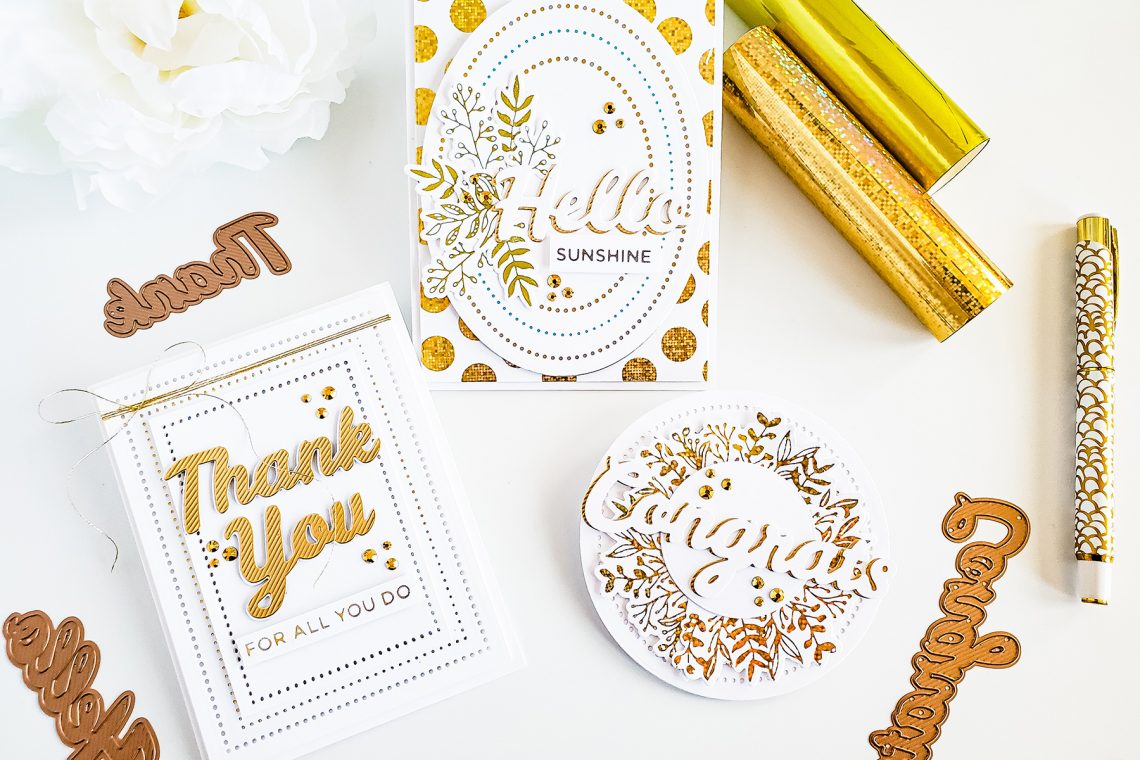
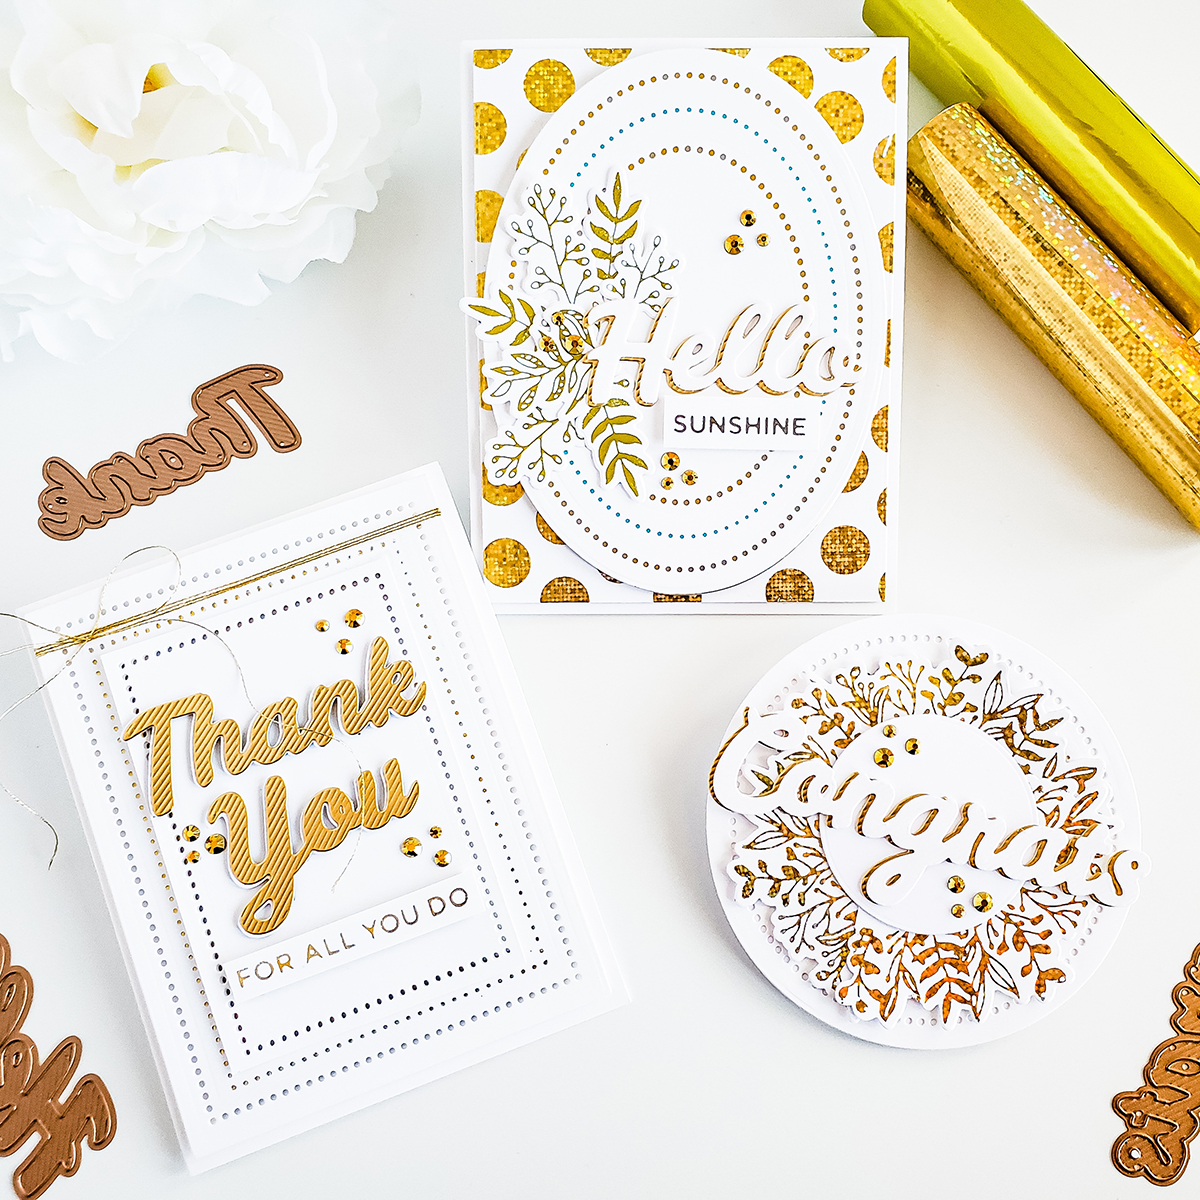
Thank You for All You Do Card

To begin with, I started by turning the Glimmer Hot Foil System Platform on. Because, I was going to add foil accents to the cards. Thus, while the platform was heating up, I lined up over an A2 size white card panel the first 2 largest rectangles from the; Nestabilities Essential Rectangles Etched Dies set. Next, I ran the dies along with the white card panel through my Platinum 6 Die Cutting and Embossing Machine to die-cut the card panel for the card. Also, I ran through the die-cutting machine another white card panel along with the fifth-to-last die from the same set. Once, I had the dotted detail on the second card panel, I trimmed the edges off with the paper trimmer even though, I could have used the sixth die from the set, I skipped that step because, I was going to add the foil accents to the card panel using the sixth-to-last plate from the; Essential Glimmer Rectangles Hot Foil Plates. I did it this way, because I wanted to raise the level in between the bottom and top panel for a dimensional look.
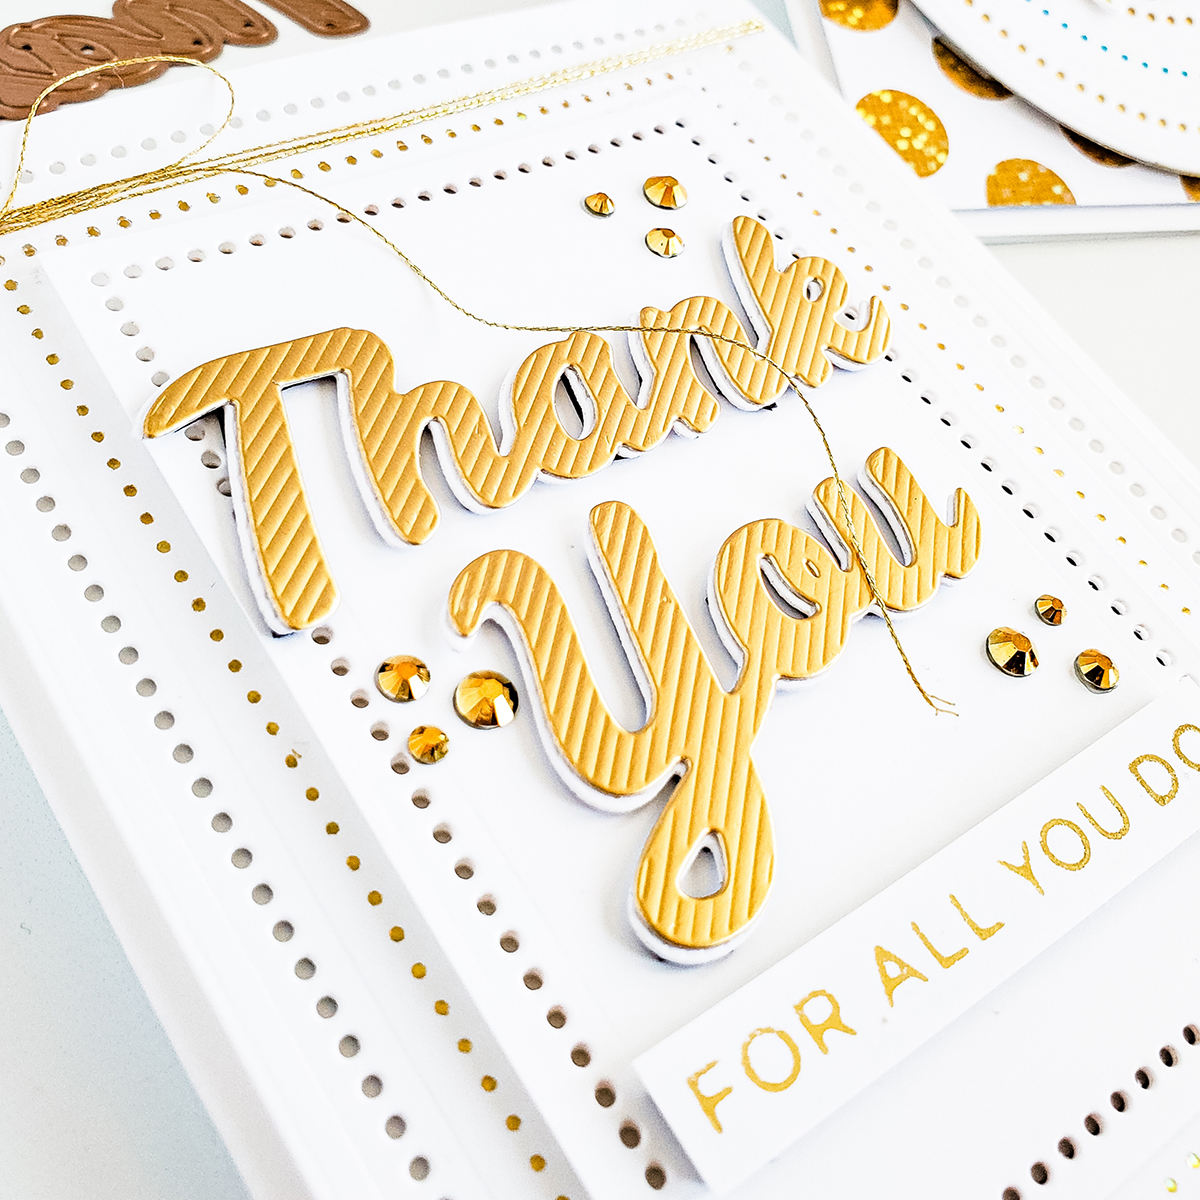
So, right after when the card panels were done and foiled, I foam mounted them to an A2 side-folding white card base as shown in the image above, and I moved on to create the focal point for the card. As for the focal point which, in this case is the Thank you, I ran though the die-cutting machine the plain die from the Die D-Lites Bold Type Thank You Etched Dies to die-cut it 3X out white cardstock as well as the detailed die which, I ran only 1X to die-cut it out of gold cardstock. Right after when all die-cutting pieces were done, I stacked the plain whites, and I offset it to the right the gold on top of them. Lastly, to finish the card off, I foam mounted the die-cutting Thank you as well as a sub-sentiment which I had previously foiled on white cardstock using the plates from the More Sentiments Glimmer Hot Foil Plates and Glimmer Hot Foil Roll – Gold. As finishing touches, I added gold jewels as well a large piece of metallic thread which I wrapper around and finished with a tied bow to complement the gold from the foils and Thank you sentiment.
Hello Sunshine Card
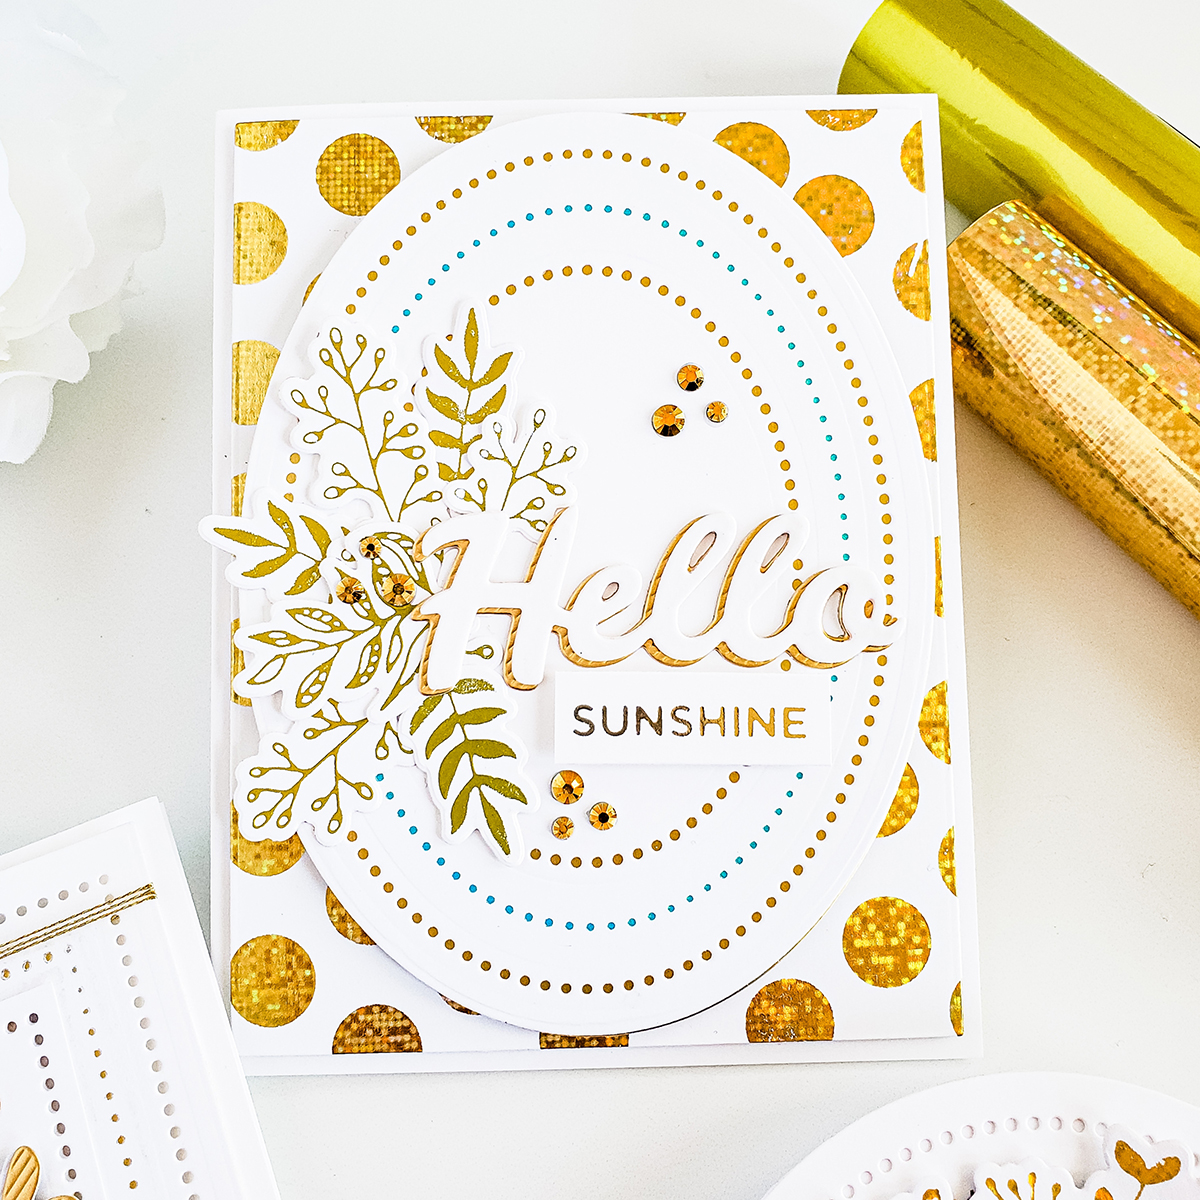
For the second inspiration, I went a little overboard by adding lots and lots of shine to the card. So, to begin with I started by foiling the card panel. To do that, I used Glimmer Hot Foil Roll – Speckled Aura which is included in the Glimmer Hot Foil 4 Rolls – Spellbound Variety Pack and Polka Dot Strip Glimmer Hot Foil Plate from Foiled Basics by Yana Smakula. Once, I had a full foiled background, I trimmed the edges off from it, and I foam mounted it to an A2 top folding white card base. To create the oval, I lined up over a white card panel the fifth, seventh and the largest die from the Nestabilities Essential Ovals Etched Dies to die-cut and add the dotted detail to it. To add an extra pop of color, I placed over the oval the sixth-to-last plate from the Essential Glimmer Ovals Hot Foil Plates and I foiled the oval with Glimmer Hot Foil Roll – Moondust which is also included in the same glimmer hot foil 4 roll set.
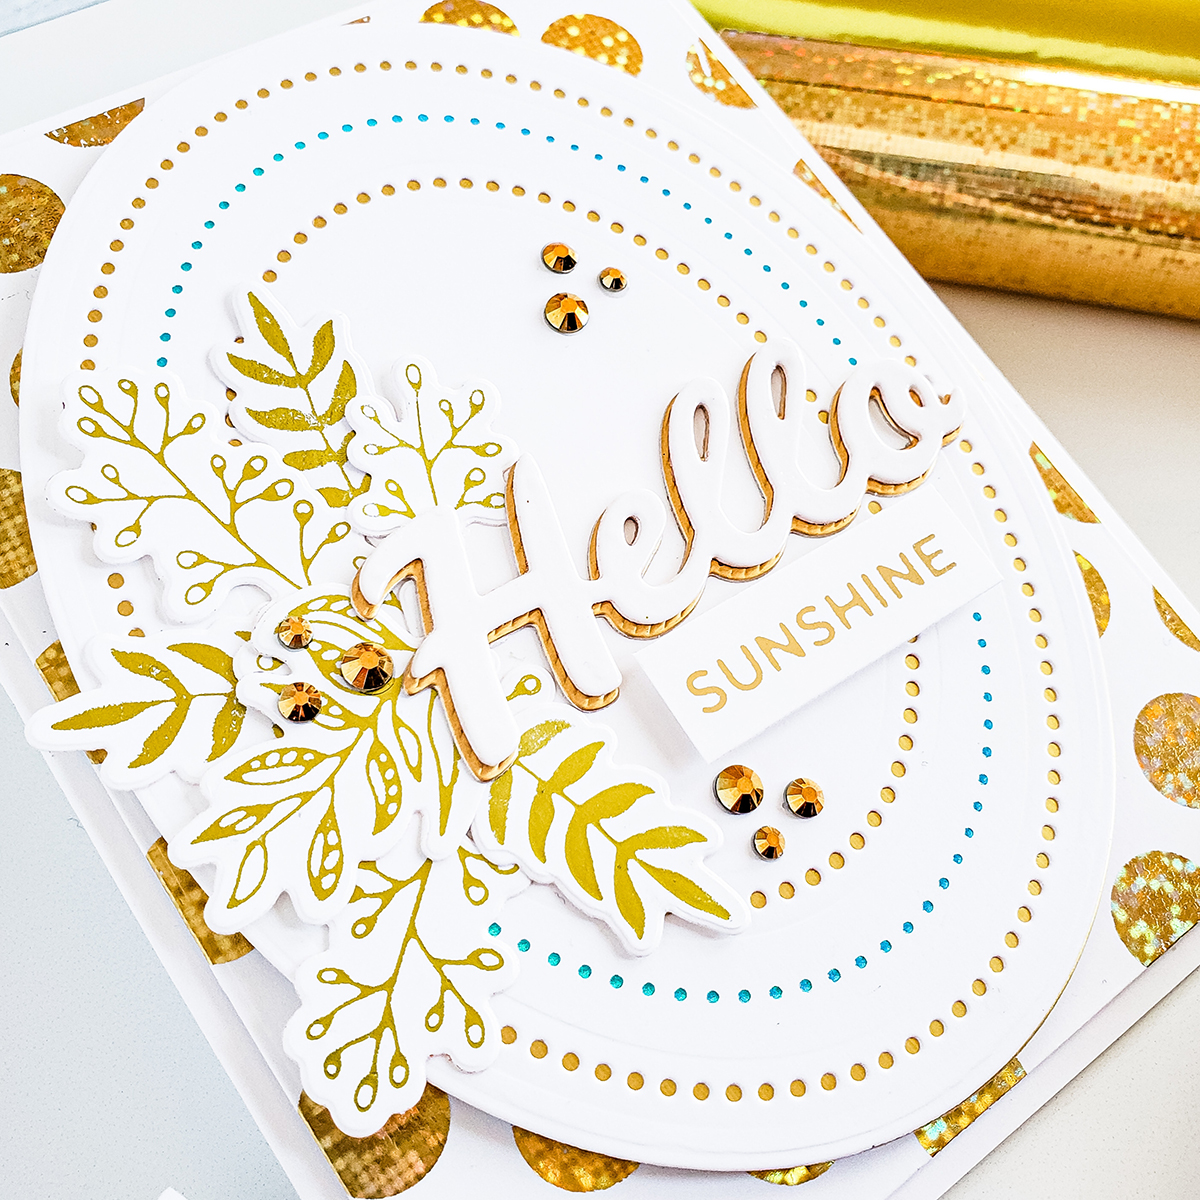
Lastly, I adhered down the backing of the detailed oval to another oval which I had previously die-cut out of gold cardstock, and I foam mounted it to the card. As for the Hello, ran through the die-cutting machine the plain layer to die-cut it 3X out of white cardstock and its detailed layer to die-cut it 1X out of gold cardstock. Right after when all die-cutting were done, I stacked the whites and I clear gloss heat embossed the dimensional Hello for a glossy/shiny look. To finish the card off, I created a cluster with the foliage that I had previously foiled on white cardstock using; Organic Foliage Glimmer Hot Foil Plate & Die Set and Glimmer Hot Foil Roll – Citrine. Once the foliage was glue down to the left side of the oval, I adhered with liquid glue the detailed gold Hello followed by the glossy and dimensional white Hello which I offset it as shown in the images above. As finishing touches, I adhered with liquid glue 3 sets of gold jewels and the sunshine sentiment which I had foiled on white cardstock using the same set. By the way, the sunshine is part of the sentiments from the More Sentiments Glimmer Hot Foil Plates it actually says hello sunshine however, because I was using the Hello die-cutting sentiment, I trimmed the hello off from the sentiment to combine the die-cutting and foil sentiments for this card.
Congrats Shaped Card
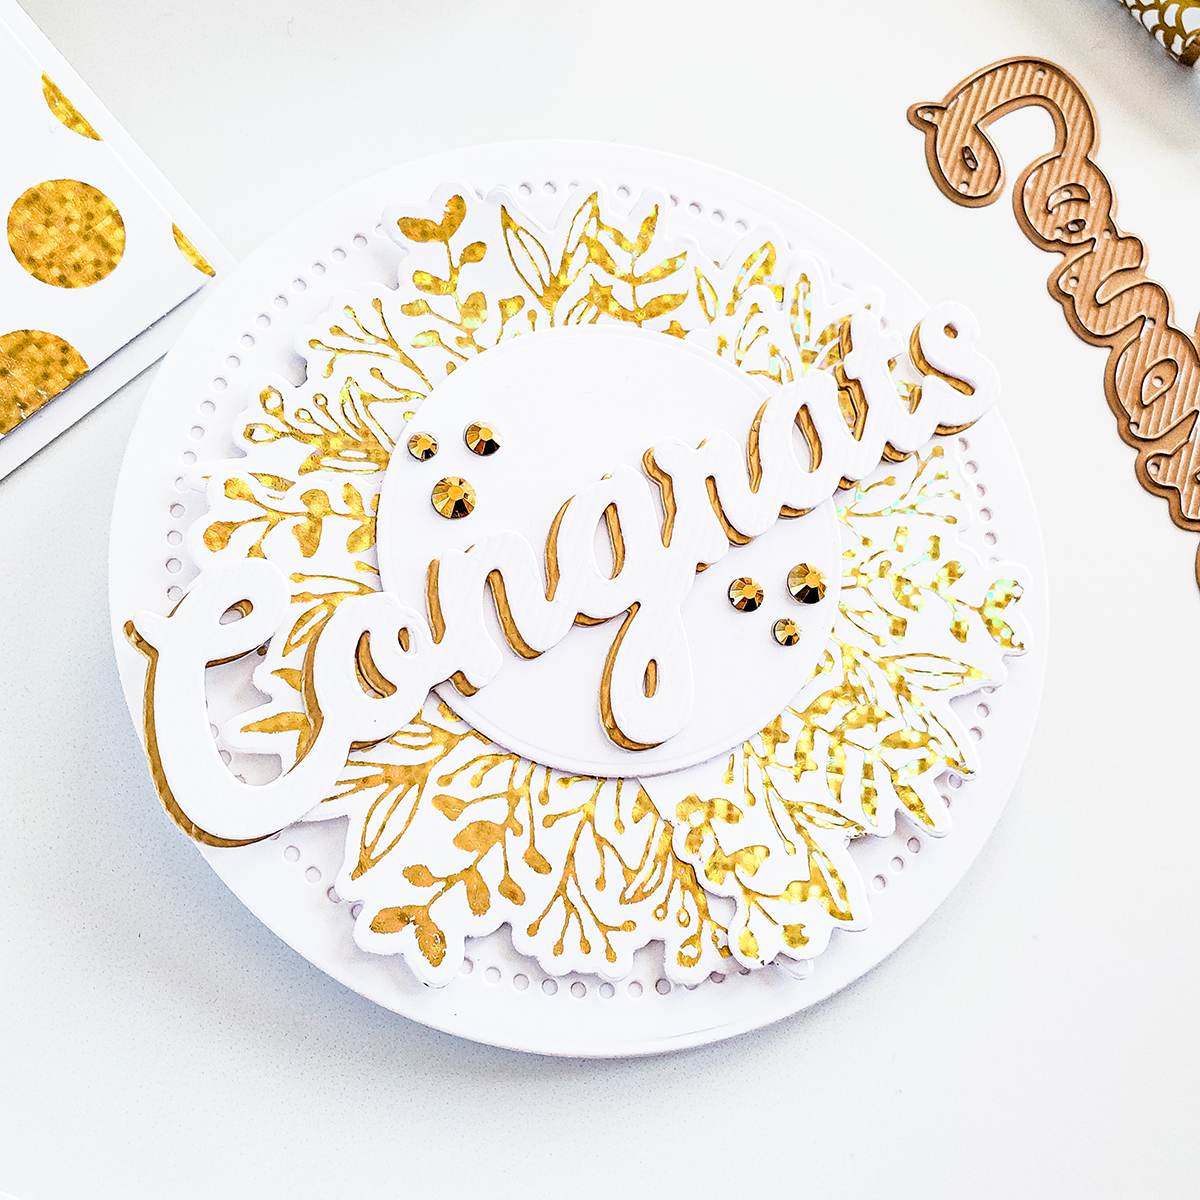
For the third and last inspiration, I created an elegant round shaped Congrats card which could be excellent for a wedding or any special occasion. So therefore, to make this card I started by running through the die-cutting machine the largest die from the; Nestabilities Essential Circles Etched Dies to die-cut it 2X out of white cardstock. Next, I lined over one of the white circles the seventh-to-last circle die, and I ran both to the die-cutting machine to create the dotted details. Then, I placed over my scoring board the other white circle and I made a scoring line on one of its edges creating that way a hinge so my card could open and close once both circles were adhered together. Right after when the card base was done, I adhered the 3 foliage borders to create a wreath by the way to make the wreath I used; Foliage Border Glimmer Hot Foil Plate & Die Set.
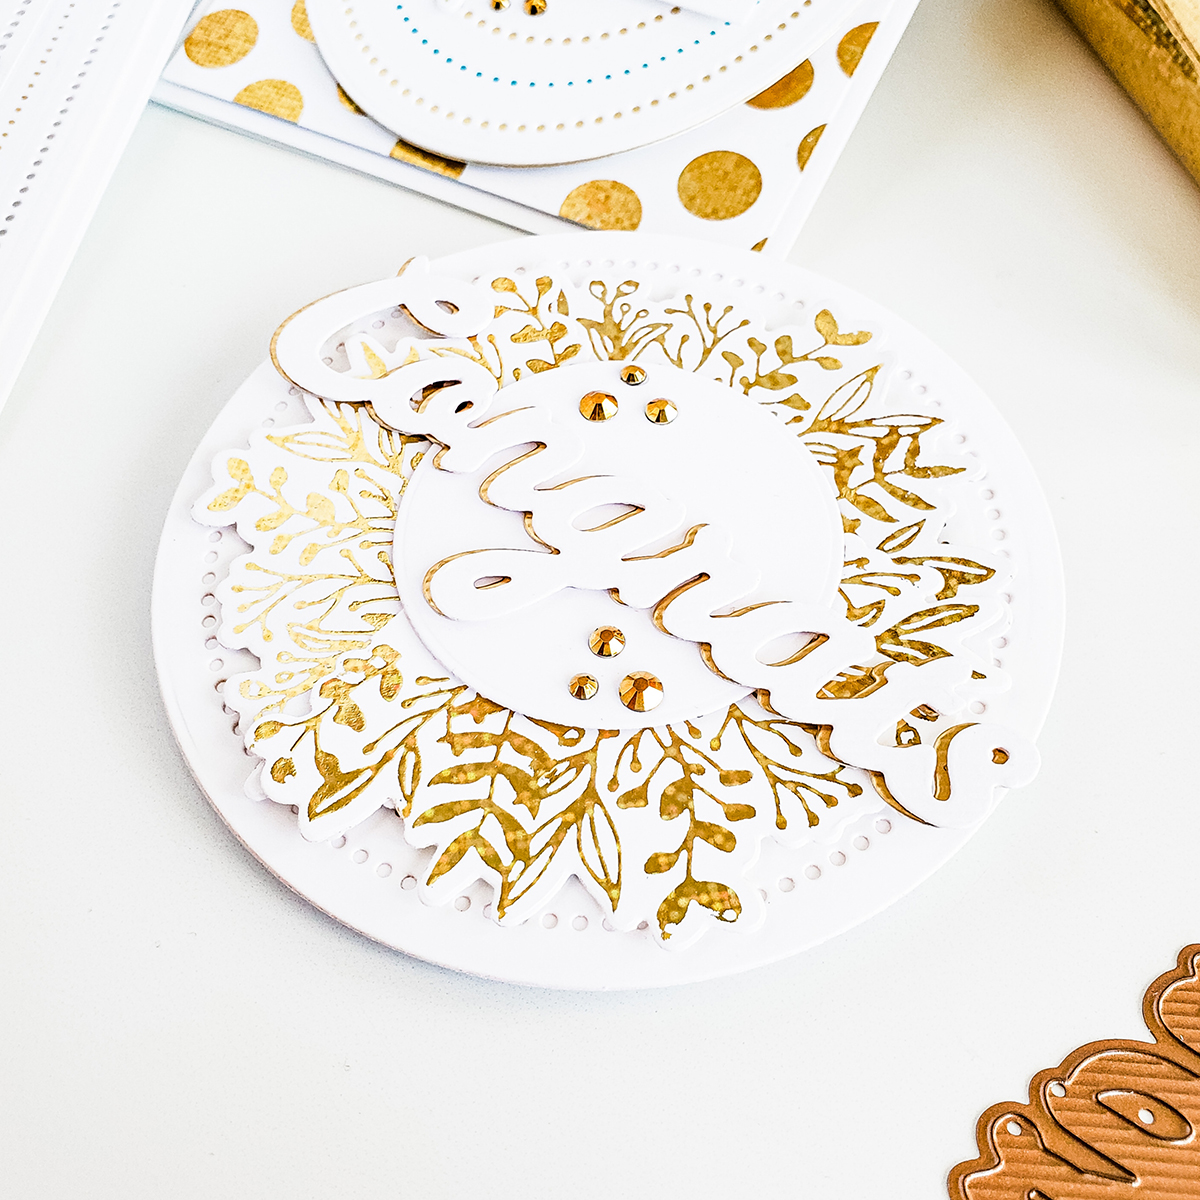
Once the wreath was adhered to the shaped card, I ran through the die-cutting machine the fourth-to-last circle die from the Nestabilities Essential Circles Etched Dies to die-cut a circle out out of white cardstock which soon after die-cutting it, I foam mounted it to the card. Lastly, I ran through the die-cutting machine the detailed layer that creates lines from the Die D-Lites Bold Type Congrats Etched Dies to die-cut it 3X out of white cardstock and 1X out of gold cardstock. Once the die-cutting Congrats were done, I stacked the whites, and I layered them up on top of the gold die-cutting. I wish I had captured better the details from the white but, due the lighting it was hard capturing as I did for the Thank you in the first example. To finish the card off, I adhered gold jewels to complement the gold from the foil as shown in the image above.
With that being said, I hope that you’ve enjoyed learning about how, I’ve created these cards showcasing the new; Bold Type Sentiments Collection. If you get inspird, be sure to tag us in your social medias using the hashtags #Spellbinders #NeverStopMaking #GlimmerHotFoilSystem when sharing your creations so, we can see what you are creating with this beautiful collection.
Spellbinders Supplies:
Thank you so much for stopping by, we hope to see you soon.
Have a fabulous crafty day!
Yasmin

Candy Colored Christmas Cards with Maria Peters
Gilded Greetings with Erum Tasneem