
Wedding Season Inspiration | Cardmaking Ideas with Jenny
Hi there all you beautiful crafty people, it’s Jenny from JCCards here! I’m excited to be guesting here on the Spellbinders blog, sharing three card projects I created using the wonderful Wedding Season Collection by Nichol Spohr. This collection was so much fun to play with – the sky really is the limit for color coordinating with any forthcoming wedding theme, and it can easily be tailored for other occasions as well such as birthdays or anniversaries!

I spent so much time choosing colors for my cards – running through my cardstock stash and seeing which colors paired well together, and also looking at weddings on Pinterest for inspiration. It really took me back to when I was planning my wedding – you guys are going to LOVE this collection.
Mr & Mrs
My first card features the Wedding Dress & Tux dies, along with the main sentiment from the Mr & Mrs Wedding Cake dies.
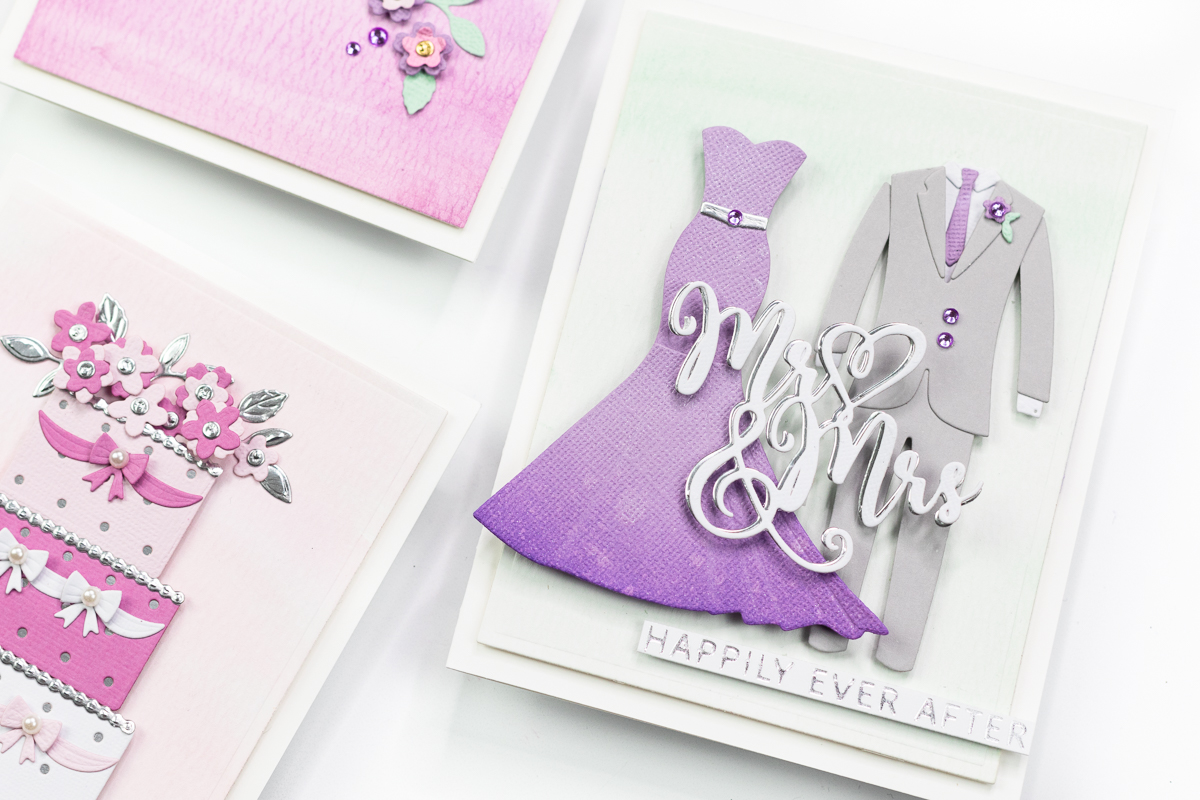
I decided to go for a purple and silver theme, a little reminiscent of my wedding. I wanted a glamorous wedding dress, and so I die cut it from purple textured cardstock from an earlier Spellbinders Club Card Kit, and then edged the bottom of the skirt in a darker purple ink. I also added some spritzes of shimmer spray for shine. I love the embossed/etched lines that these dies create – the fabric folds on the skirt are fabulous!
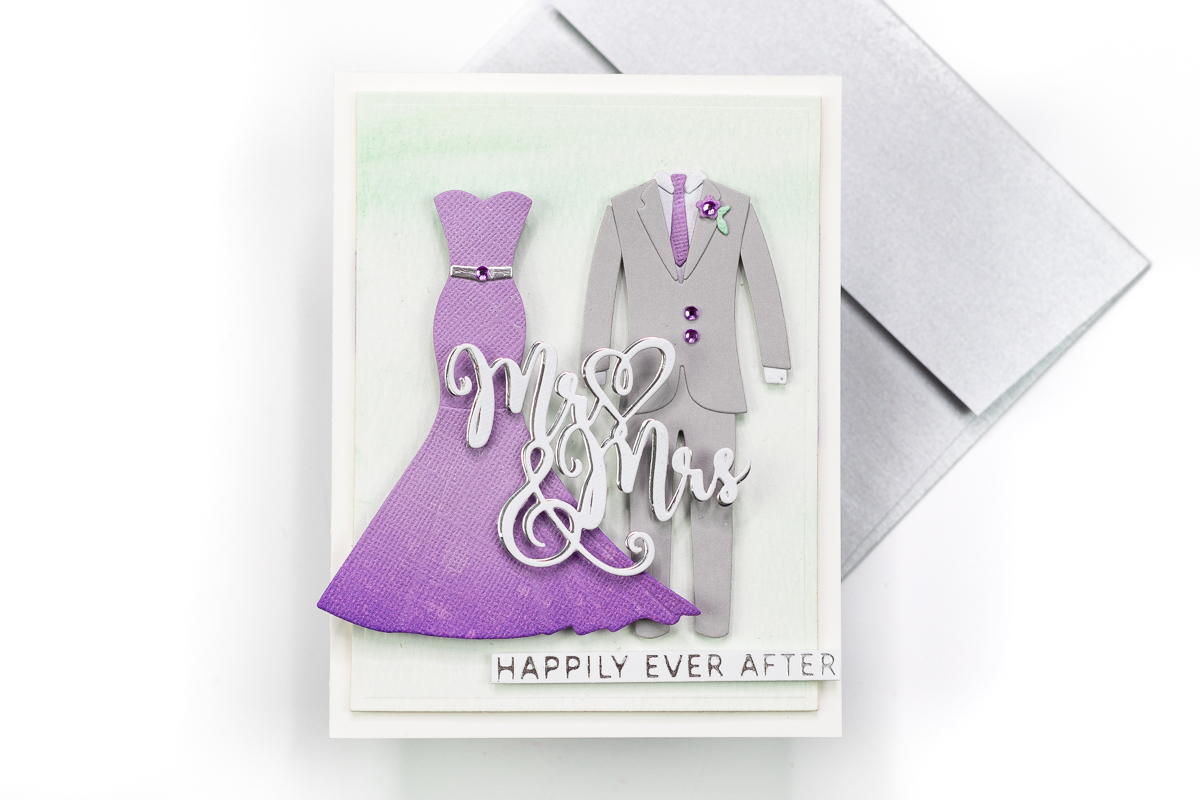
I die-cut the remaining pieces of the tux from white textured cardstock, grey cardstock and some FSJ Mirror Silver cardstock for the dress embellishments. The tiny flower and the tie on the tux were created from the same purple cardstock to coordinate, plus some aqua cardstock for the tiny leaf. I also die cut the ‘Mr & Mrs’ sentiment die from silver mirror and white cardstock, and adhered them together.
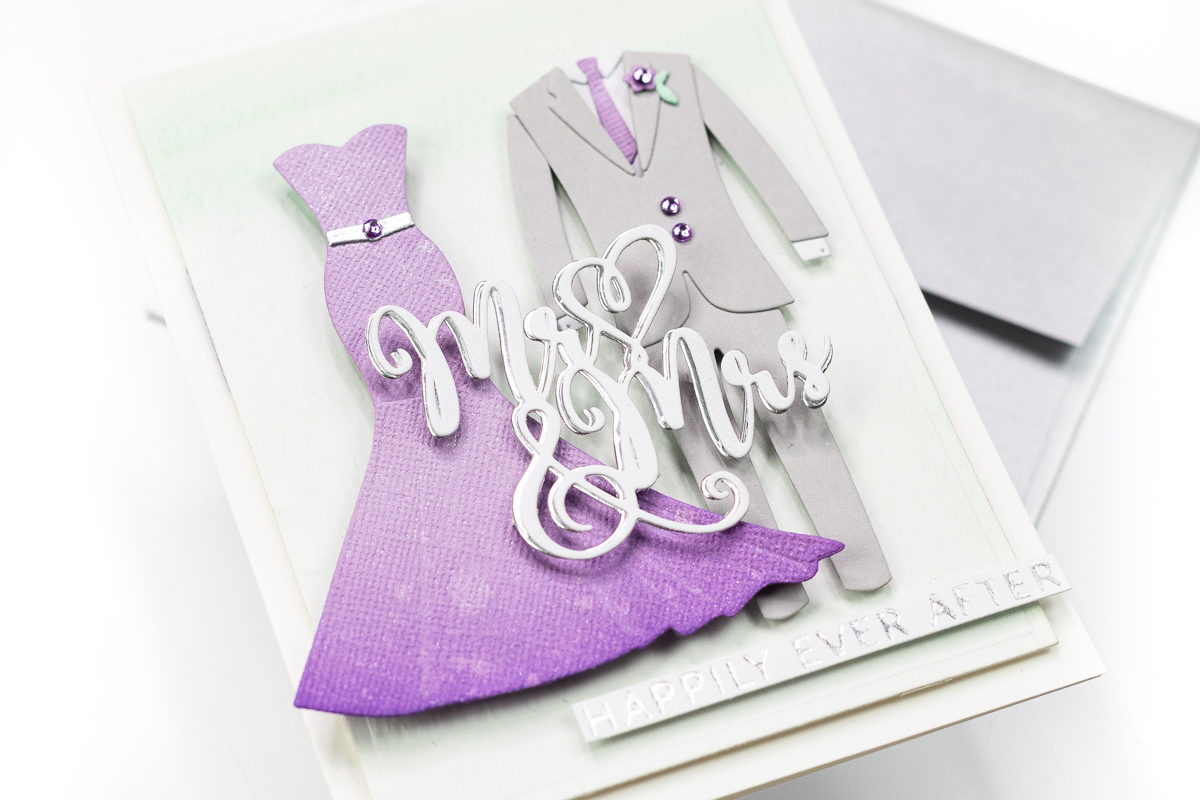
The fun part is piecing it all together once all your pieces are cut. My background panel was a panel of watercolor cardstock very lightly washed with aqua watercolor to tie in with that tiny leaf, then die cut it with the largest A2 Matting Basics B rectangle. I pieced everything together on this panel with liquid adhesive and foam squares then popped it onto a white notecard. I also scattered a few purple gems on the dress belt and tux buttons for some extra glitz.
The sub sentiment is from the Glimmering Wedding Wishes Glimmer Hot Foil Plates from the Wedding Season Collection. I foiled the Happily Ever After sentiment plate using silver foil and my Glimmer machine onto white cardstock then adhered it to the base of the card. I popped it over the edge to match the peeping over the edge of the dress skirt.
Congratulations Cake
My next card features the cake dies from the Mr & Mrs Wedding Cake dies. I die cut the two layers in dark pink and white cardstock. I then created a third layer from light pink cardstock by die-cutting the largest layer again, and then using the layer outline die and recutting the piece again to trim off the end, but still keeping rounded corners – three tiers for the price of two! I backed all of the layers with a solid silver mirror cardstock piece – don’t you just love how it peeps through!?

I die cut the cake piping die cut from silver mirror cardstock. I wanted to keep the card neutral to act as a birthday or wedding or anniversary card – I decided to die cut piles of the flowers and leaves from the set from silver mirror and coordinating pink cardstock, as well as the bows and swag for the cake sides. The Main Attraction magnet from Spellbinders was invaluable in helping me to keep my workspace organised and stopping me lose those tiny flower dies!
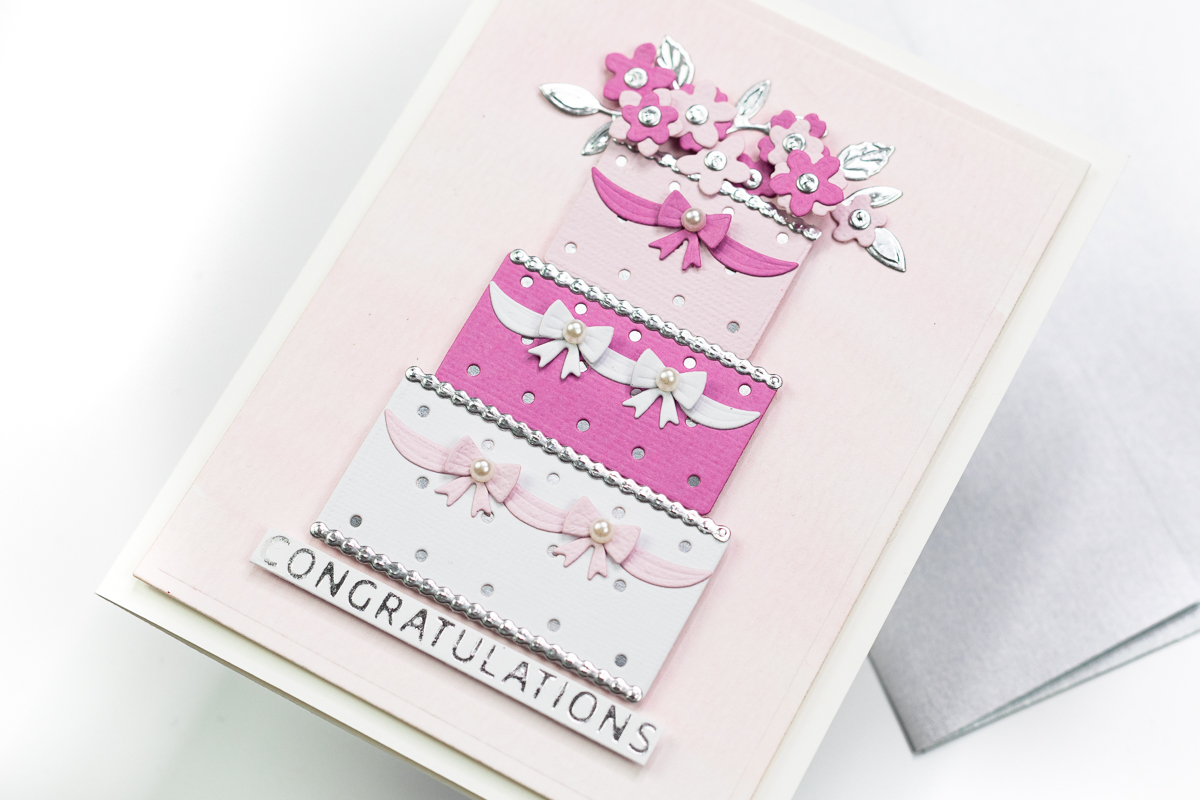
My background panel was created in the same way as my first card, with a pink watercolor wash. I arranged the cake layers onto the panel with foam squares, and adhered the piping and ribbon swag with liquid glue. I then arranged the flowers and leaves on top, adding the flower centres die cut from silver mirror to coordinate with the leaves and piping, and a few pearls to the bows. My sentiment is also from the Collection was foiled in silver as before using the Glimmer machine. I just love that you can add that extra cake layer for versatility with this die set!
Happily Ever After
For my final card, I focused on the Happily Ever After sentiment die from the Collection. This time I decided to go for a purple watercolor wash for my background, die cut as before with the Matting Basics die. I also die cut the Happily Ever After sentiment from the watercolor washed panel, saving all the little pieces that fell out of the word, and then again from FSJ gold mirror cardstock.
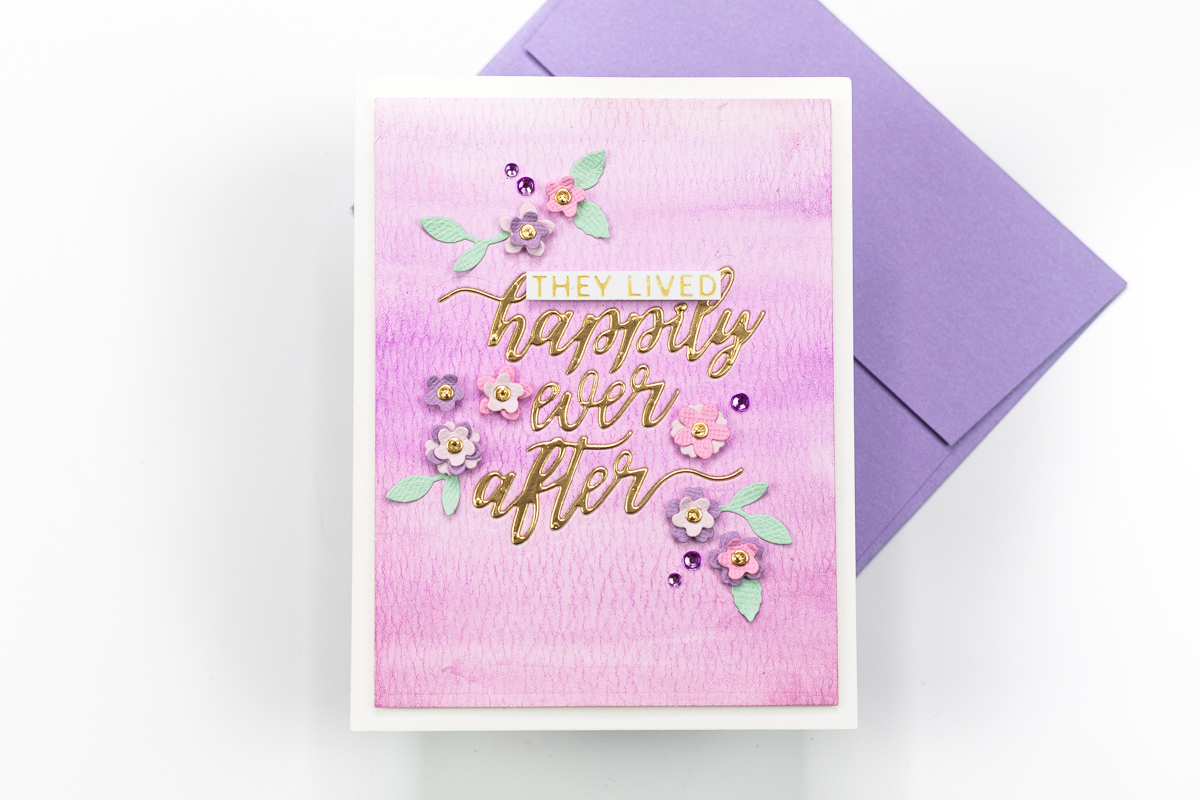
I covered a panel of white cardstock completely in adhesive and then added my die cut panel over the top. I then inlaid my gold sentiment, and popped in the left over purple watercolor pieces for a seamless flush look.
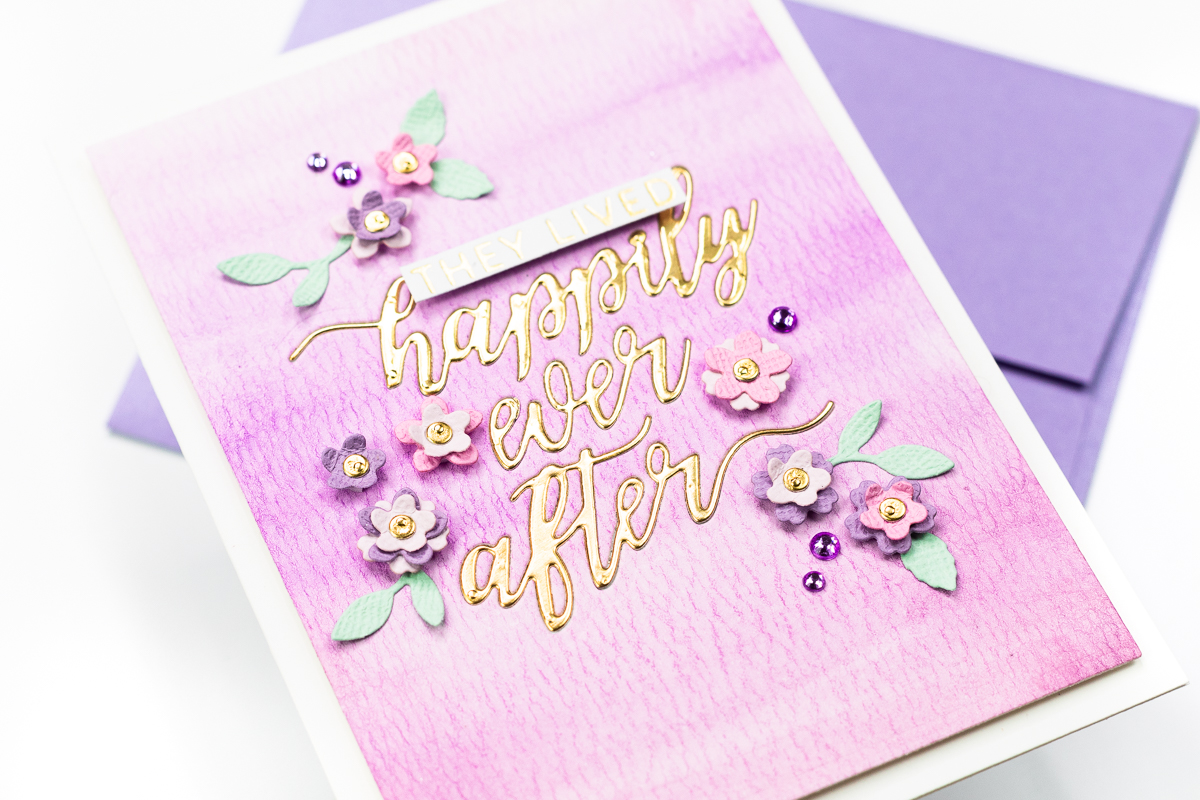
To decorate, I created lots of purple and pink flowers from the Mr & Mrs Wedding Cake dies, this time with gold centres. You can achieve lots of different looks by layering the petals together. Don’t forget to add dimension by curving the leaves and petals (I used my Tool ‘n One). I added a few gems to finish and mounted the panel onto a white card base.
Spellbinders Supplies:
Other supplies
Altenew Ultraviolet Ink, Altenew 36 Pan Watercolors, Ranger Distress watercolor cardstock, Scrapbook Adhesives Foam Adhesive, Martha Stewart Dolphin Gray cardstock, Neenah Solar White 110lb cardstock, Hero Arts purple gems, Hero Arts white pearls.
Thank you so much for letting me help inspire you today! I hope I’ve given you a hint at some of the possibilities achievable with this set! You can find some more of my cards over on my personal blog at jccards.com. Stay safe and have a wonderful day.
Jenny
One Comment
Denise Evans
Love your beautiful cards! The colors are wonderful!!