Elegant Twist Collection Cardmaking Inspiration with Hussena Calcuttawala
Hello, crafty friends! It’s Hussena from Quill and Punch Works here! I’m excited to be guesting here on the Spellbinders blog, sharing two card projects I created using the magnificent Elegant Twist Collection by Becca Feeken. I had such a great time working with this collection – the designs are beautiful and timeless and can be combined and used for so many projects!
Elegant Twist Collection creates designs with the classic braid motif in mind. Layer with other coordinating shapes to inspire elegance and beauty that Amazing Paper Grace by Becca Feeken is known for.
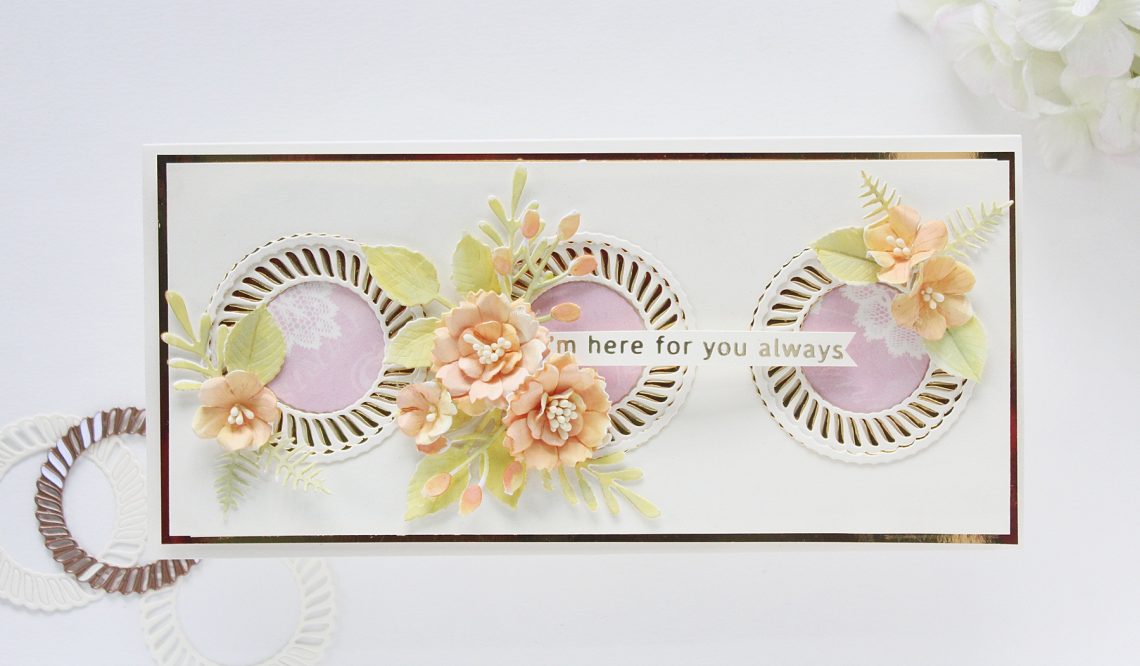
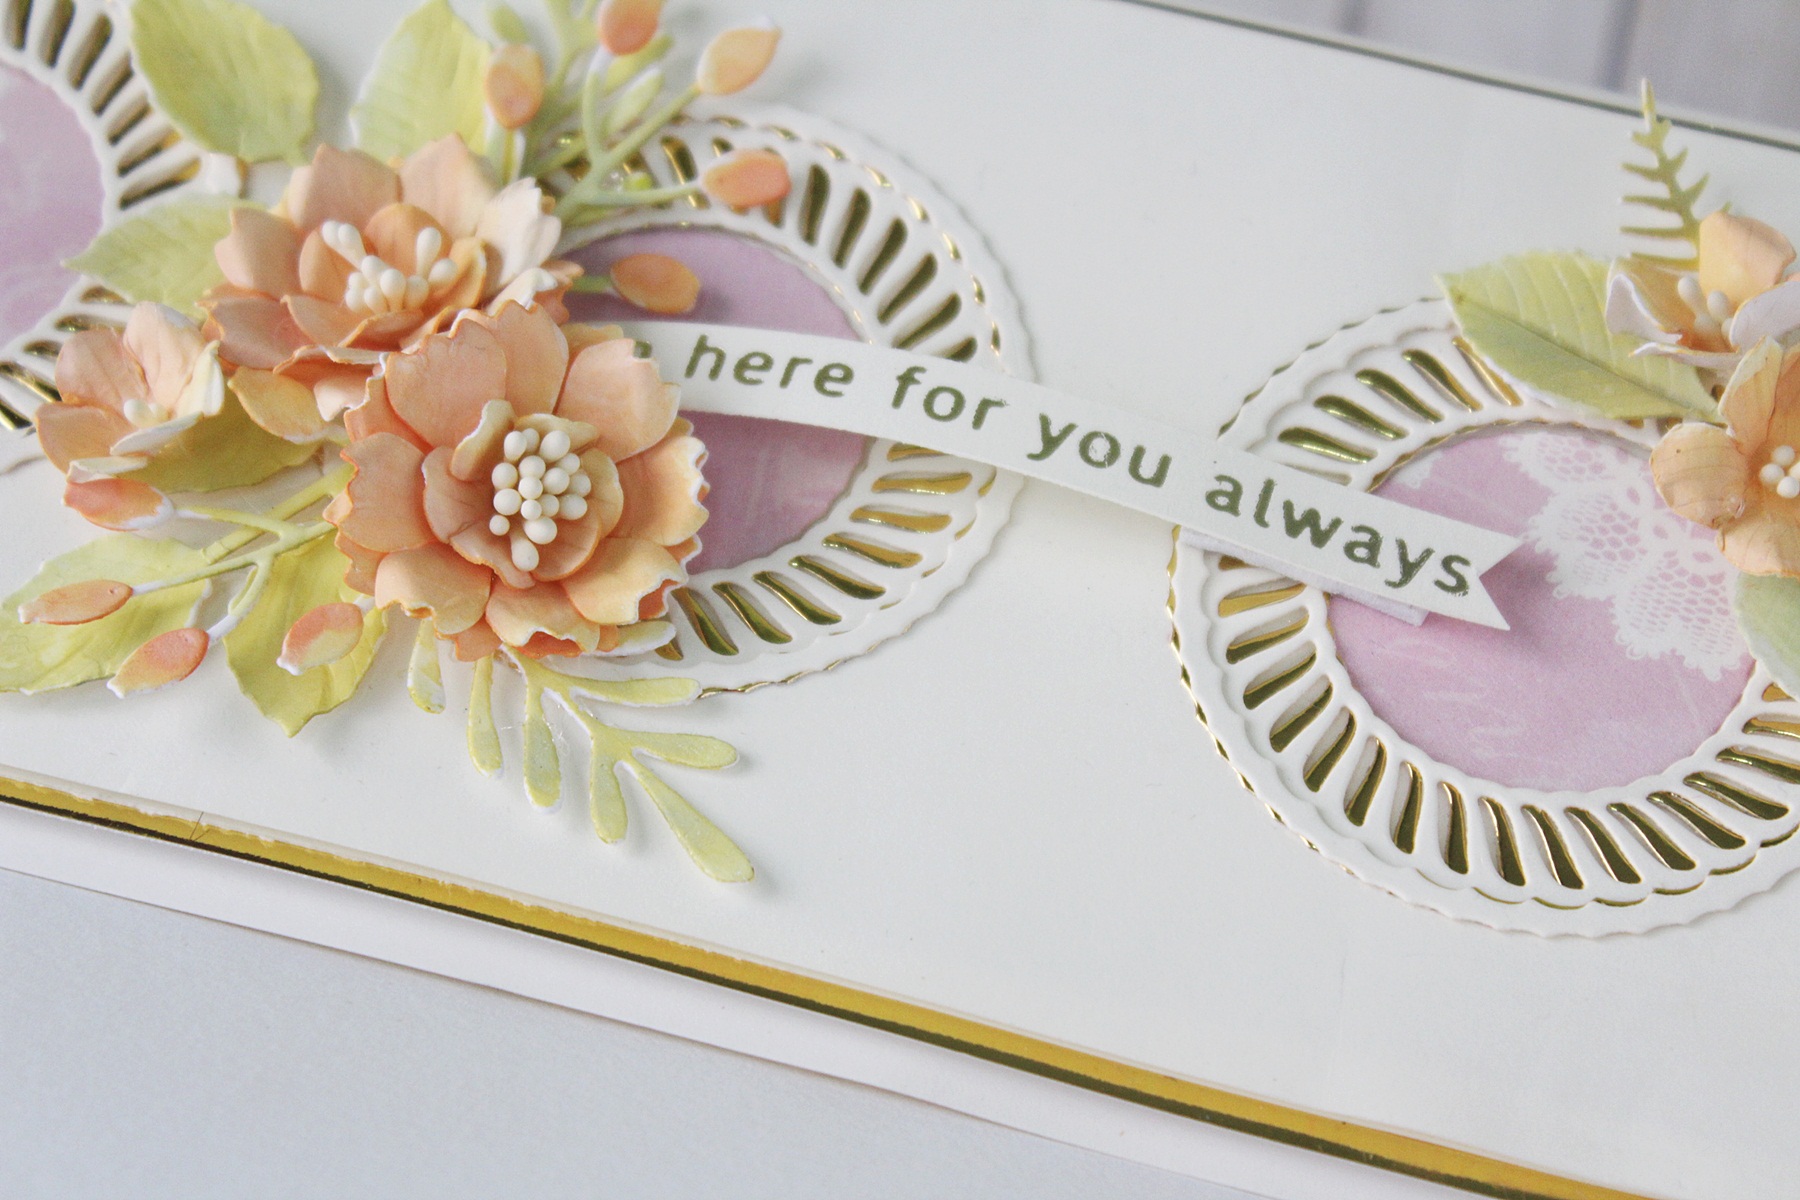
My first Card features the Elegant Twist Circles Etched Dies, the Splendid Trilliant Etched Dies, and a sentiment Glimmer Plate from the Borders and Sentiments Glimmer Hot Foil Plates.
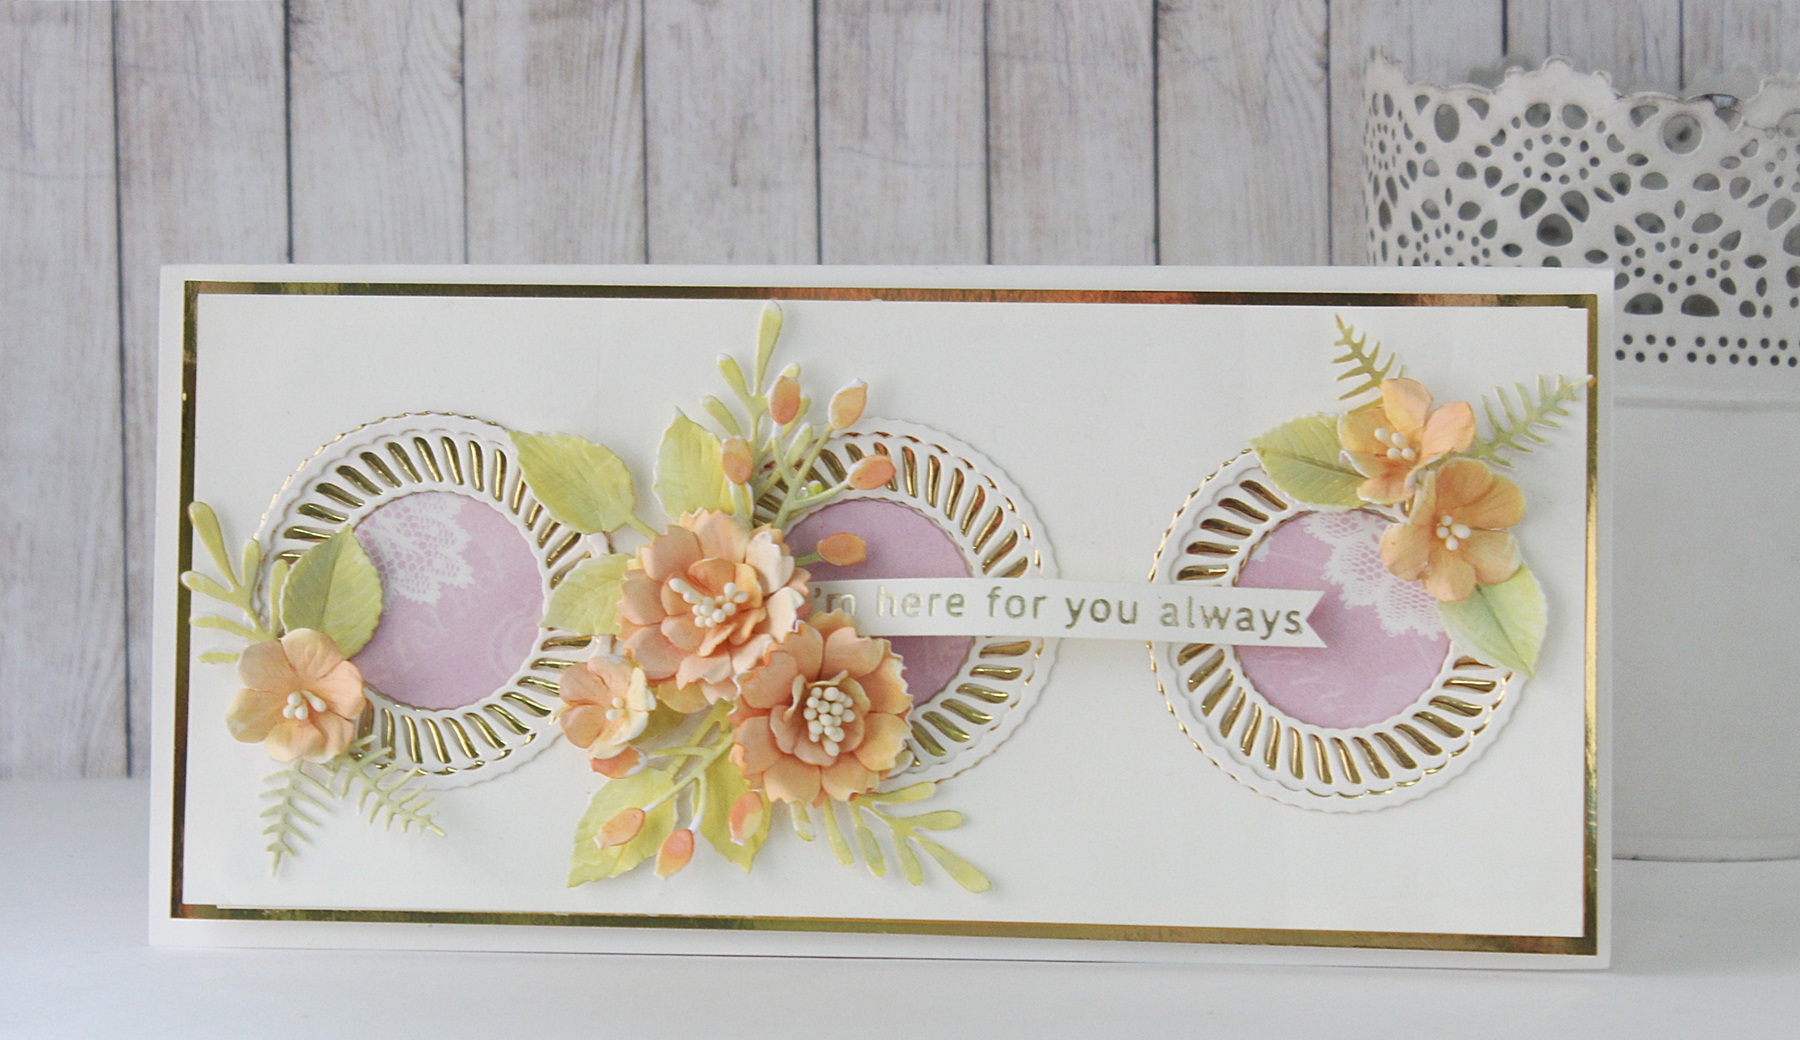
I have been in love with Slimline Cards recently and decided to create one for my post as well. I will admit, that the measurements did take me some time to figure out, but I am quite happy with the end relt. To create my card, I die cut three inserts for my circles using the small circle pattern and the small circle inner rim dies from the Elegant Twist Circles Etched Dies using my Platinum 6 Die Cutting and Embossing Machine – 6″ Platform. I taped the two dies together while die cutting to help create the basic layout of my card.
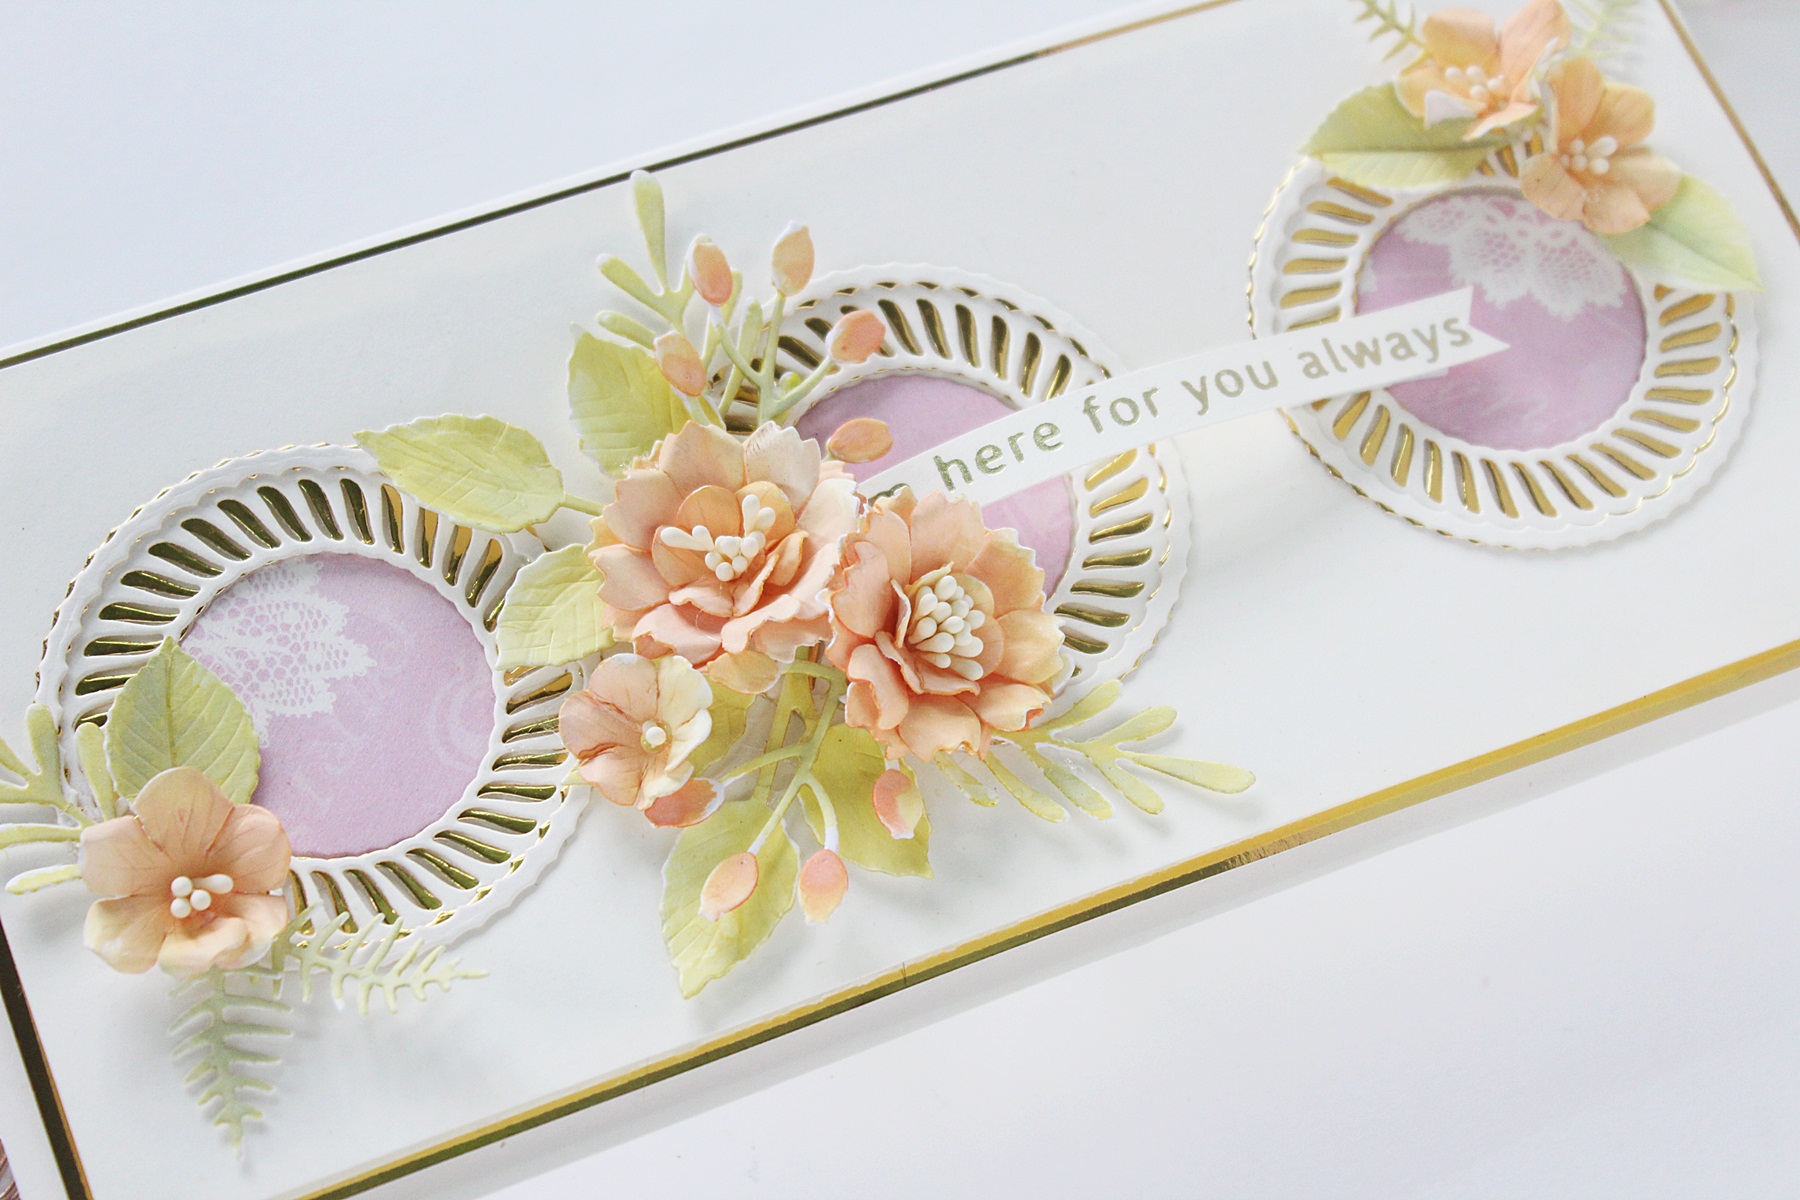
Then, I die cut the small circle outer rim die from Gold Mirror Cardstock to create the inlay piece for my circles. I adhered the die cut Gold Mirror Cardstock frames behind my circles to interweave the die cut designs. Next, I die cut the rims for my circles by die cutting the small circle outer rim and the small circle pattern dies together (I used Washi Tape to tape the two frames together while die cutting) from Buttercream Cardstock. I repeated this process thrice in order to get three rims for my circle frames and then adhered them down to my panel.
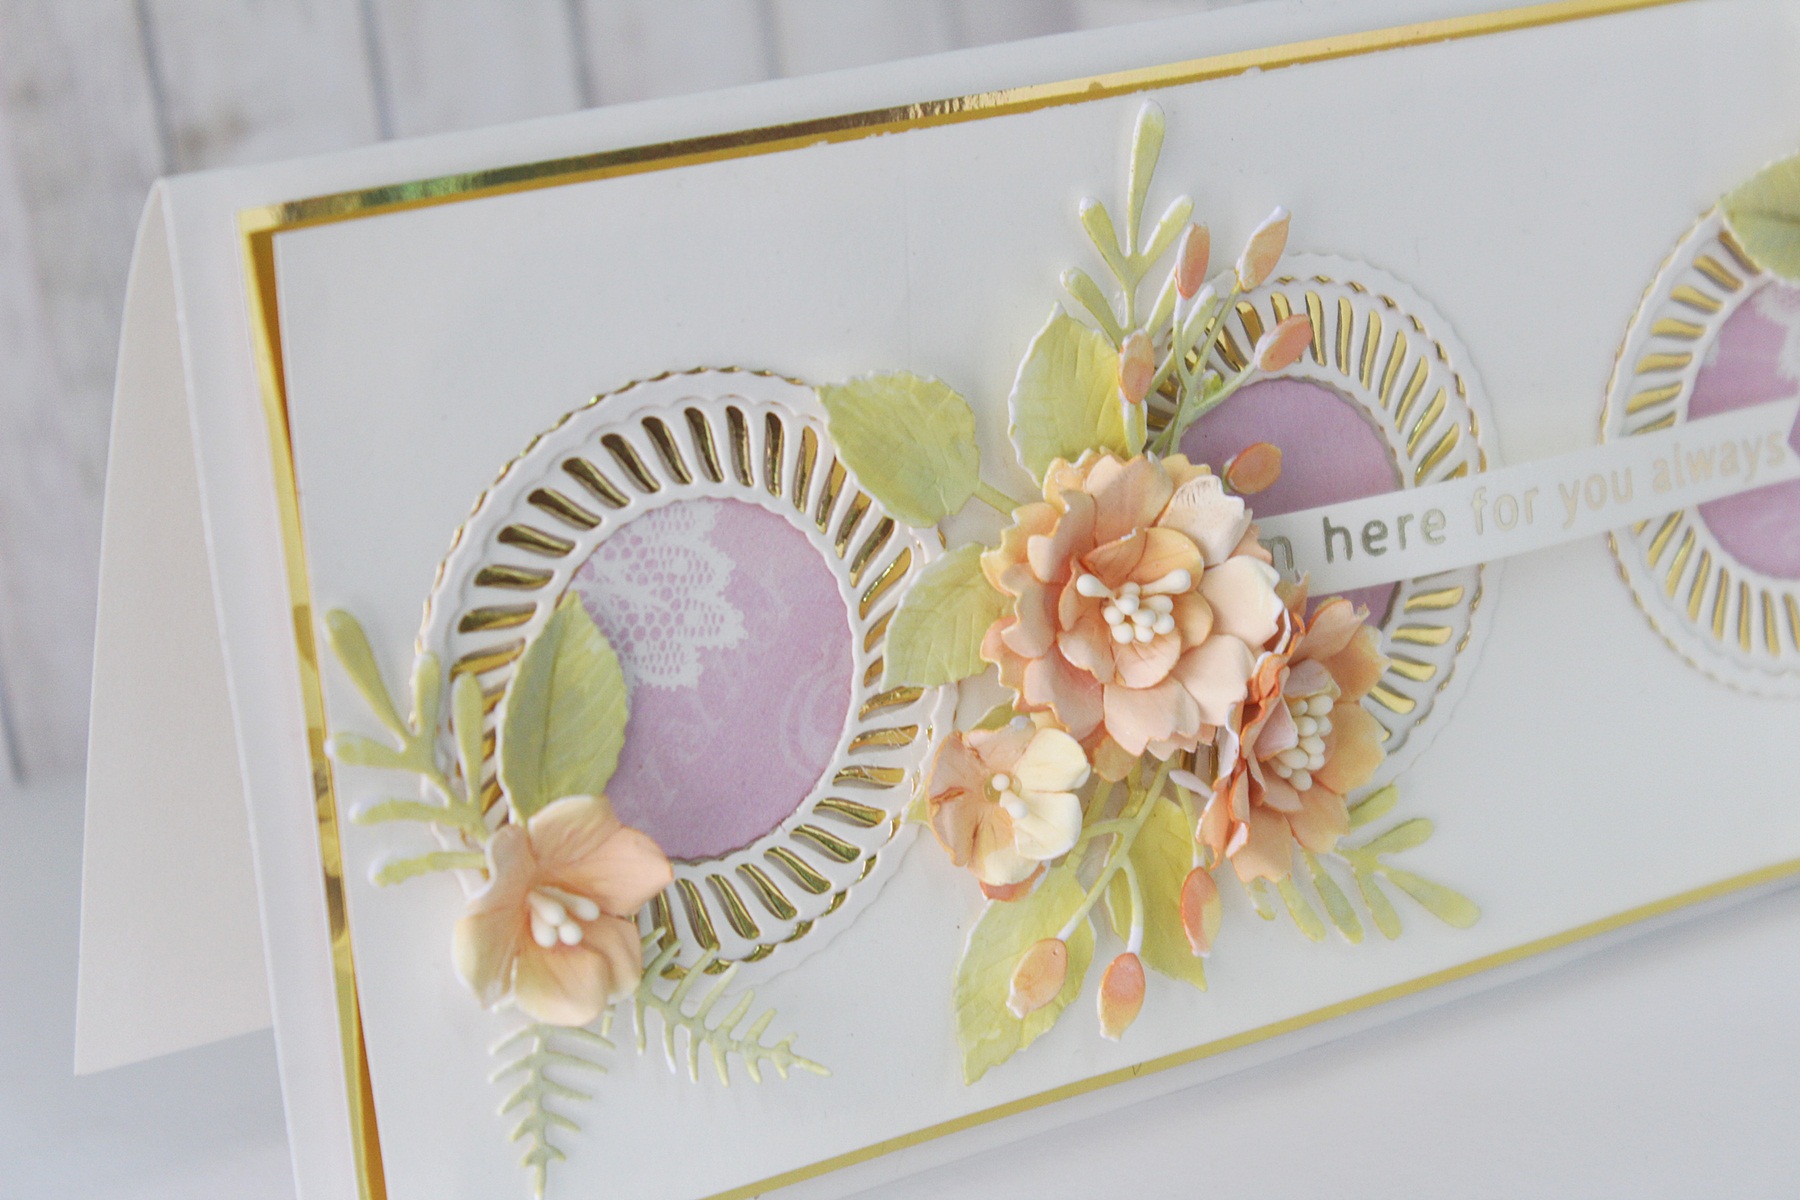
I also die cut three circles using the small circle inner rim die from patterned paper to add to the centres of the circles on my panel. I just felt the card was looking a bit too plain without it, and so, I went ahead and added them. I know, it sounds a tad bit confusing, however, once you figure it out, you’ll be able to create these Slimline Card designs in a jiffy!
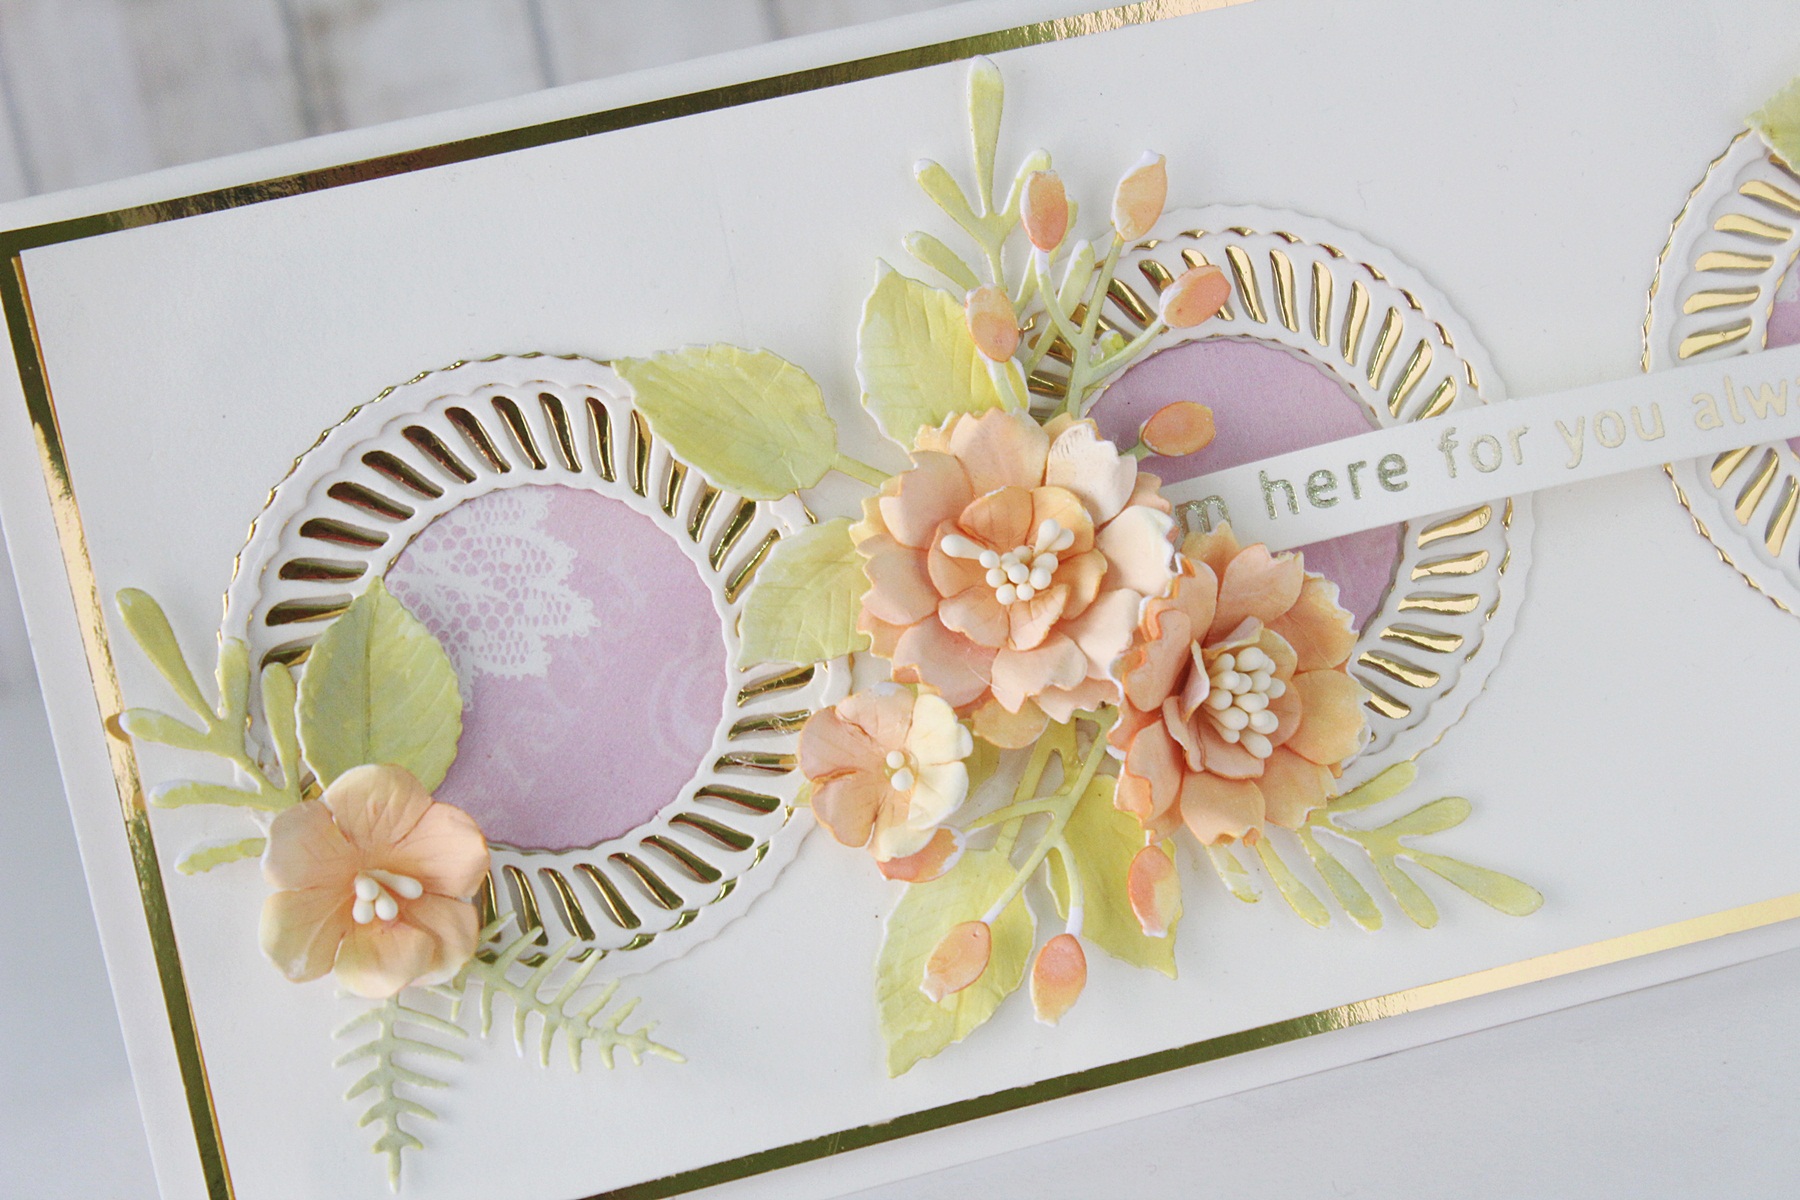
To embellish my card, I created few handmade flowers. I used the flower dies from this month’s Amazing Paper Grace Club Kit Set to die cut my flowers from Color Splash Watercolor Sheets and colored them using Banana Cream Re-Inker. I love using re-inkers to color my flowers as it’s so easy and quick to do. You need to just take a sheet of Watercolor paper, add a few drops of the Re-inker of your choice, and then use a Watercolor Brush to paint the paper. It’s a great technique to help color a large number of flowers quickly as well. I also added some foliage for my flowers which were die cut using the dies from the June 2020 Card Kit. I colored the leaves and foliage using the Sweet Pear Re-Inker. I did dilute the color using water for a more light wash of color.
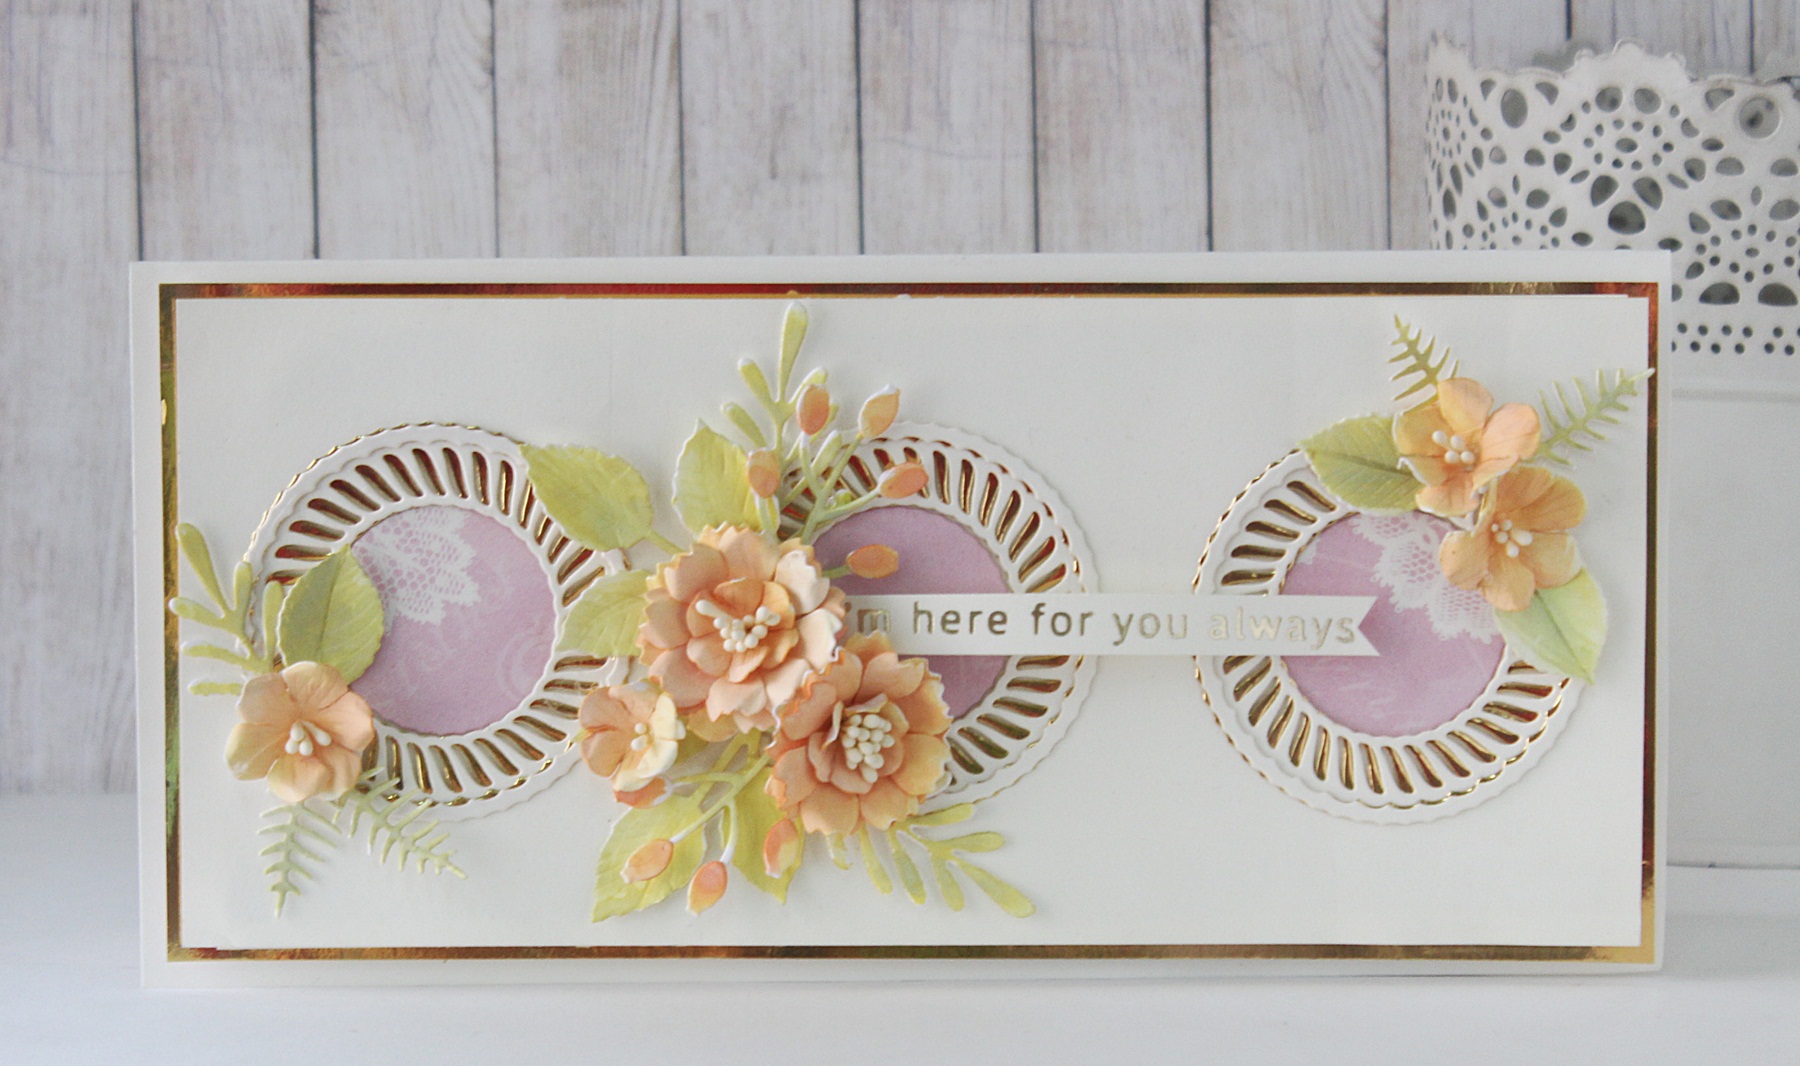
For my sentiment, I used one of the sentiment plates from the Borders and Sentiments Glimmer Hot Foil Plates Set. I used the Glimmer Hot Foil Roll – Champagne to foil my sentiment in my Glimmer Machine. I then used a die to die cut the banner to create my sentiment strip. I then adhered my panel to a custom-made card base using foam tape for dimension.
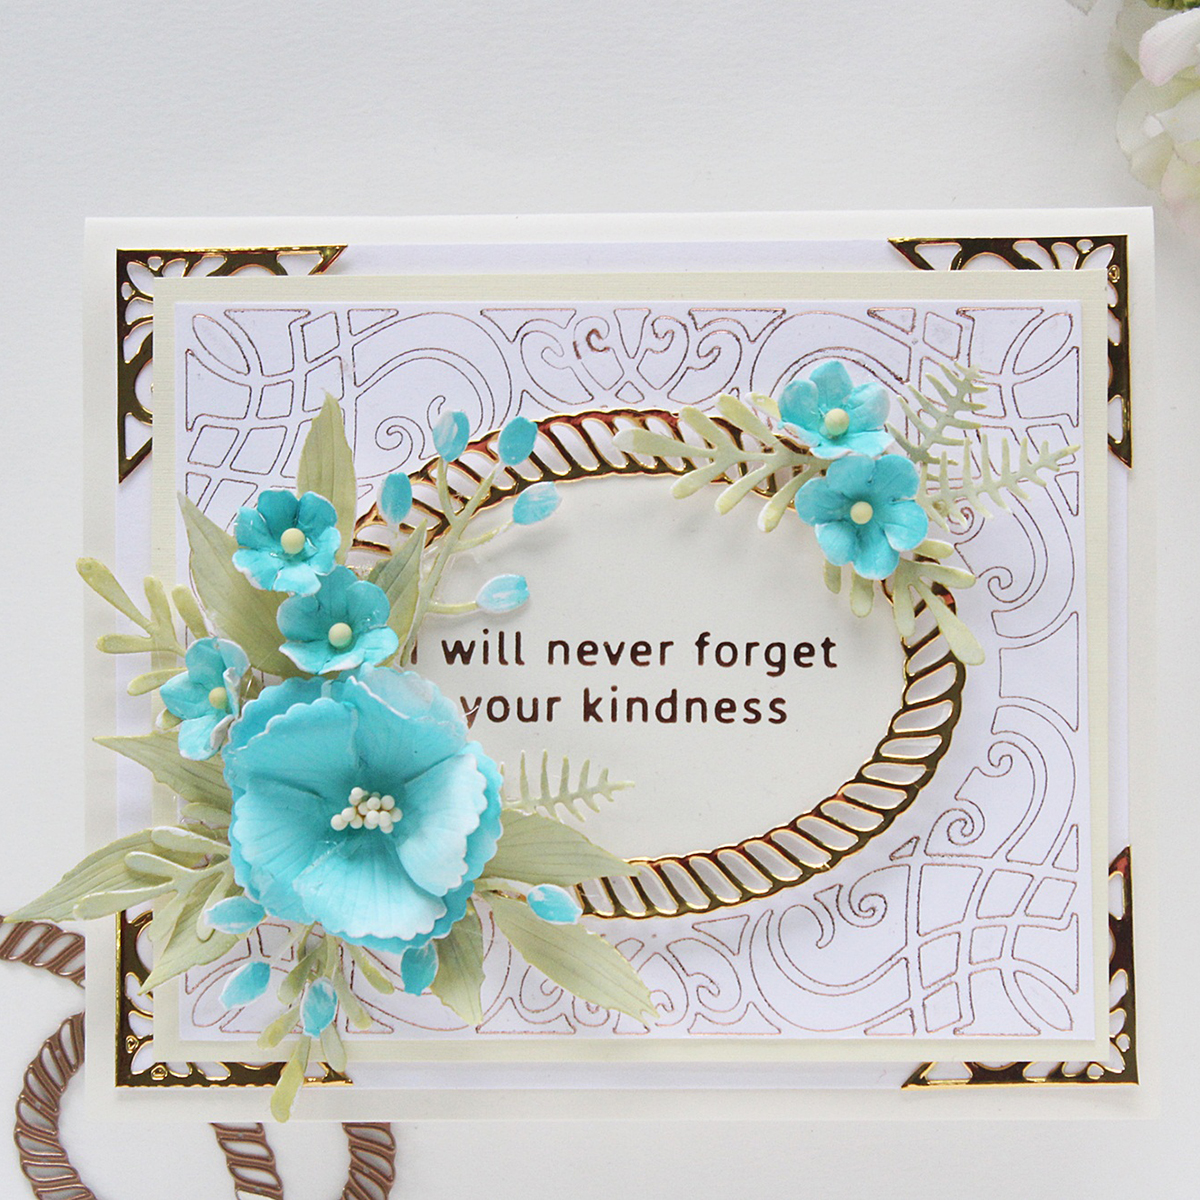
My second Card features the Elegant Twist Ovals Etched Dies, Splendid Trilliant Etched Dies, along with a sentiment Glimmer Plate from the Borders and Sentiments Glimmer Hot Foil Plates.

I love the gorgeous die designs from the Elegant Twist Ovals Etched Dies and wanted to created a card to showcase it in its full beauty. I started with a piece of Whip Cream 8.5 x 11 Cardstock and trimmed it to size, as I wanted to foil the card panel using the Card Creator A2 Corner Cotillion Die from one of Becca’s previous collections. I foiled the entire die piece using the Glimmer Hot Foil Roll – Blush using my Glimmer Machine. This provided for an interesting background piece.
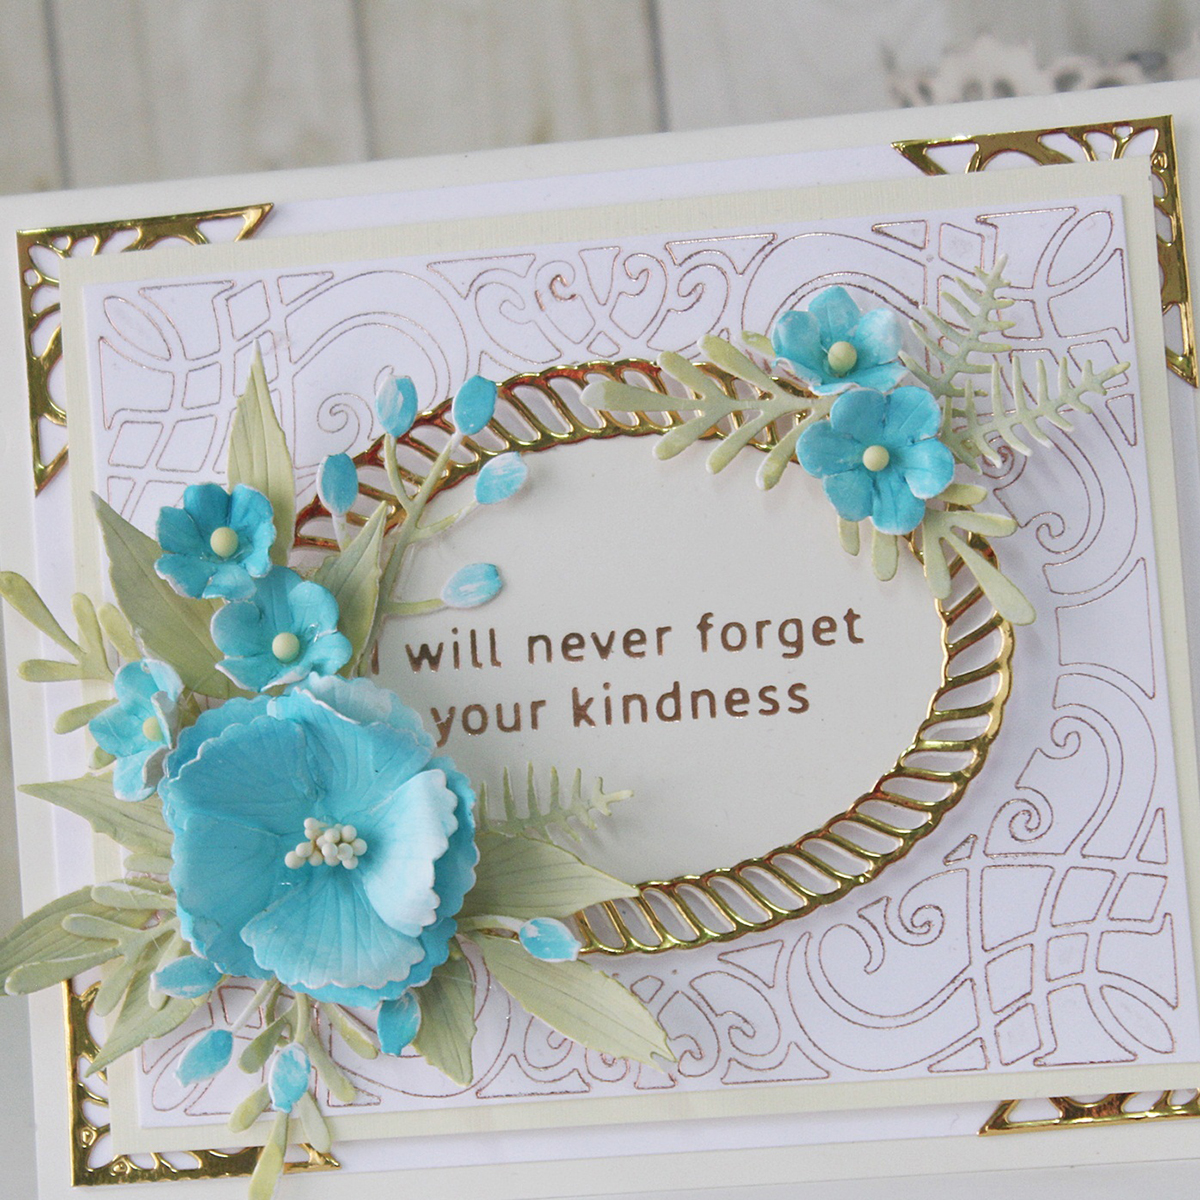
Then, I die cut the large oval pattern die from Gold Mirror Cardstock and kept it aside. I also die cut an oval using my Nestabilities Classic Ovals Die Set from Buttercream Cardstock. I foiled my sentiment on this oval die cut using one of the Glimmer Plates from the Borders and Sentiments Glimmer Hot Foil Plates. I used the same Glimmer Roll – Blush for foiling the piece. Then I adhered the frame and the oval piece to my previously foiled panel.

I decided to create my own handmade flowers to embellish the card. I used the flower dies from the Amazing Paper Grace Club Kit Set to die cut the flowers from Color Splash Watercolor Sheets. I colored them using the Turbo Teal Re-Inker which was diluted with water for a lighter color. The leaves were die cut using the die from the Sweet Cottage Flowers Etched Dies. The additional foliage was die cut using the various dies from the June 2020 Card Kit. I used the Sweet Pear Re-Inker to color the leaves and foliage.

Now it was time to put my card together – I adhered all the embellishments on my card panel. I felt that the card was missing something, so I die cut four corner pieces from the Splendid Trilliant Etched Dies using Gold Mirror Cardstock. I adhered them to another card panel and then finally matted this panel to my card base. I love how the oval die cut adds so much elegance to the design. It’s definitely a must-have in your stash!
Spellbinders Supplies:
OTHER SUPPLIES
Neenah Solar White 110 LB Cardstock, Cream Linen Textured 12 x 12 Cardstock, White Fun Foam; Patterned Paper: Papericious Me Before You 12 X 12 Patterned Paper Pack; Adhesive: Scrapbook Adhesives 3D Foam Squares, Tombow Mono Multi Liquid Glue, Double Sided Foam Tape, Mini Glue Gun; Tools and Accessories: McGill Inc. Paper Blossoms Tool Kit, Cream Thread Pollens, Prima Marketing Watercolor Brush Pens
Thank you so much for letting me help inspire you today! I hope you liked my creations! If you did, please let me know which card is your favourite and why! 🙂
To see more of my work with Spellbinders products, do visit my Instagram page and subscribe to my Blog. Stay safe and have a wonderful day.

2 Comments
susieprovince
Your cards are absolutely beautiful! Truly. I would love to be the recipient of one of your cards. You have inspired me. Thank you and God bless.
Nina Couture
Wow