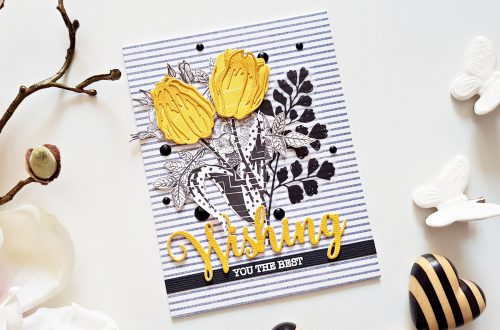
Create Gorgeous Christmas Cards with Susan’s Holiday Flora Collection with Carol Hintermeier
Hello Spellbinders’ friends! I’m Carol Hintermeier, and I’m so very thrilled and honored to be invited to be your Guest Designer today! I’m from Texas and it’s always so hot in the summer and it’s the perfect time to get started on your holiday cards. I’ve always loved creating cards using flower shaping dies, but never have I worked with such beautiful, detailed floral dies as these from Susan’s Holiday Flora Collection by Susan Tierney-Cockburn!

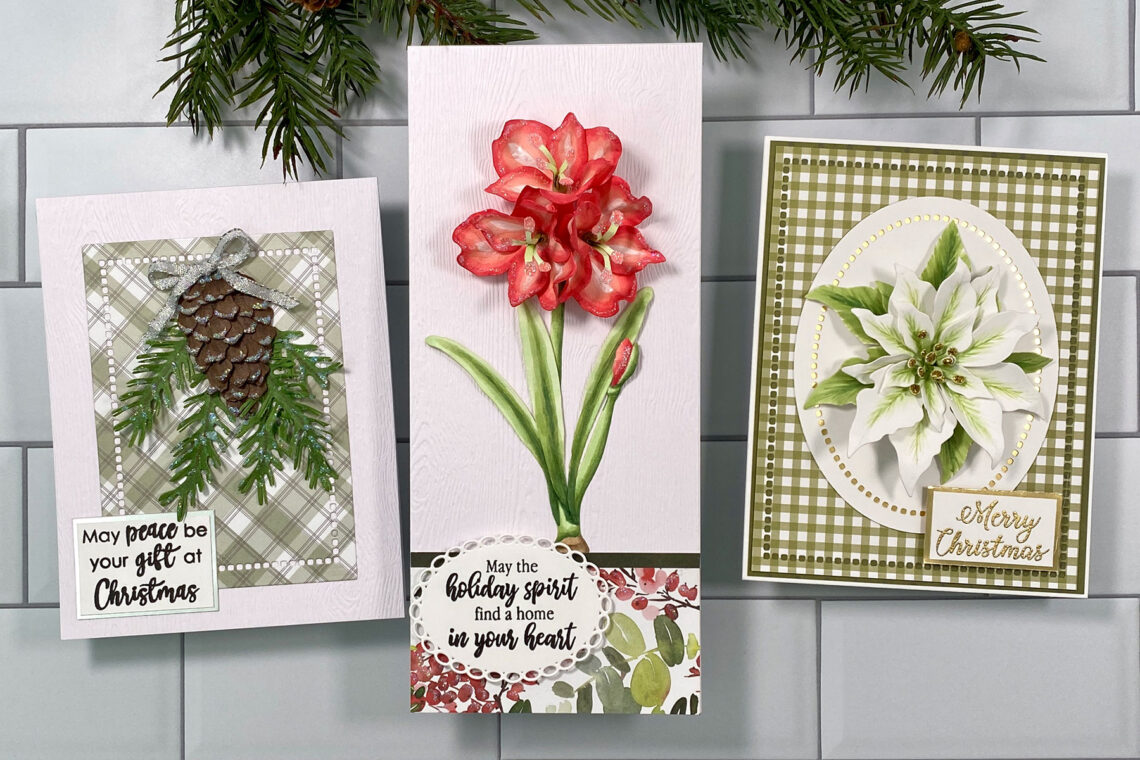
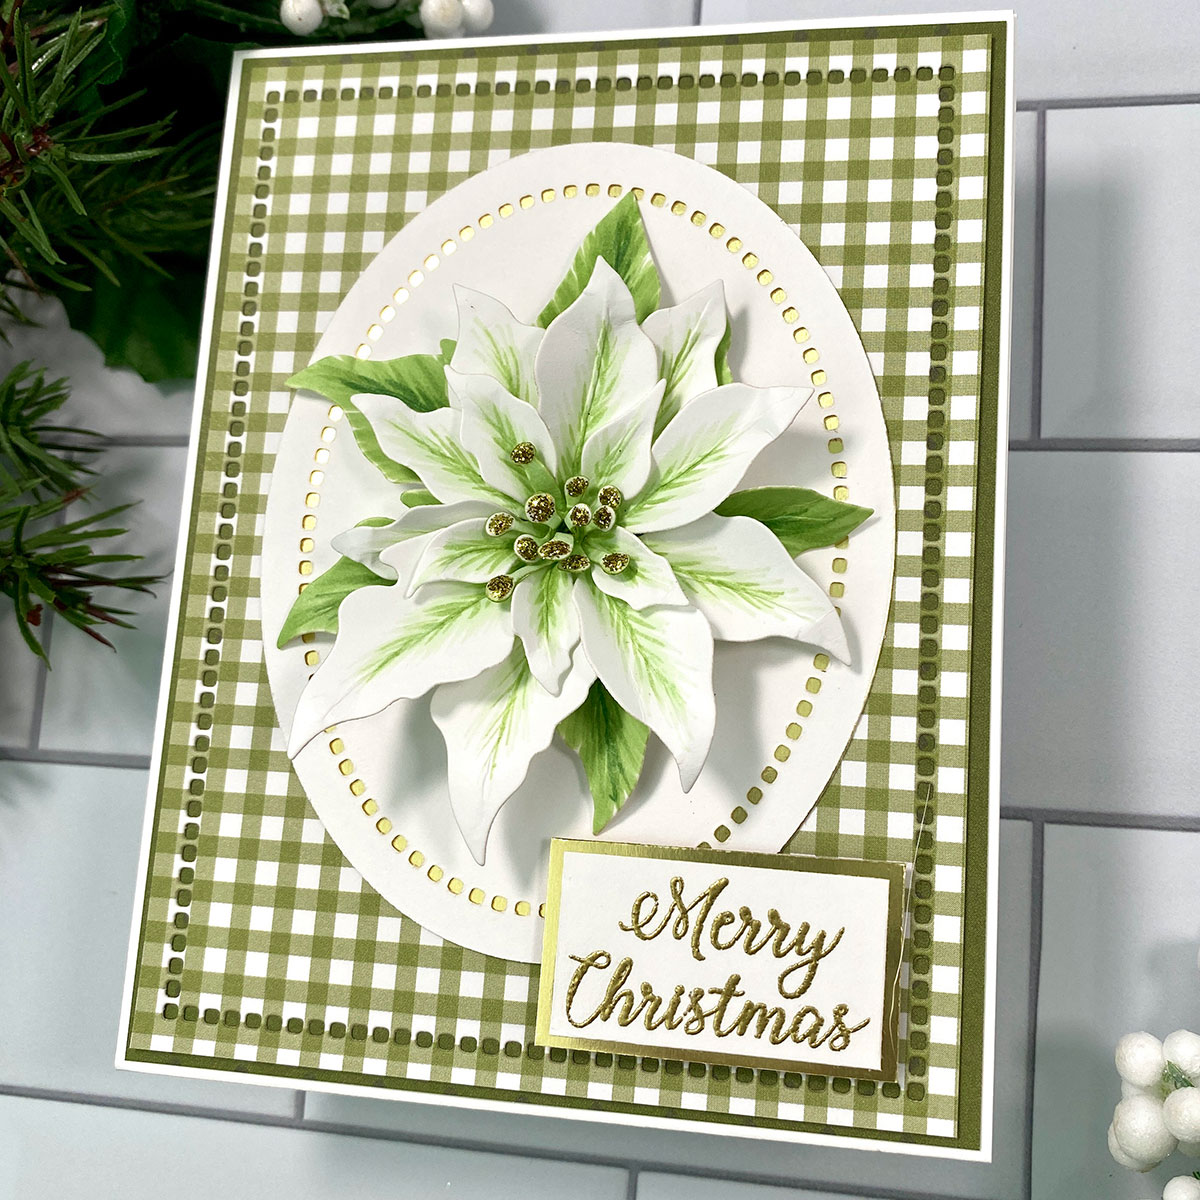
My first card features the gorgeous Poinsettia die set. For each of my cards I watched Susan’s wonderful videos where she shows (in real time) how to create the gorgeous florals and greenery. These videos are so very helpful and I’ll be sure to give you a link to each one. The Poinsettia link is HERE.
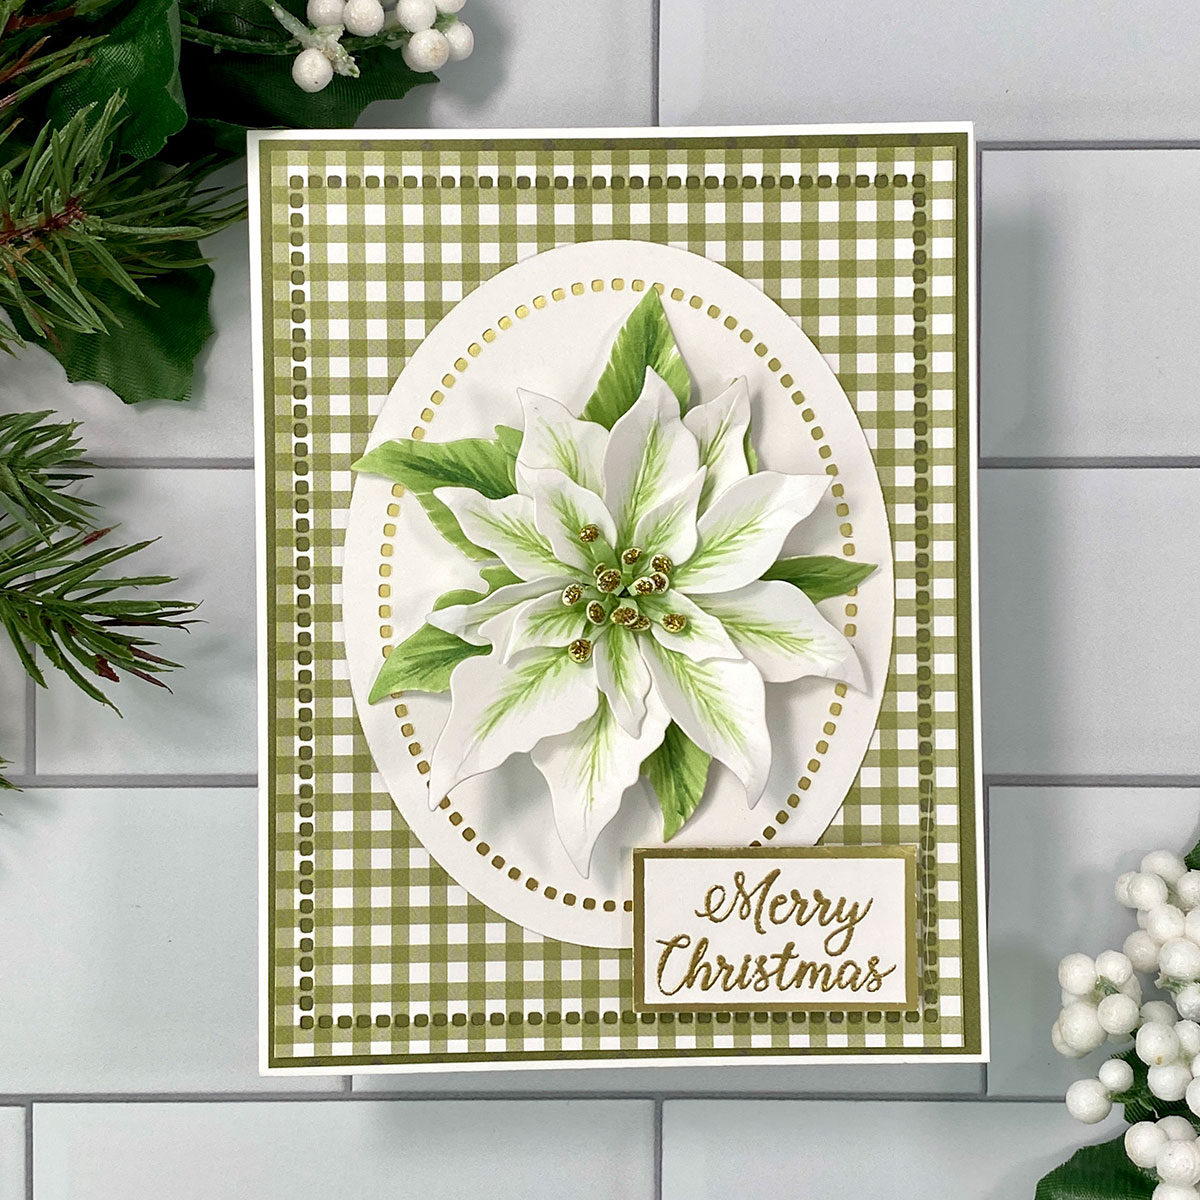
- I die cut the Poinsettia parts from white card stock with my Spellbinders Platinum Die Cutting Machine.
- Color the floral pieces with Copic markers.
- I used some flower shaping tools such as a ball tipped stylus to shape the petals.
- I used liquid glue to adhere the Poinsettia parts together.
- Add glue to the tips of the stamens and sprinkle on gold glitter. Let dry.
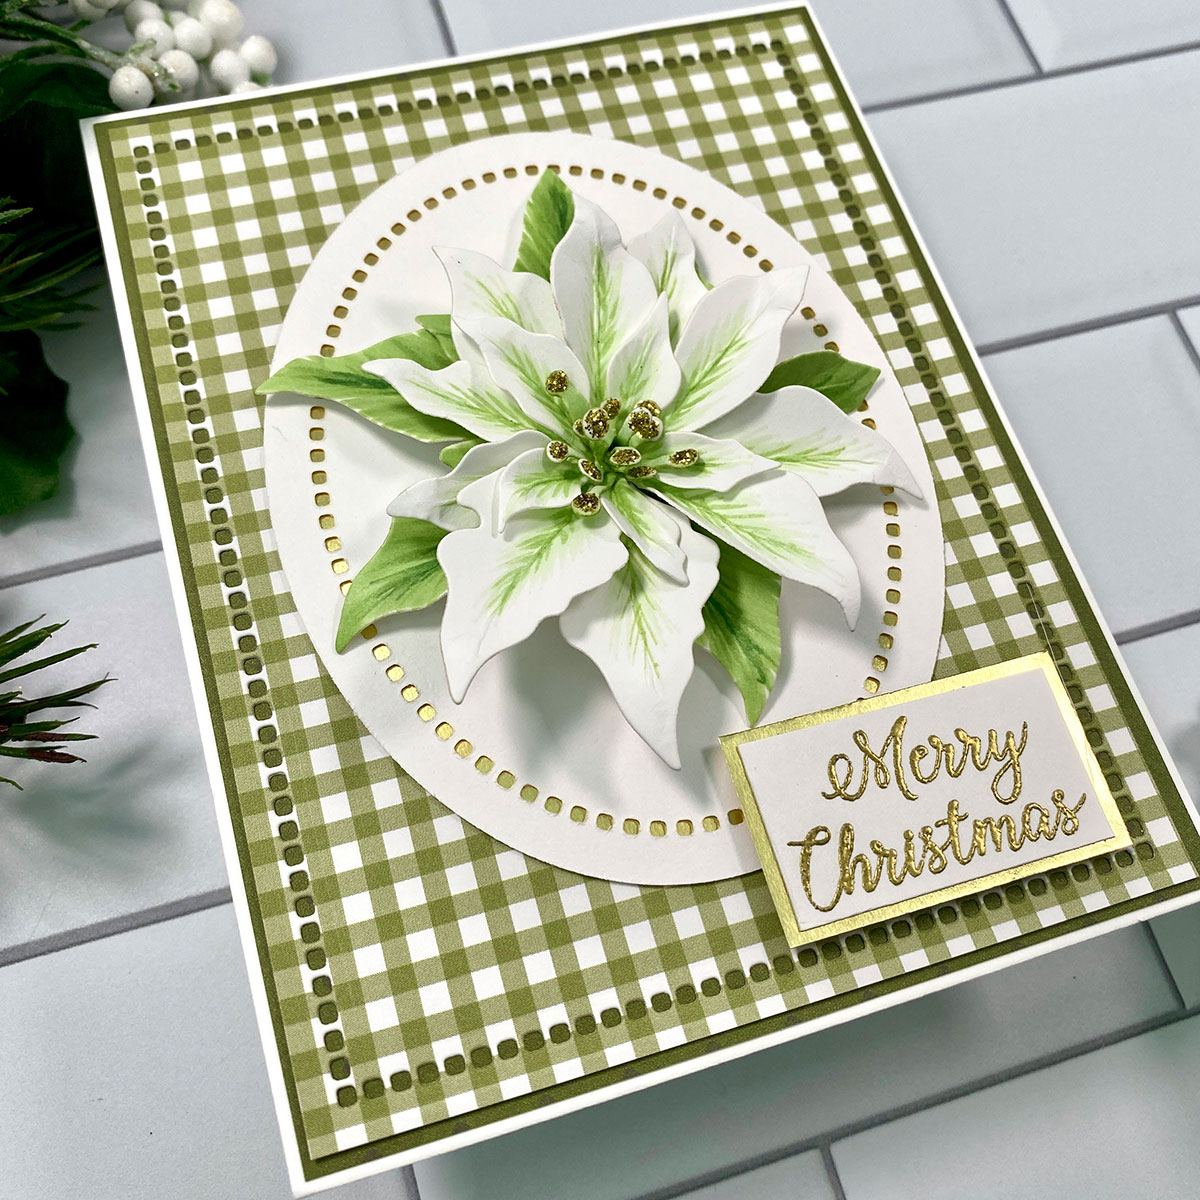
- For the card base, I added a dark green patterned paper layer to a top-folding A2 white card.
- I die cut green gingham paper with the larges Hemstitch Rectangles die and adhered it to the card.
- I die cut a Gold Mirror Cardstock piece with the middle oval die in the Hemstitch Ovals die set.
- Then I die cut some white cardstock with the same oval die, but I also added the hemstitch die this time. I adhered this to the gold mirror layer and added the oval to the card.
- I adhered the poinsettia to the center of the oval.
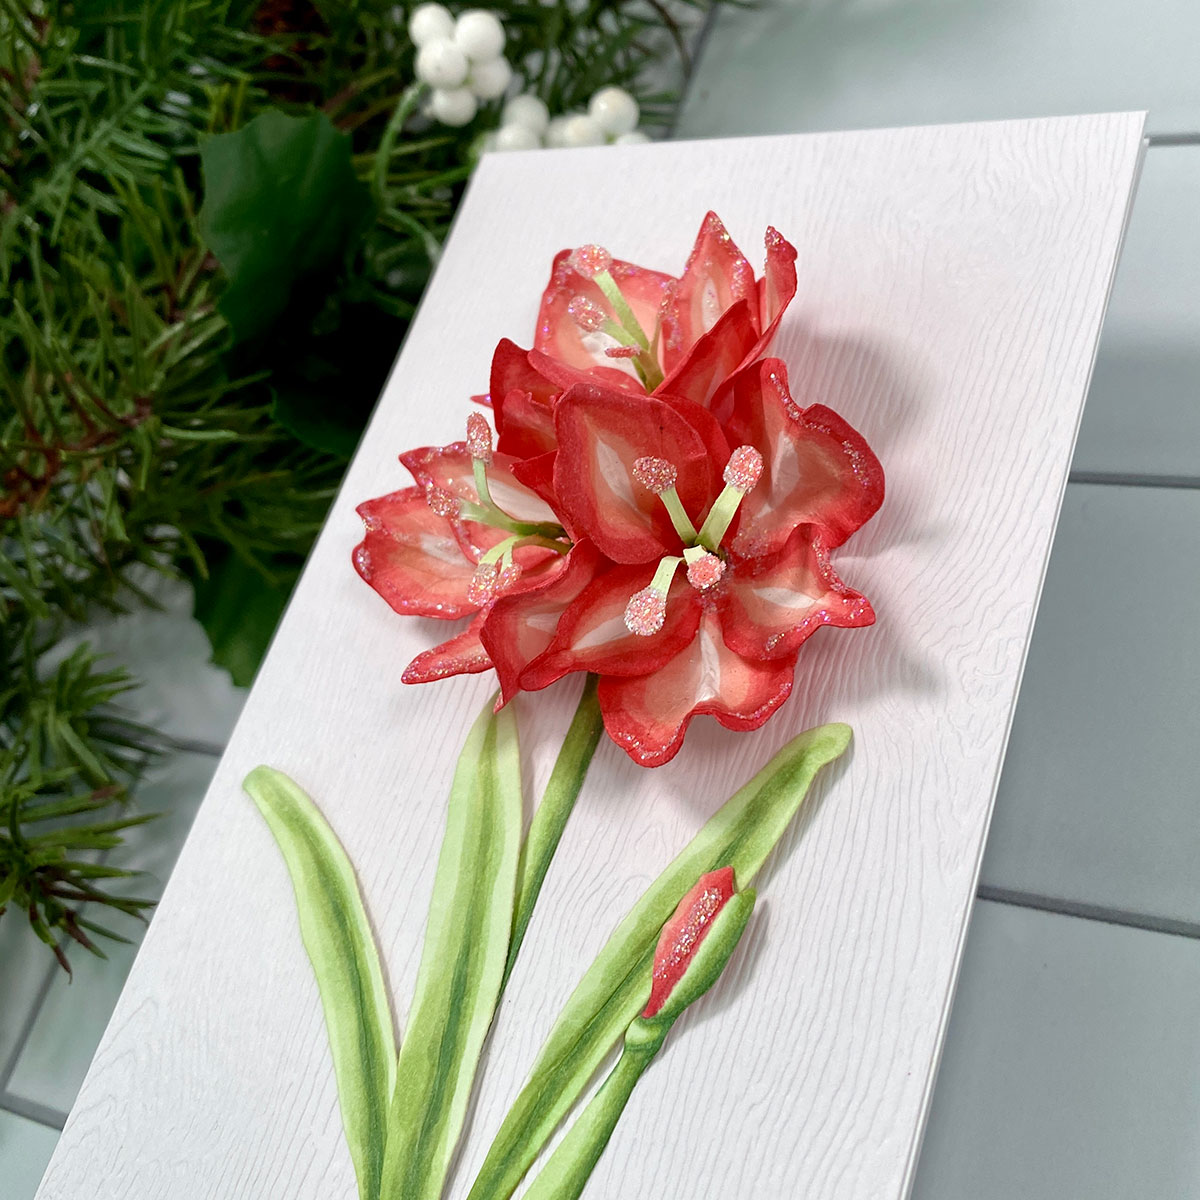
- Because I think holiday cards are the perfect excuse to add all the sparkle, I added thin lines of liquid glue on the flower petals, the stamen tips, and the patterned paper and sprinkled on some crystal glitter. I love the sparkly touches this adds!
- I stamped the sentiment from the Holiday Quotes set with Versamark ink, sprinkled on gold embossing powder and heat set it. I trimmed it to a rectangle shape and adhered it to a gold mirror cardstock layer.
- I popped up the sentiment with foam tape and adhered it to the card.
Spellbinders Supplies:

Other supplies
Neenah Solar White 80# cardstock, Honey Bee Stamps Summer Stems 6×6 paper pad, Scrapbook Adhesives foam squares, Stickles Gold Fine Glitter, Art Glitter Dries Clear Adhesive, Versamark Watermark Stamp pad
For my second card, I used the stunning Amaryllis die set to create a fun slimline card.
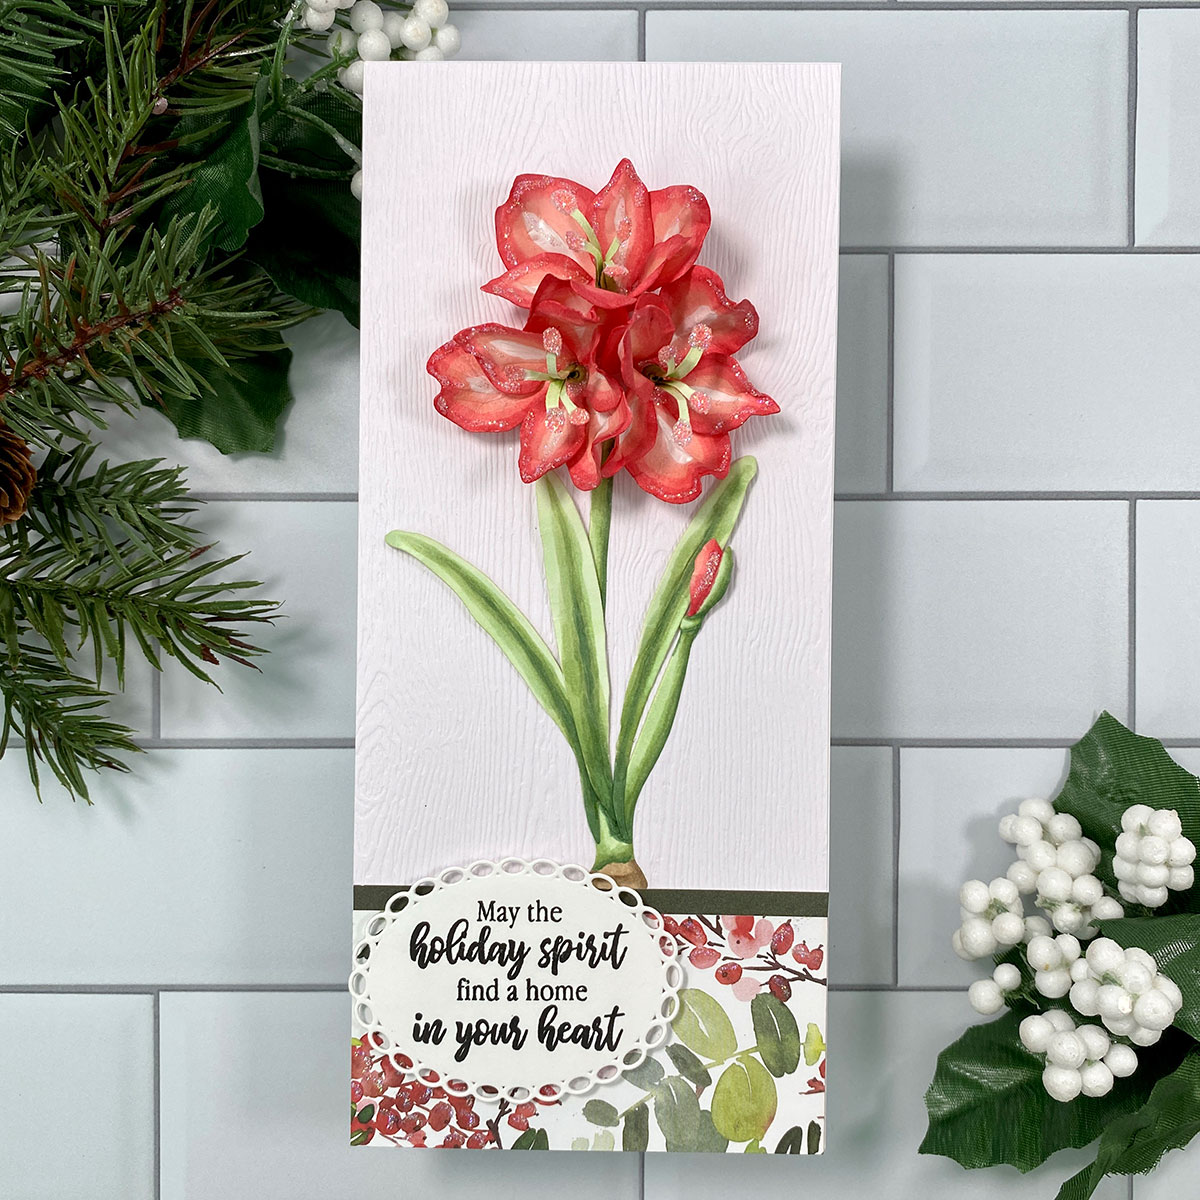
- I die cut the Amaryllis dies from white cardstock with my Platinum die cutting machine. Again, I colored them with some Copic markers.
- I watched Susan’s video to learn how to assemble the flower pieces. I used liquid glue to adhered the parts and set them aside to dry while I created my card base.
- My slimline card measures 3-1/2” x 8” and I made it by scoring a 7” x 8” piece of white cardstock at 3-1/2”.
- I added some white woodgrain cardstock to the card after I trimmed it to 3-1/2” x 8”.
- Then I added a piece of patterned paper that I trimmed to 3-1/2” x 2-3/4”. I adhered a thin strip of coordinating dark green paper above it.
- I stamped the sentiment from the Holiday Quotes in black ink and die cut it with the third smallest Elliptical Ovals die and popped it up onto the card with some foam squares.
Spellbinders Supplies:
Other supplies
Honey Bee Stamps Holiday Cheer 6×6 paper pad, Ranger Distress Woodgrain Cardstock, Art Glitter Dries Clear Adhesive, Art Glitter Crystal Ultrafine Transparent glitter, Adhesives foam squares, Honey Bee Stamps Intense Black Ink
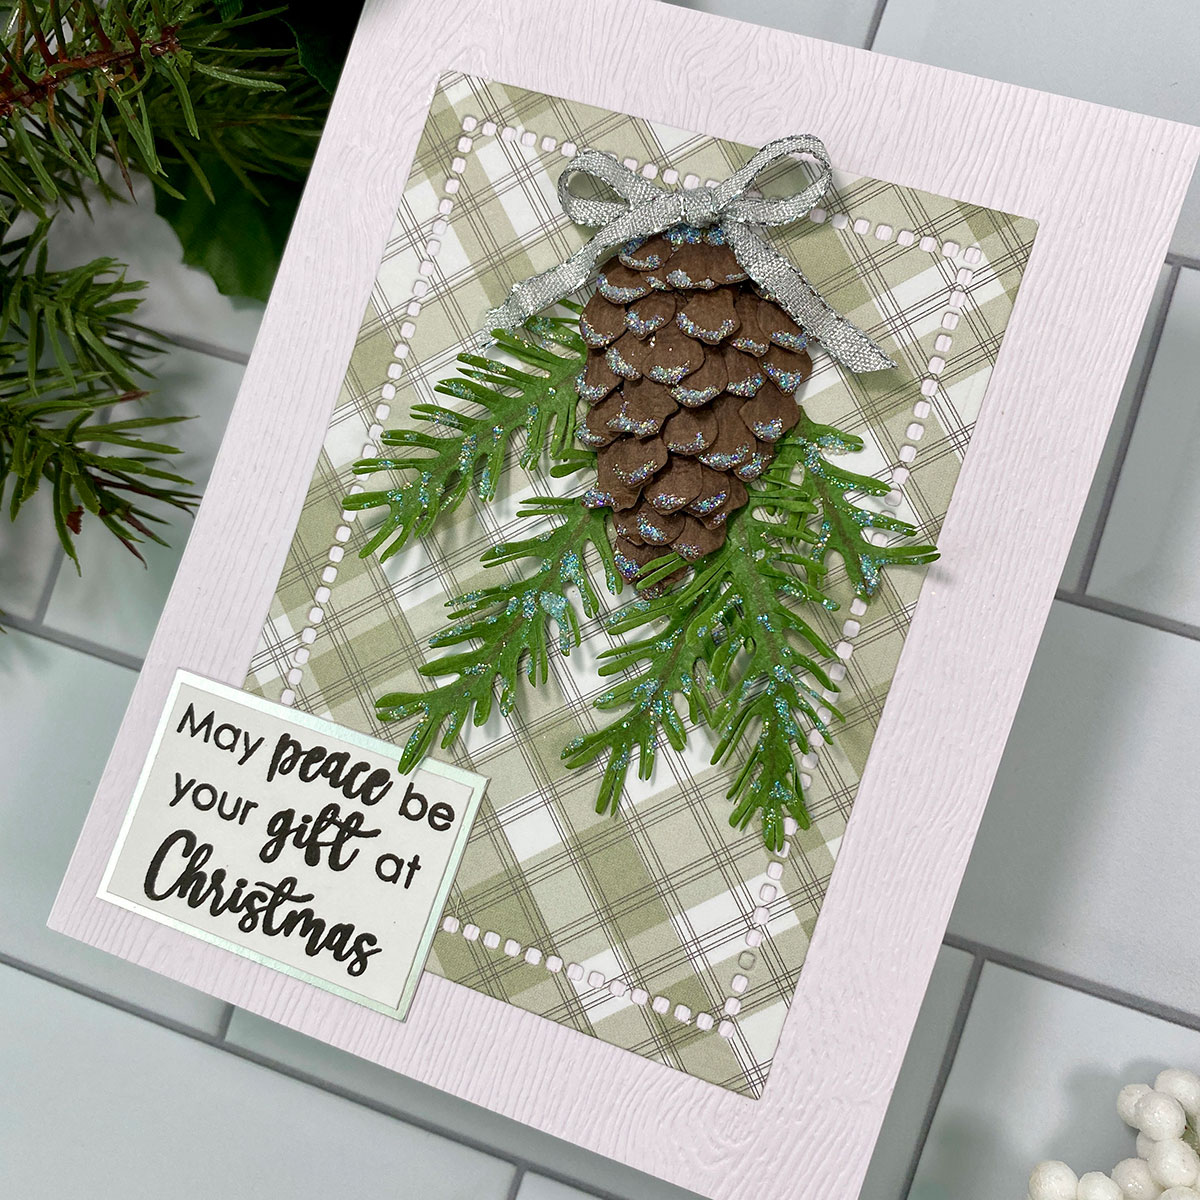
My final card was so fun to make! I love the Pine Cone and Evergreen Bough with Ladybugs die set! After watching Susan’s video on how to layer the pinecone pieces, I knew I had to give it a try!

- This time I die cut the pieces from colored cardstock. I used some brown and green cardstock from my stash. Beginning with colored cardstock does save time and you don’t have to worry too much about blending any Copic markers you use for some shading, which I did.
- Next I created my card base by adding a piece of wood grain cardstock, layered with green plaid paper I die cut with the next to largest Hemstitch Rectangle die.
- I assembled the pine cone following Susan’s directions, adhering my pieces directly to my card front. Honestly, at first I didn’t think mine was going to look good. But….just keep going and it will! I just love how this turned out!
- As I said before, I need glitter on my holiday cards! I hope the photos show just how pretty and sparkly it is.
- While my glitter dried, I stamped the sentiment in black ink. Then I trimmed it and adhered it to a silver cardstock layer and glued it to my card.
- To top off the pine cone, I used some silver wired ribbon I’ve had forever, tied a little bow and adhered it with a glue dot.
Spellbinders Supplies:
Other supplies
Distress Woodgrain Cardstock; Honey Bee Stamps: Holiday Cheer 6×6 paper pad & Intense Black ink; Art Glitter: Dries Clear Adhesive & Crystal Ultrafine Transparent glitter
I so enjoyed creating these cards with Susan’s Holiday Flora Collection and hope I’ve given you more inspiration for trying these out! I’d love to see you over on my Instagram, @c.ann.h, or at my blog, Crafting by Carol. Thank you so much for stopping by!
2 Comments
MaryH
What a lovely job you did from layouts to bringing the sets to life! I love the embossing and the papers you have selected for each card – matches made in heaven. Lots of talent displayed in these makes – KUDOS.
Carol H.
Mary, thank you so very much for your sweetest comment! You’ve surely made me smile!