Hot Foiling the Be Bold Color Block Collection
Hello! My name is Jen Kotas and I’m so happy to be on the Spellbinders blog today. I’ve got two cards to share with you made using the new Be Bold Color Block Collection. What a fun collection with so many ways to use them creatively!
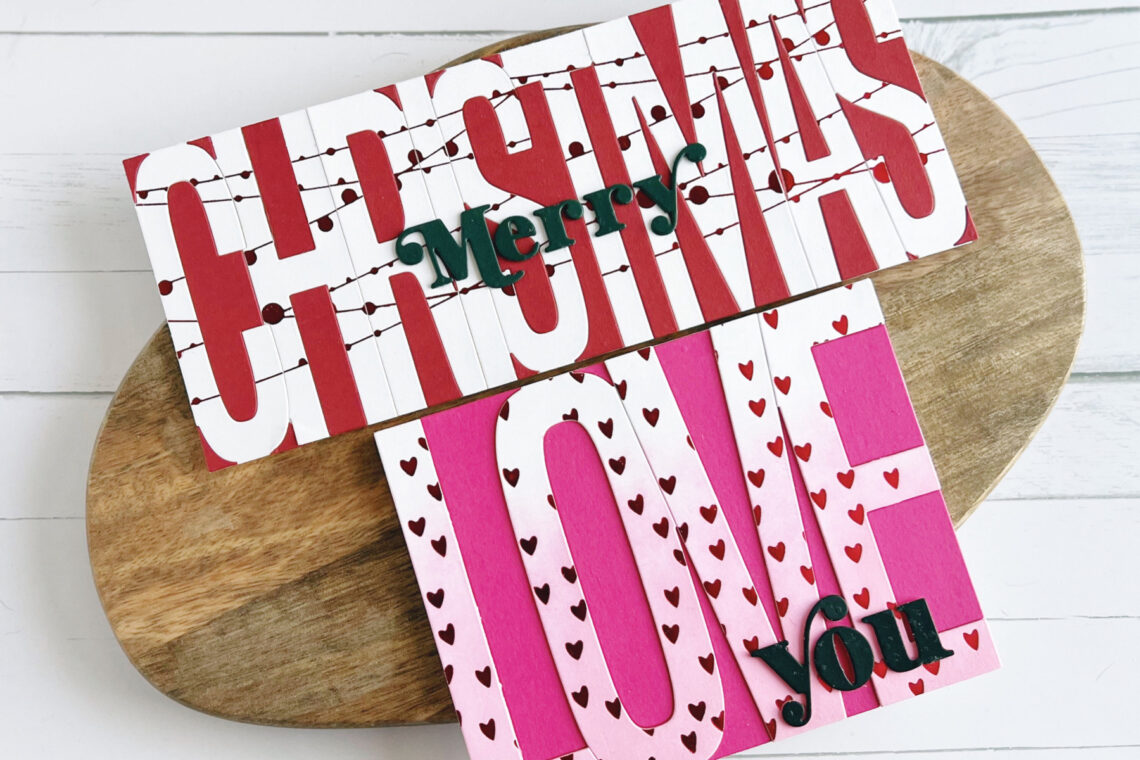
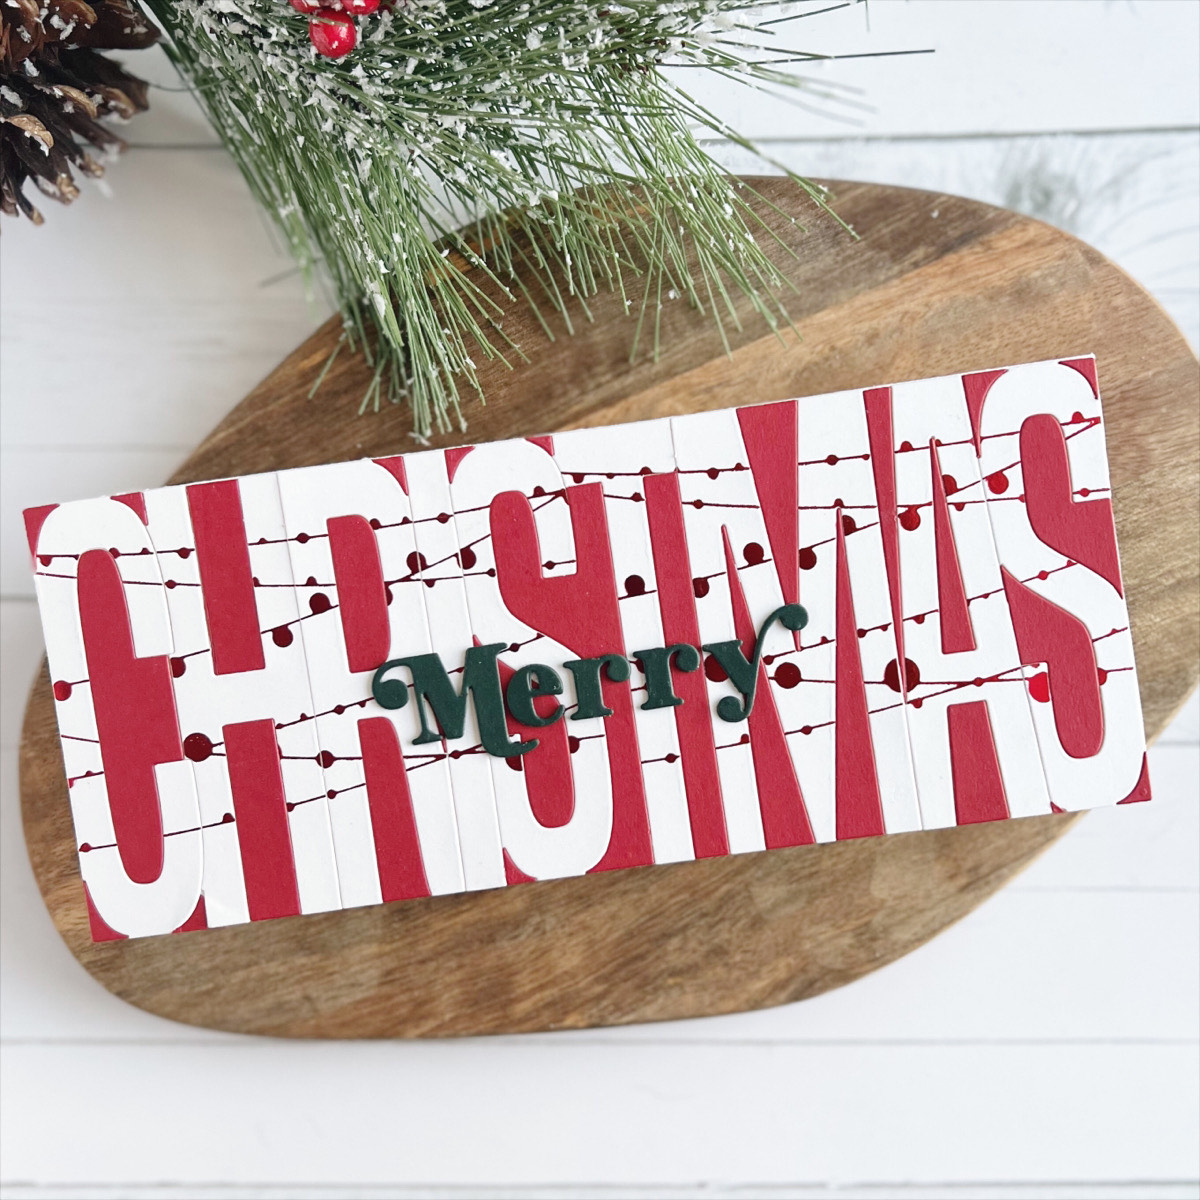
I decided not to add any embellishments since there was so much shiny hot foil there already. If you don’t do hot foiling (though I highly recommend it), you could use stamps instead. For the Christmas card, you could foil the cardstock first and then die cut but I wasn’t sure what I was doing when I cut it ahead of time. Make sure your glimmer plates are facing the right way before foiling. Don’t foil the hearts upside down!
Instructions:
- Die cut the Be Bold Color Block Merry Christmas Etched Dies twice from white cardstock. You’ll only need the letters. Put one set aside for later.
- Adhere the letters C H R I S to a piece of printer paper with temporary adhesive.
- Place the String Lights Background Glimmer Hot Foil Plate and Red Glimmer Hot Foil Roll over the letter and hot foil.
- Repeat steps 3 and 4 with T M A S.
- Adhere the two sets of letters together.
- Adhere letters to a red slimline panel and place on a slimline card base.
- Die cut “merry” four times from green cardstock, adhere together and place in center of card.
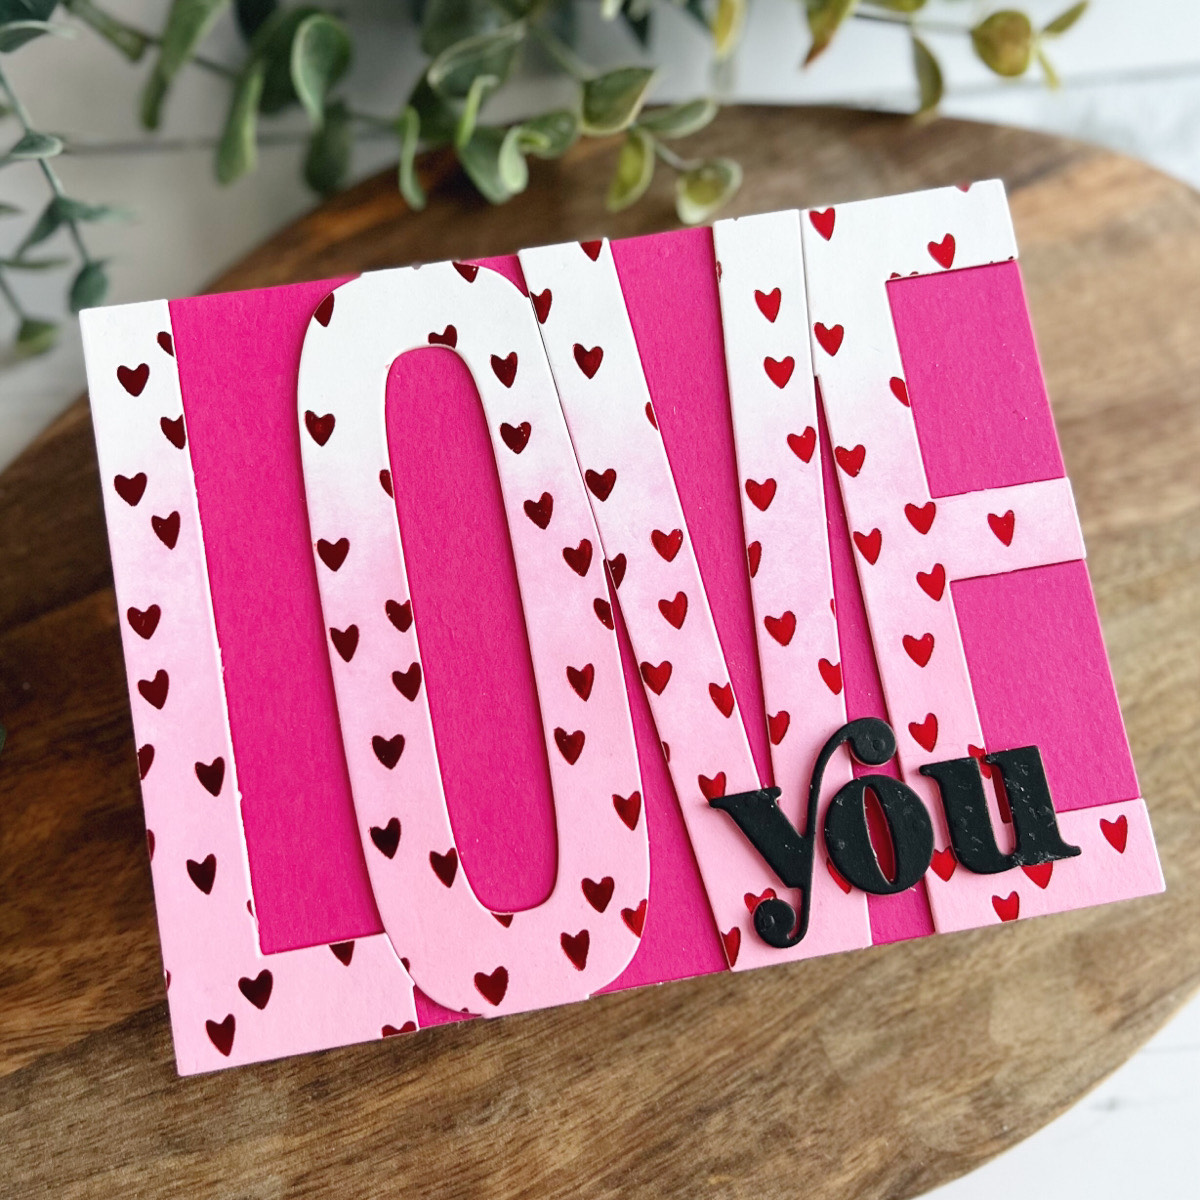
Instructions:
- Die cut Be Bold Color Block Love You Etched Dies once from white cardstock and once from pink cardstock. Save all the pieces from the pink except the letters. The white letters will be inlaid.
- Lay the Scattered Hearts Background Glimmer Hot Foil Plate and Red Glimmer Hot Foil Roll over the first letter and hot foil. Repeat for all letters.
- Blend on pink ink heavier at the bottom, fading to white at the top.
- Add letters to an A2 card base with liquid glue. I placed the card in the corner of my stamp positioner to help line things up.
- Once the letters are in place add the pink pieces around the them.
- Die cut “you” four times from black cardstock, adhere together and add to card.
Adding hot foil to these letters was a lot of fun and quite easy. I honestly didn’t know if it was going to work out when I started. You can see more card making tutorials on my blog, Who Stole My Glitter or visit my Instagram page for more inspiration. Thanks for visiting!
Spellbinders Supplies:

Other Supplies
Neenah Solar White Cardstock, Hero Arts Cardstocks in Pitch Black, Cranberry & Azalea, Simon Says Stamp Midnight Green Cardstock, Bearly Arts Precision Glue, Tombow Mono Adhesive (Temporary), Distress Oxide Ink in Pink Flamingo, Misti Stamp Positioner.
Inked Messages Inspiration | Skillful Sailor Cards with Bibi Cameron
Simple Mixed Media Inspiration with Canvas Sheets