Classically Becca Collection – Bright Spring Cards with Annie Williams
Hi there, this is Annie Williams and I’m excited to be back on the blog today to share a couple of projects using the new Classicly Becca Collection from Spellbinders. The intricate backgrounds, gorgeous sentiments, and beautiful florals inspired me to create three bright springtime cards for a variety of occasions.

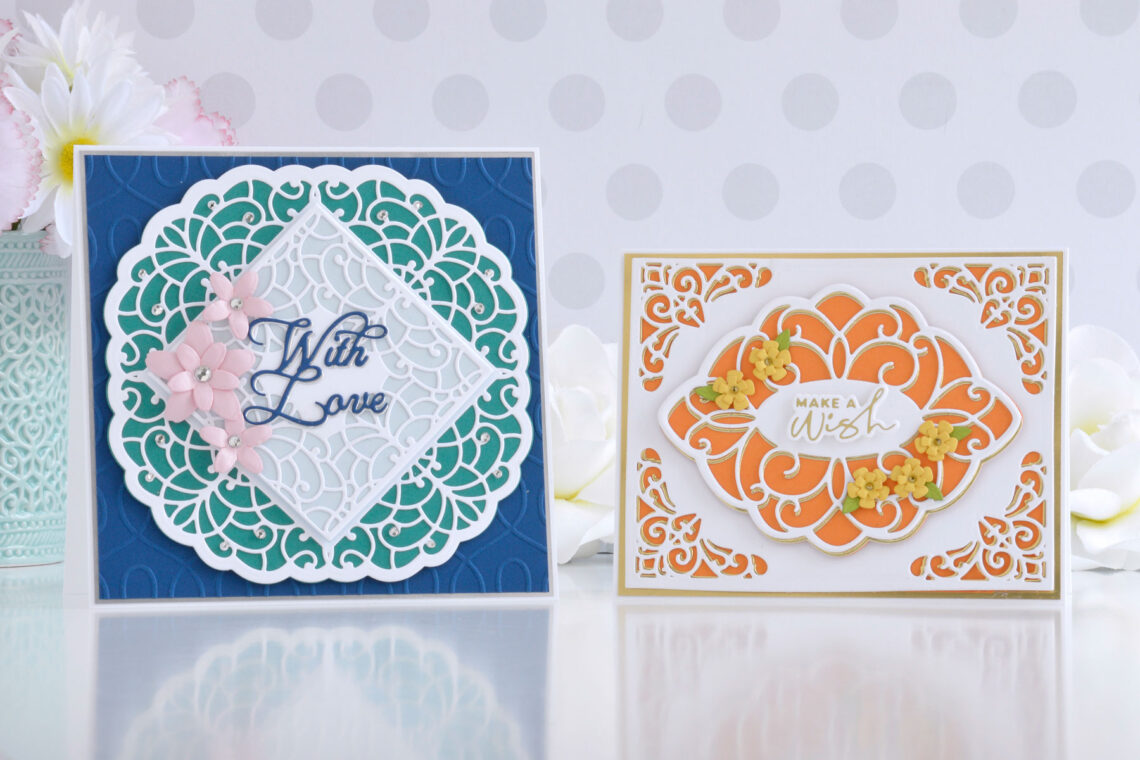
The A2 Filigree Marquis Die Set has everything you need to easily create a beautiful card front. I choose bright colors and added pops of gold to this simple, but pretty birthday card.

- Die-cut white and Mirror Gold Cardstock using the Outer Rim and Corner Frame Insert dies from the A2 Filigree Marquis Die Set. Adhere the layers together with liquid glue so that the gold layer peeks out slightly in the corner designs.
- Die-cut Persimmon Cardstock using the Outer Rim die and adhere to the back of the background panel with liquid glue.
- Mat the background panel with Mirror Gold Cardstock and adhere it to a top-folding A2-sized white card base with tape runner.

- Apply Matte Gold Hot Foil to white cardstock using one of the sentiments from the Yana’s Special Sentiments Glimmer Plate Set and the Glimmer Hot Foil Machine. Cut it out using the coordinating die.
- Die-cut Persimmon, Mirror Gold, and white cardstock using the Filigree Oval Outline and Insert dies and assemble the layers as done with the background panel above.

- Adhere the filigree panel to the center of the card front with foam adhesive and pop the sentiment up in the middle with more foam adhesive.
- Die-cut Beeswax and Rainforest Cardstock with the flower and leaf dies in the set. Shape the petals a bit with a small ball stylus and assemble them with liquid glue.
- Arrange the flowers around the sentiment and adhere down, embellishing the centers with Gold Mix Gems.
Spellbinders Supplies:

Other Supplies
Heavyweight white cardstock, tape runner, foam adhesive

I love making square cards, so was excited to try the Circle Meets Square Die Set next. With a deep blue layered background and a few tiny blooms, this love card comes together easily and beautifully.
- Trim a piece of Cosmic Sky Cardstock to 5.25” square and emboss it using the Loops Embossing Folder.
- Mat the panel with Mirror Silver Cardstock and adhere it to a top-folding 5.5” square white card base with tape runner.
- Die-cut white and Lagoon Cardstock using the Outer Rim and Large Circle Insert dies from the Circle Meets Square Die Set and adhere together with liquid glue.
- Die-cut white and Glacier Cardstock using the Square Rim and Insert Dies and adhere together with liquid glue.

- Die-cut Cosmic Sky and Mirror Silver Cardstock with the sentiment die from the With Love Regalia Card Builder Die Set. Adhere the layers together with liquid glue, allowing the silver layer to peek out from behind like a shadow.
- Die-cut Pink Sand Cardstock using the Small and Mini 5 Petal Blossom Dies from the Cinch & Go Blossoms Die Set.
- Shape the petals with a small ball stylus and adhere the larger flower together with liquid glue.

- Adhere the large circle background die-cut to the card front with foam adhesive and pop the smaller square die-cut in the center with more foam adhesive.
- Add the sentiment to the center of the card with liquid glue and adhere the flowers to the left.
- Add Silver Mix Gems to the flower centers and around the background panel.
Spellbinders Supplies:
Other supplies
White heavyweight cardstock, tape runner, foam adhesive

With so many versatile new background designs in this collection, I decided to create a slimline card next. I added lots of sparkle and shine to the intricate die-cuts for this fun and ornate card for a friend.
- Trim a piece of white cardstock to 3.5” x 8.5” and die cut it at both ends using the Card Builder Rims and Insert from the Adoring Fleurette Card Builder Die Set. Trim off any leftover overhanging parts from the middle of the background panel.
- Trim a piece of Glacier Cardstock to about 3.25” x 8.25” and adhere behind the die-cut panel with liquid glue.
- Mat the background with Mirror Gold Cardstock and adhere it to a top-folding slimline-sized white card base with tape runner.

- Trim white and Mirror Gold Cardstock into about a 2” wide strip and die cut each end with the Eyelet Border Die from the Romantic Slimline Borders Die Set.
- Adhere the layers together with liquid glue and then position it vertically over the center of the card front to hide the unfinished edges of the background.
- Die-cut white, Mirror Gold, and Cosmic Sky Cardstock with the Sentiment Rim, Insert, and Sentiment dies from the Adoring Fleurette Card Builder Die Set and adhere together with liquid glue.

- Pop the sentiment panel up in the center of the card front with foam adhesive.
- Die-cut Dahlia and Rainforest Cardstock with the flower and stem dies from the set and add around the sentiment with liquid glue.
- Embellish the background with Gold Mix Gems for tons of sparkle.
Spellbinders Supplies:
Other supplies
White heavyweight cardstock, tape runner, foam adhesive

I hope you enjoyed this trio of bright springtime cards and thanks so much for stopping by today. You can find more inspiration over at my blog AnnieBWills.com.


One Comment
MaryH
Lovely, just lovely cards anyone would adore getting. What a surprise for me; I find I like the Persimmon Color! Usually don’t gravitate to orange colors unless doing a pumpkin; but I really love your card using this color. Of course, now I want to get a package of this Persimmon Color cardstock and have some fun with it!