Garden Favorites Collection Inspiration with Hussena
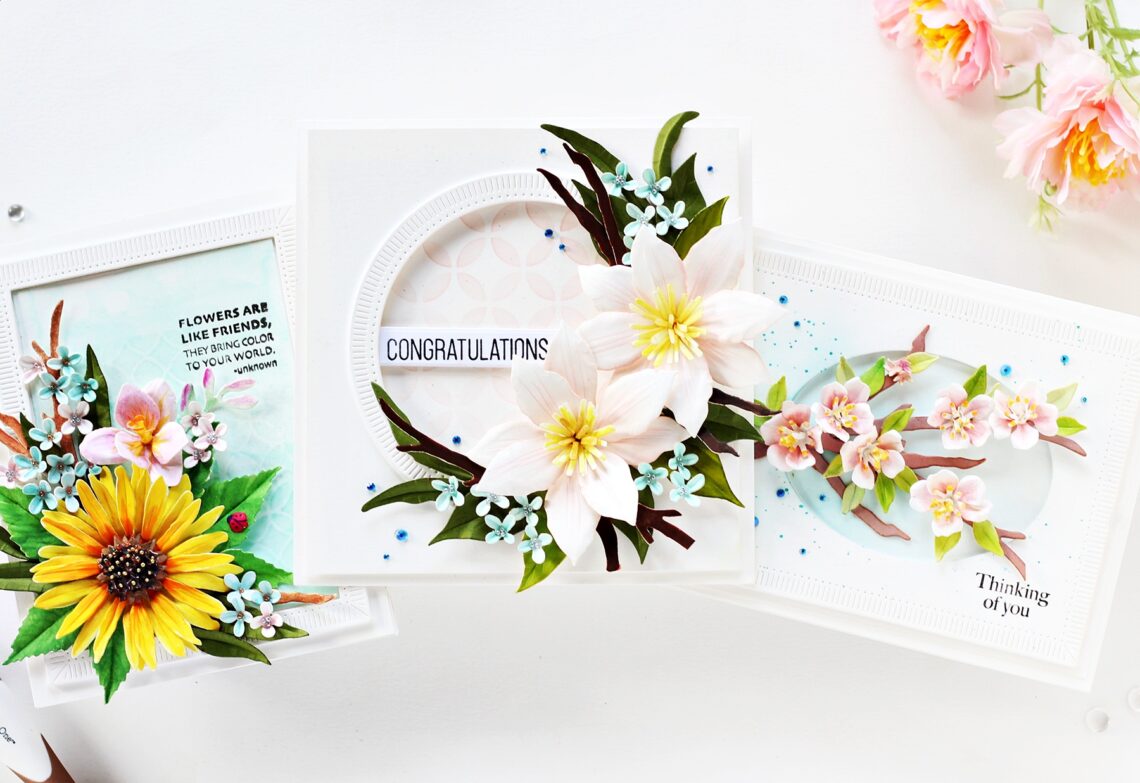
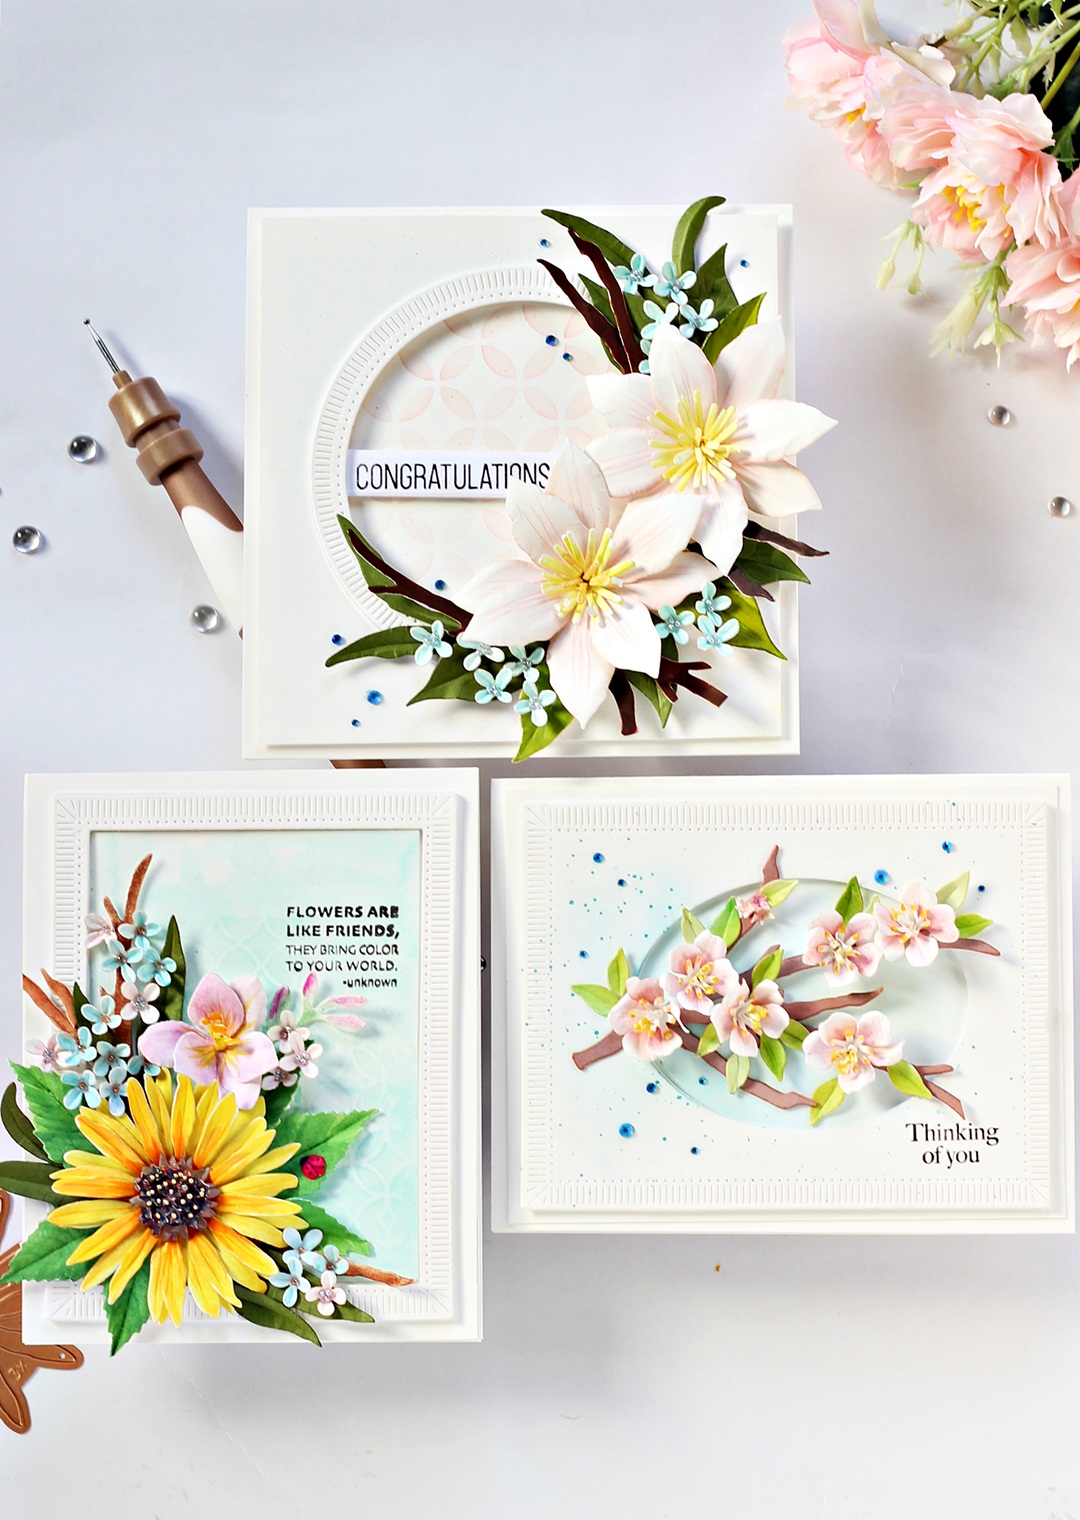
Hello everyone! This is Hussena from Quill and Punch Works, and I am delighted to be guest designing on the Spellbinders blog today. I have three projects to share, highlighting the NEW Susan’s Garden Favourites Collection. The breathtaking blooms and unique elements in this Collection inspired me to create three soft and cheery springtime cards featuring some of my favorite flowers.
I loved the big bold blooms in the Sunflower and Ladybugs Die Set, so I decided to create with that first. I combined it with different elements from the Sunflower and Ladybugs Etched Dies, Freesia Etched Dies, Bearded Iris Etched Dies, Lilac Etched Dies, Dogwood Etched Dies, along with the Fluted Classics Rectangles Etched Dies.

To create my card, I first die-cut Susan’s Garden Specialty Cardstock using the sunflower dies in the Sunflower and Ladybugs Die Set. I die cut enough layers to help me create on full sunflower. Next, I blended Orange Gouache in the center of each layer with a paintbrush and then applied Yellow Gouache to the tips of each petal. I shaped the petals using the tweezers in Susan’s Garden Ultimate Tool Kit and adhered the layers together with liquid glue. Next, I die-cut Susan’s Garden Specialty Cardstock using the flower center and seed dies in the Sunflower and Ladybugs Die Set. I colored the pieces using Brown Gouache and cupped the petals using the small ball tip in Susan’s Garden Ultimate Tool Kit and adhere the layers together with liquid glue. Next, I added Gold and Orange Glitter Balls to the centers for a realistic touch.
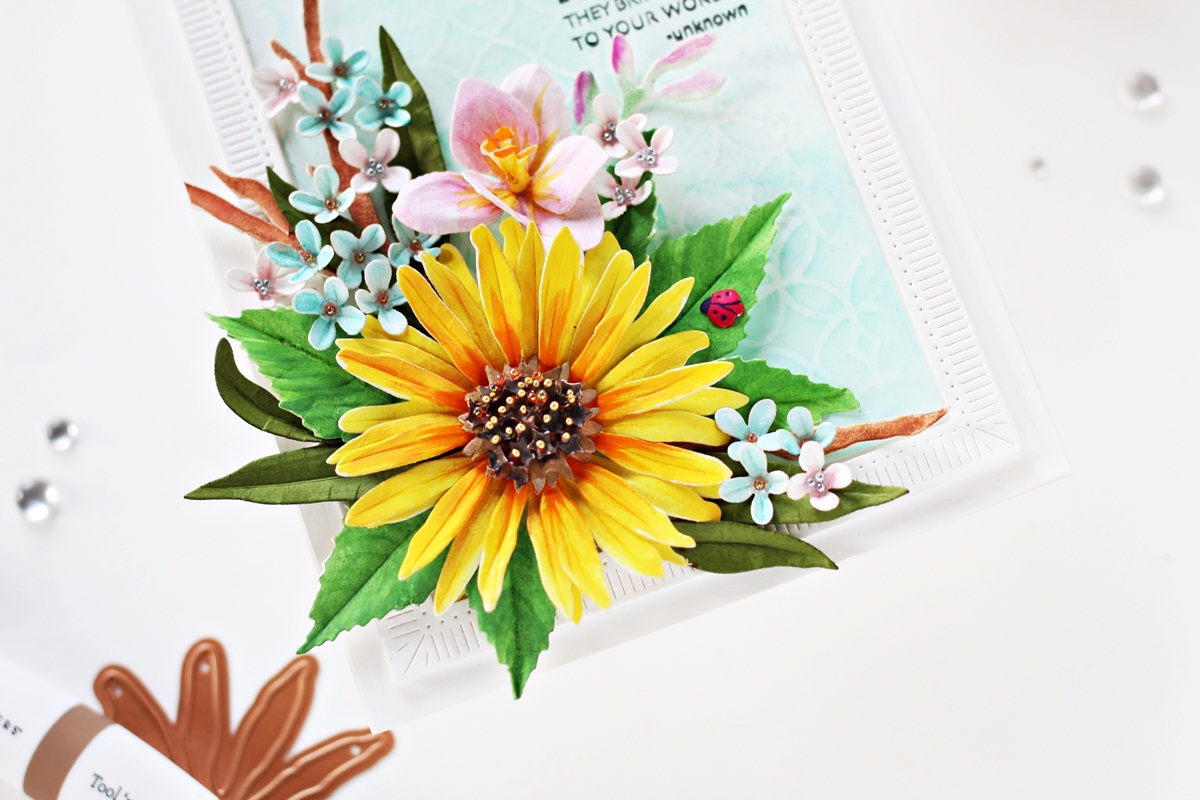
Next, I die-cut Susan’s Garden Specialty Cardstock using the leaf dies in the Sunflower and Ladybugs Die Set and Fern Cardstock using the curved and straight leaf dies included in the Bearded Iris Etched Dies. I colored the white leaves using Green Gouache and added a vein to each using the leaf tip tool in Susan’s Garden Ultimate Tool Kit. Next, I shaped the tips using the medium ball tip for a more realistic finish. Once that was done, I die-cut Susan’s Garden Specialty Cardstock using the branch die in the Freesia Etched Dies and colored the pieces using Brown Gouache. Then, to create additional filler flowers and foliage for my card, I die-cut Susan’s Garden Specialty Cardstock using the petal layers and bud dies in the Freesia Etched Dies. I colored the die-cuts using Lilac Gouache and then used a dark orange Copic Marker to flick some color out from the center to add some quick color to the petals. Then, I embossed each piece using the tweezers in Susan’s Garden Ultimate Tool Kit and adhered the layers together with liquid glue. Next, I die-cut Susan’s Garden Specialty Cardstock using the bloom die set in the Lilac Etched Die Set. I colored the die-cut pieces using Light Pink and Blue Gouache and cupped the petals using the small ball tip in Susan’s Garden Ultimate Tool Kit. I added Silver and Orange Glitter Balls to the center of the lilacs for added interest.
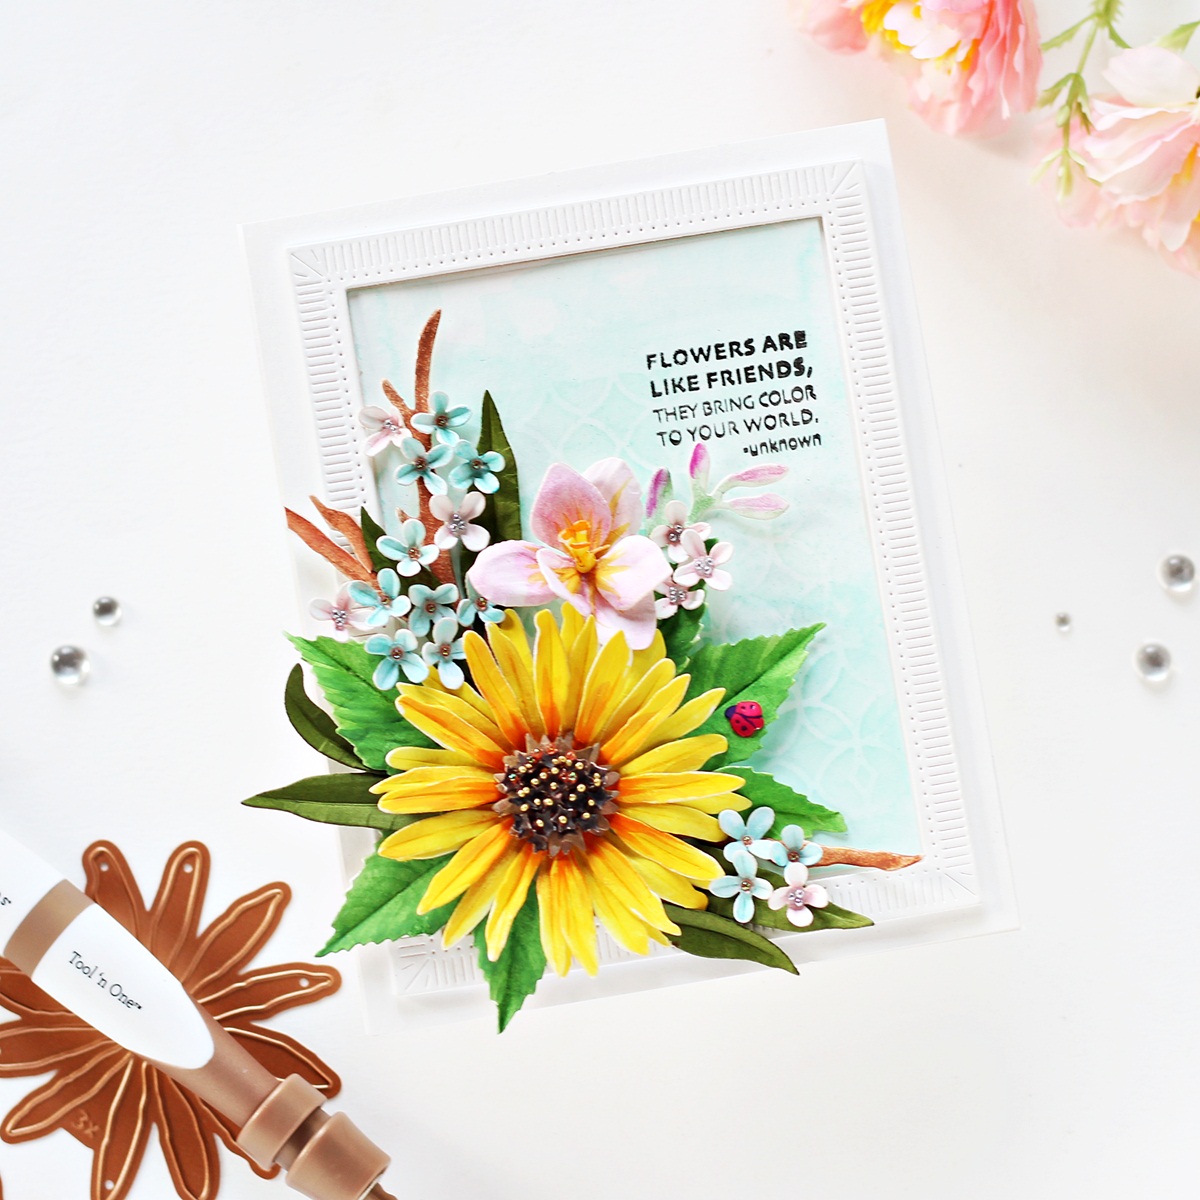
Next, I die-cut Snowdrift Cardstock using the Large Rectangle Outer Rim and Insert Die together from the Fluted Classics Rectangles Etched Dies to create a frame for my card front. Then, I trimmed a panel of White Cardstock to size and wet the panel with water, and used Tumbled Glass and Peacock Feathers Distress Inks with a Water Brush in a dabbing motion, allowing the colors to mix slightly. Next, I placed a stencil in the center of the panel and applied Mint Ink lightly all over with a blending brush to create a soft background. I stamped a sentiment from the Garden Favorites Sentiments Clear Stamp Set onto the panel using Versafine Onyx Black ink. I adhered the flowers, foliage, and frame down onto my panel using the Bearly Art Original Precision Craft Glue for a stronghold. Then, as a finishing touch, I die-cut Snowdrift Cardstock using the four spot ladybug die in the Sunflower and Ladybugs Die Set and colored the piece using a red Copic Marker and Black Fineliner Pen to add some details to the body. I adhered it down on one of the leaves and then mounted my card front to an A7-sized white card base using a tape runner.
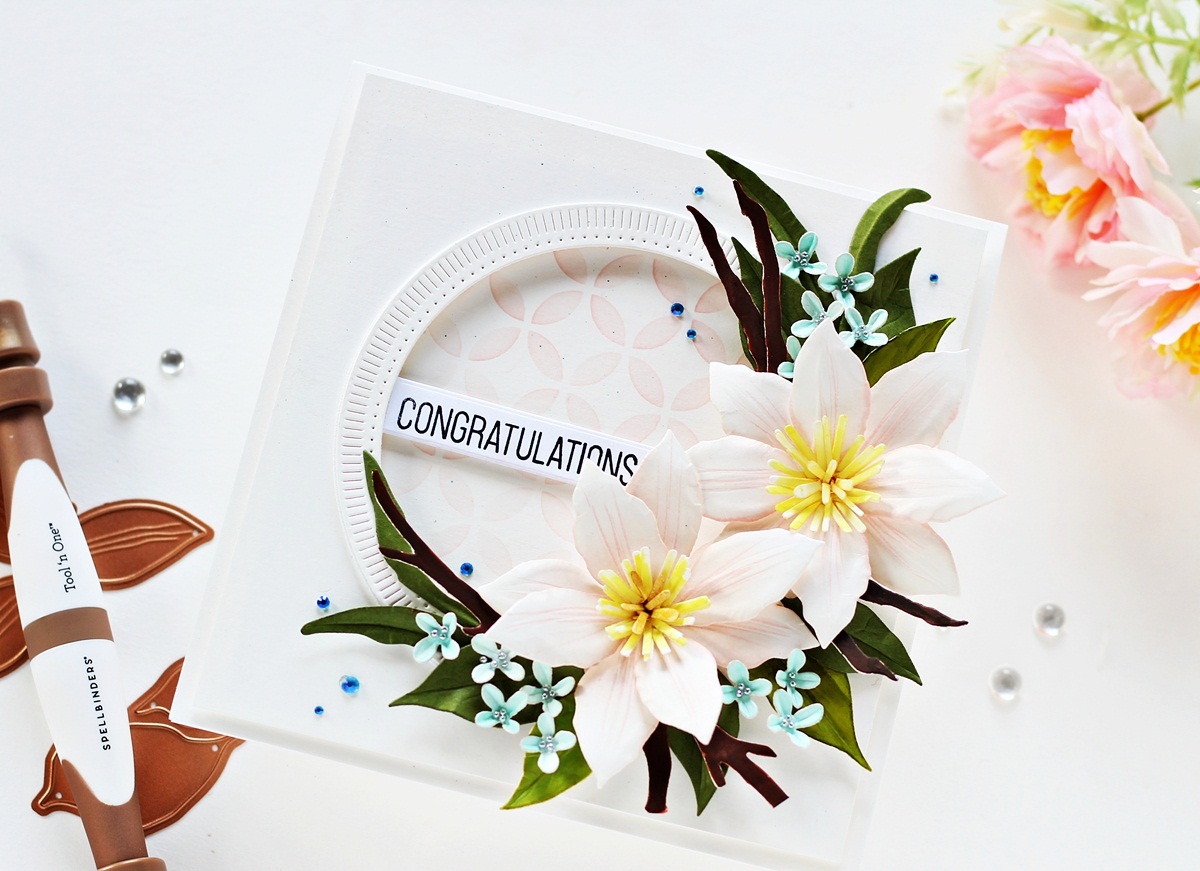
My next card features the Clematis Etched Dies, which is one of the most impressive-looking flowers in the collection. I wanted to make sure I used a canvas large enough to really show off all of the layers and detail, so I created a 6” x 6” Card, which would be perfect to gift someone on their wedding or any other really special occasion.
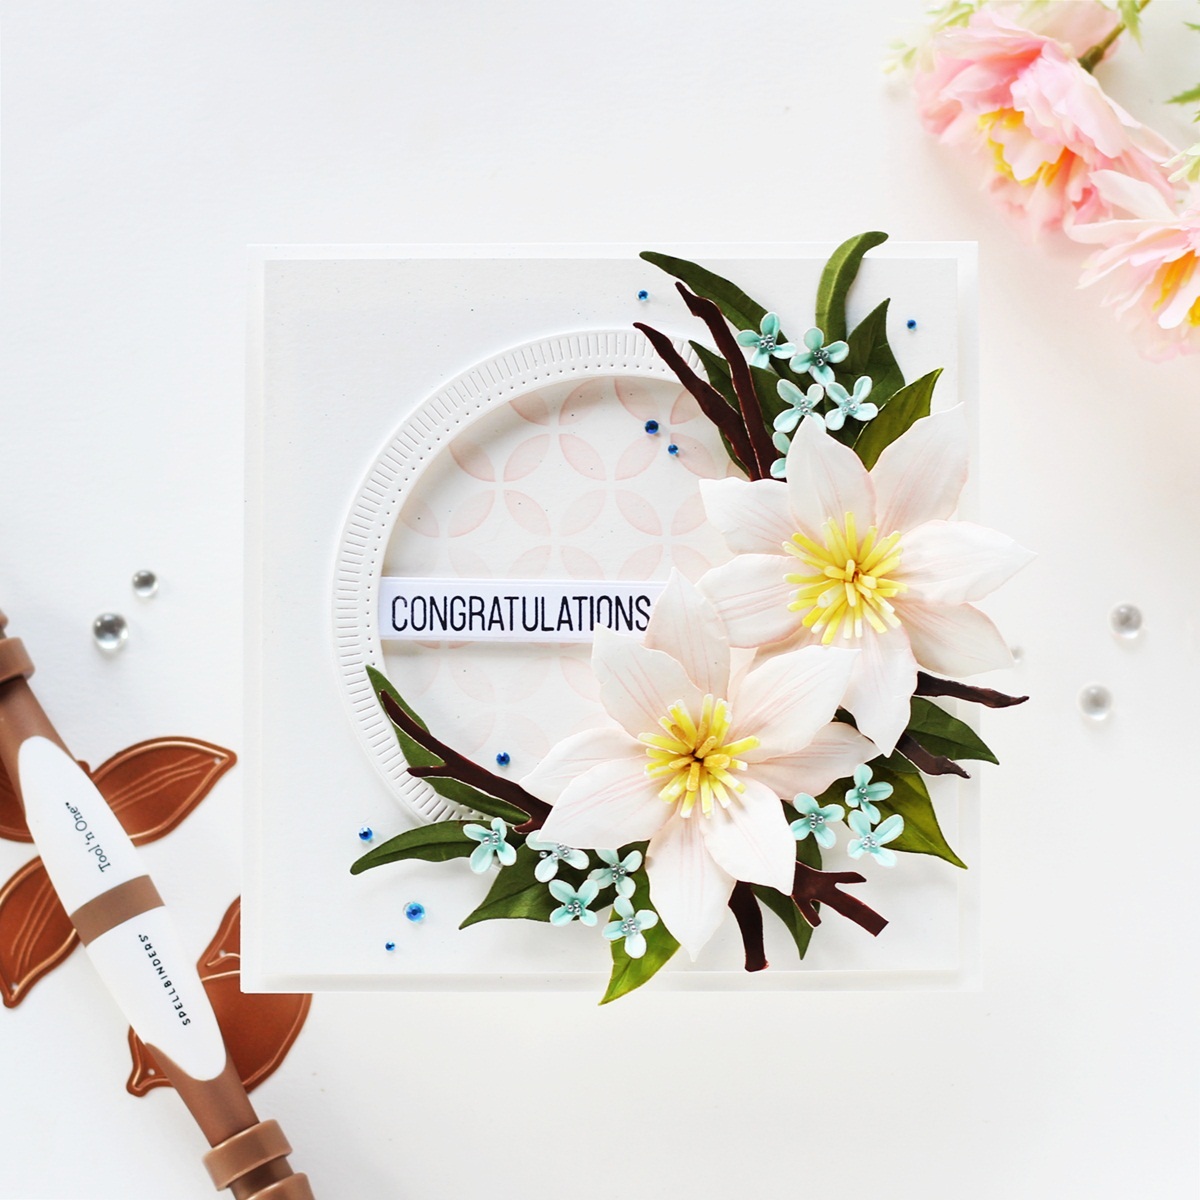
To create my card, I first die-cut Susan’s Garden Specialty Cardstock using the flower dies in the Clematis Etched Dies. I die-cut just enough petals to help me create two large flowers for my card front. Next, I used a Light Pink Copic Marker to create sweeping strokes from the center of the flower stopping before the outer edge of the petal, leaving some white area. Once that was done, I blended Spun Sugar Distress ink to the center of the flowers with a sponge dauber and around the edges of the die-cuts to add dimension. Next, I shaped the petals using the tweezers and the loop tool from Susan’s Garden Ultimate Tool Kit. I then die-cut Susan’s Garden Specialty Cardstock using the stamen die included in the set and colored the pieces using a Yellow Copic Marker and cupped the petals using the small ball tip in Susan’s Garden Ultimate Tool Kit.
Next, I die-cut Susan’s Garden Specialty Cardstock using the leaf dies in the Clematis Die Set and Fern Cardstock using the curved and straight leaf dies included in the Bearded Iris Etched Dies. I colored the white leaves using Spring Green Gouache and added a vein to each using the leaf tip tool in the Susan’s Garden Ultimate Tool Kit. Next, I shaped the tips using the medium ball tip for a more realistic finish.
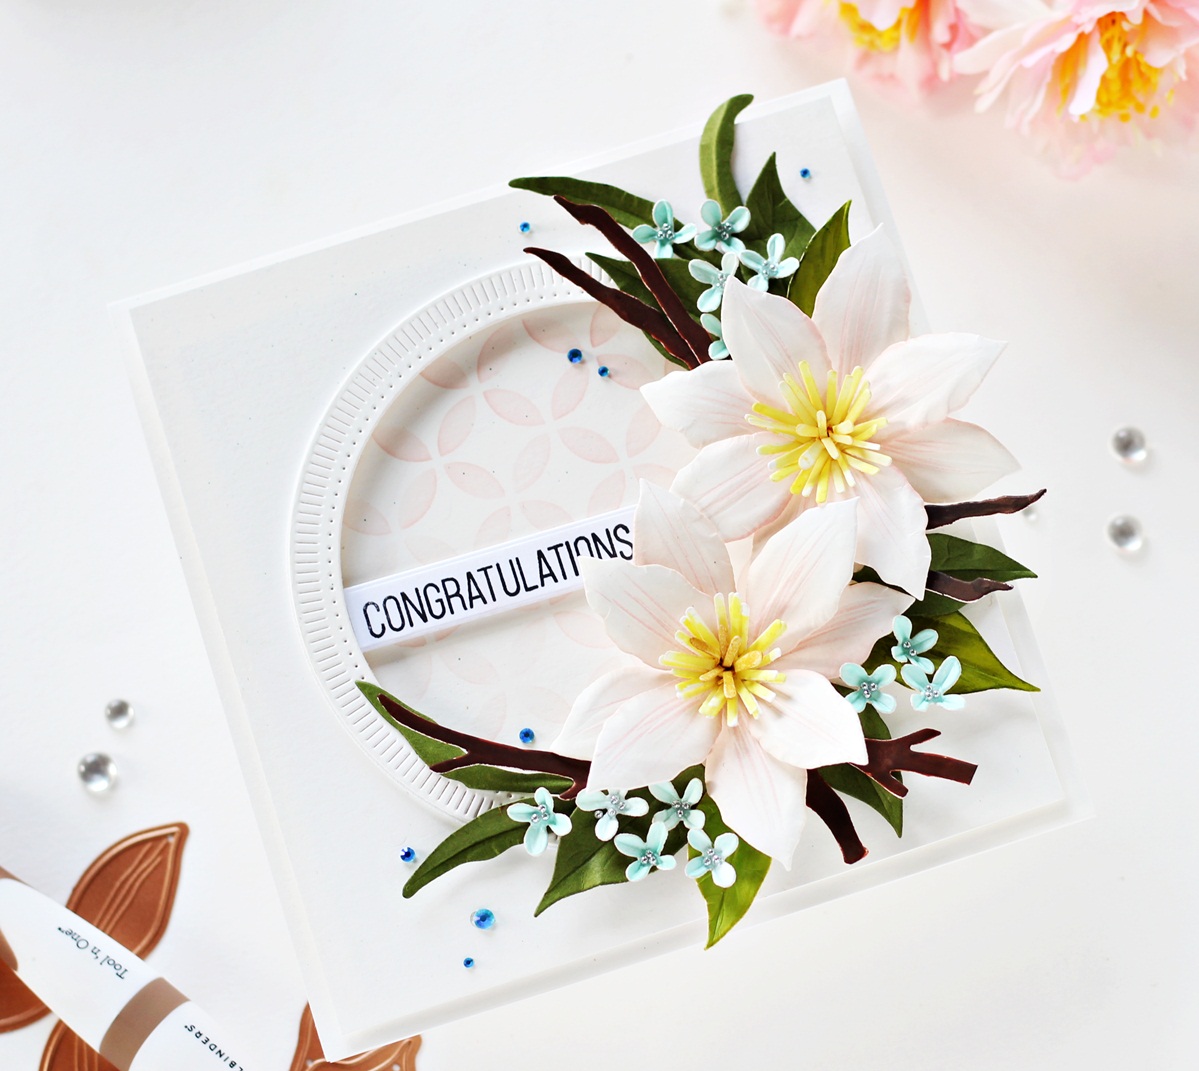
Once that was done, I die-cut Susan’s Garden Specialty Cardstock using the branch die in the Dogwood Etched Die Set and colored the pieces using Brown Gouache. Then, I die-cut Snowdrift Cardstock using the Large Circle Outer Rim, Insert, and Inner Rim Dies from the Fluted Classics Circle Etched Dies. I die-cut another piece of Snowdrift Cardstock and White Fun Foam using the Large Circle Insert Die to create a window for my card panel. I adhered the circle frame down onto the panel using foam squares for a raised effect and arranged the flowers and foliage down around the frame. Next, I placed a stencil in the center of the card base and applied Blush Ink lightly all over with a blending brush to create a soft stenciled background. Then, I stamped a sentiment from the Garden Favorites Sentiments Clear Stamp Set onto a strip of Snowdrift Cardstock using Versafine Onyx Black ink. I die-cut the sentiment using a coordinating banner die and adhered the piece onto my panel using foam squares for a raised effect.
Next, I die-cut Susan’s Garden Specialty Cardstock using the bloom die set included in the Lilac Etched Die Set. I colored the die-cut pieces using Light Blue Gouache and cupped the petals using the small ball tip in Susan’s Garden Ultimate Tool Kit. Then, I added Silver Glitter Balls to the center of the lilacs for added interest and adhered them to my panel using the Bearly Art Original Precision Craft Glue. Then, to finish, I affixed the card front to my 6″ X 6″ white card base using foam tape for dimension. Then, as a finishing touch, I adhered a few Teal Color Essentials Gems around my floral wreath. I love the beautiful sparkle of the gems!
My last card for today features the Dogwood Etched Dies, along with the Fluted Classics Rectangles Etched Dies. I thought I’d create a Dogwood floral branch for this card and wanted the die set to be the star of the show for this one. This cheery card would be perfect for sending a happy hello to a friend or to just let them know that you have been thinking about them.
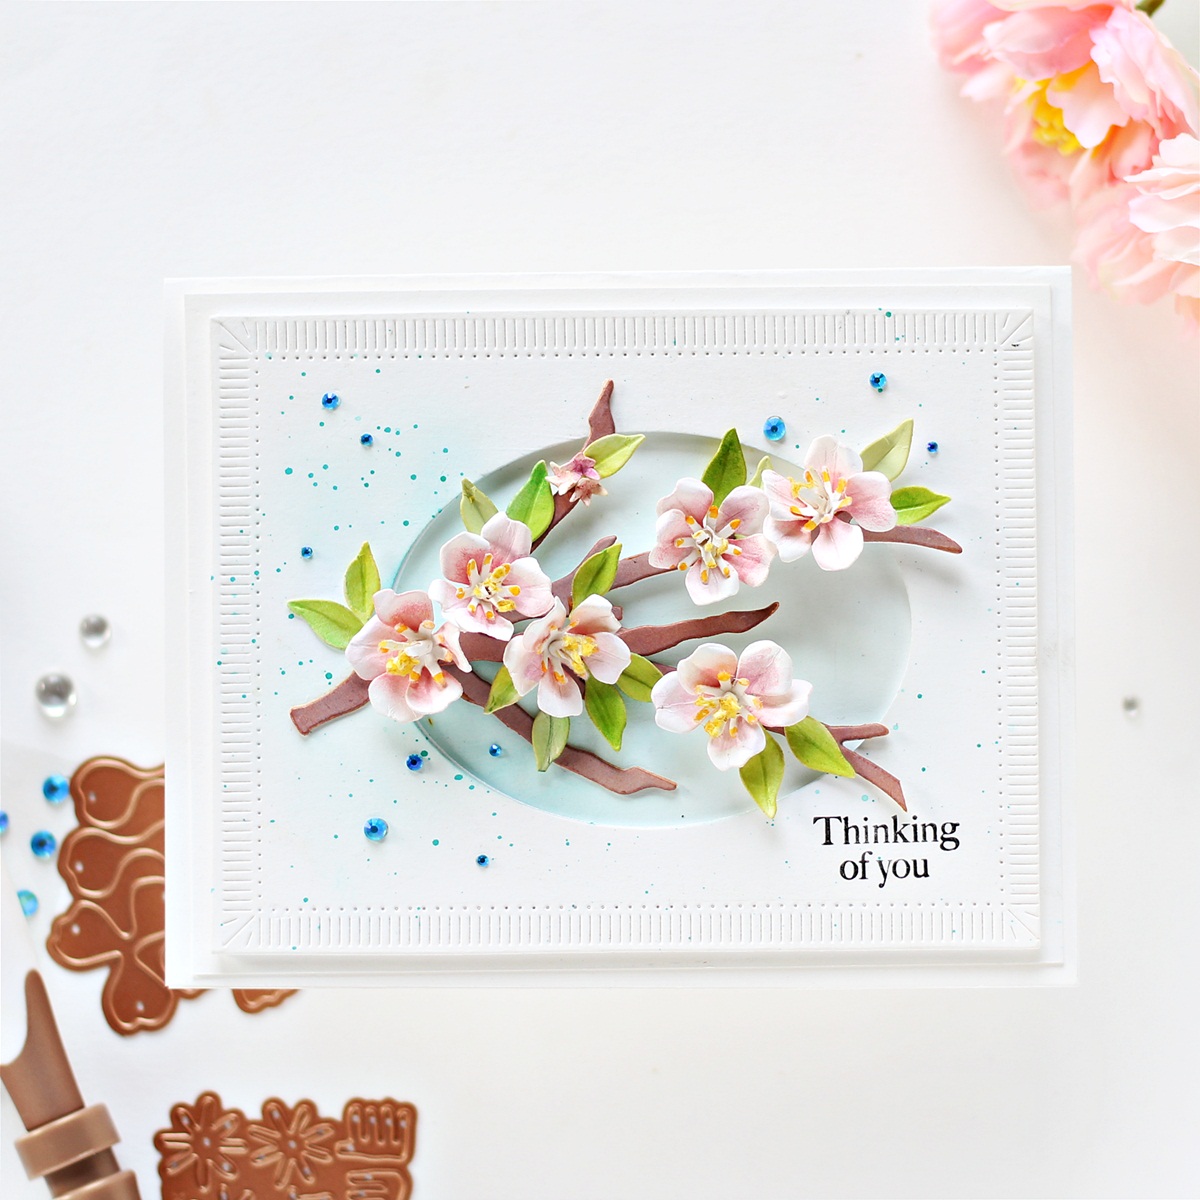
For my card, I first die-cut Susan’s Garden Specialty Cardstock using the blossom petal dies in the Dogwood Etched Dies. I cut out a bunch of the blossoms, just enough to help me create a number of Dogwood floral branches. I blended Light Pink Gouache onto about half of each petal and added veins to the petals using the leaf tip tool in the Susan’s Garden Ultimate Tool Kit. I shaped the tips using the medium ball tip and then die-cut the stamens out of Susan’s Garden Specialty Cardstock. I colored the tips of the pieces using an Orange Copic marker and shaped the pieces using the small ball tip in the Susan’s Garden Ultimate Tool Kit. Susan’s assembly videos helped me abundantly while creating the flowers and made it a really relaxing and fun process.
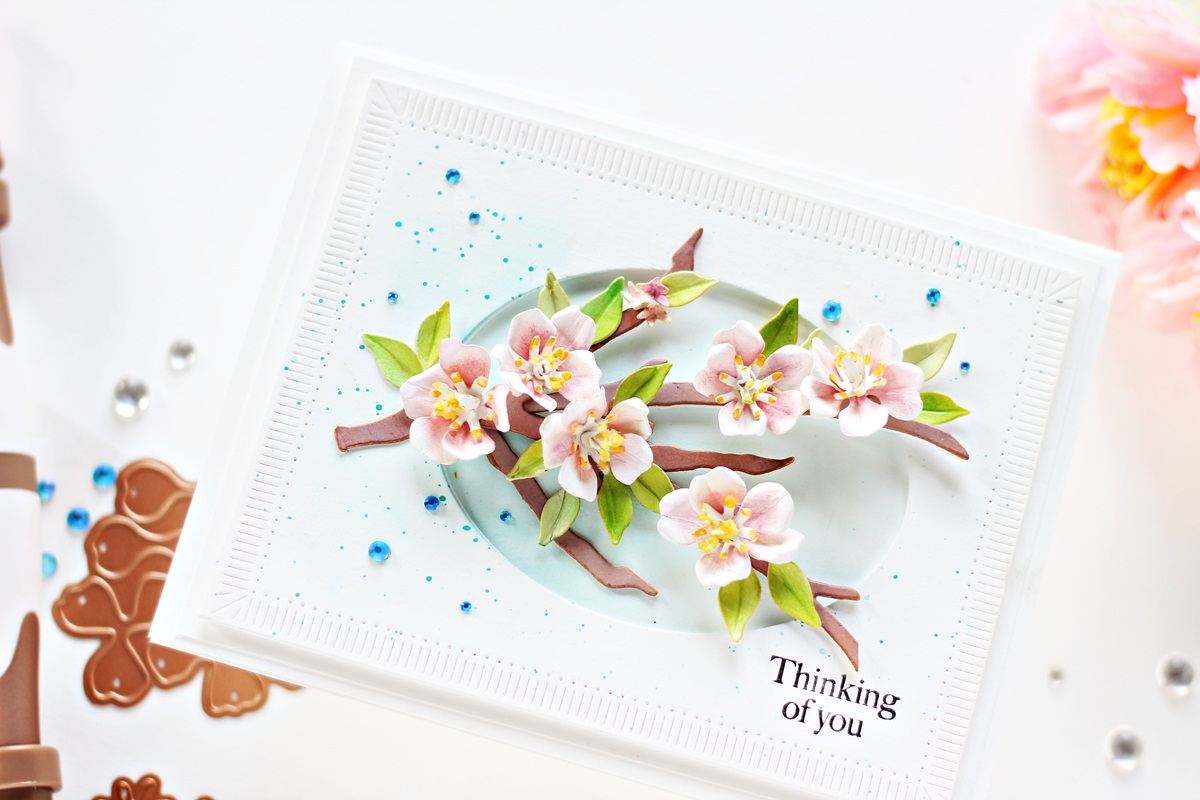
Next, I die-cut Snowdrift Cardstock and White Fun Foam using the branch dies in the Dogwood Etched Dies. I adhered two stems branches together with liquid glue to form sturdier die-cuts. Next, I applied Vintage Photo Distress Ink around the edges of the die-cuts using a blending tool to add depth. Once that was done, I die-cut Susan’s Garden Specialty Cardstock using the tiny leaf dies in the set and colored them using Light Green and Spring Green Gouache, and added veins to the leaves using the leaf tip tool in the Susan’s Garden Ultimate Tool Kit. I shaped the tips using the small ball tip for dimension and kept them aside to work on my background.

I die-cut Snowdrift Cardstock and White Fun Foam using the Large Rectangle Outer Rim and Insert dies from the Fluted Classics Rectangles Die Set. Next, I die-cut Snowdrift Cardstock using the Medium Insert Die from the Fluted Classics Ovals Etched Die to create a window for my card panel and ink blended the left one-quarter of the panel using Tumbled Glass Distress ink, concentrating the darker shade towards the top. I then flicked some blue paint on my panel using a paintbrush for a fun splatter effect. Once that was done, I trimmed another piece of Snowdrift Cardstock to size and ink blended the center of the panel using Tumbled Glass Distress ink again, concentrating the darker shade towards the left. Once I was happy with the way it looked, I adhered the layers down on my card base using liquid glue. I adhered down the branches and dogwood flowers on my panel using a combination of liquid adhesive and foam squares for dimension. Then, to complete, I stamped a sentiment from the Garden Favorites Sentiments Clear Stamp Set to the card panel using Versafine Onyx Black ink.
Lastly, I mounted the panel to a top-folding card base using a tape runner and embellished the card using a few Teal Color Essentials Gems. I am quite happy with the way this turned out!
Spellbinders Supplies:

Other Supplies
Neenah Solar White Cardstock, Copic Markers, Brustro Goauche Paints, Tumbled Glass and Peacock Feathers Distress inks, Versafine Onyx Black Ink, Heat Tool, MISTI Stamping Tool, Stencils, Flower Soft, Gold and Orange Glitter Balls, Groove Golf Tools, Black Fineliner Pen, Paint Brush, Blue Acrylic Paint, Tape Runner.
I hope you enjoyed this bunch of springtime floral cards and have been inspired to create with these gorgeous dies from the Susan’s Garden Favourites Collection. Thank you so much for stopping by!
You can find more inspiration over at my Blog and Instagram page.
Hussena Calcuttawala
'Hello! My name is Hussena, and I live in Kolkata, India. I am a stay at home mum of two kids and have been crafting for over five years now. I started my creative journey with paper quilling and since then have dabbled in various paper crafting forms like punch craft, die cutting, and more recently stamping. I am an ardent floral fan and you will find me using florals on almost all my creations. I love working with dies, especially floral and intricate ones, as they offer me various possibilities. I also love to create my own handmade flowers, and this is one of the reasons why I am drawn to Spellbinders dies. You can find my work on my blog: Quill and Punch Works
Make Quick and Easy Cards using Basic Stamping Techniques
Sharyn Sowell Holiday Traditions Collection Introduction
