Spring Into Stitching Collection – Springtime Card Inspiration with Annie Williams
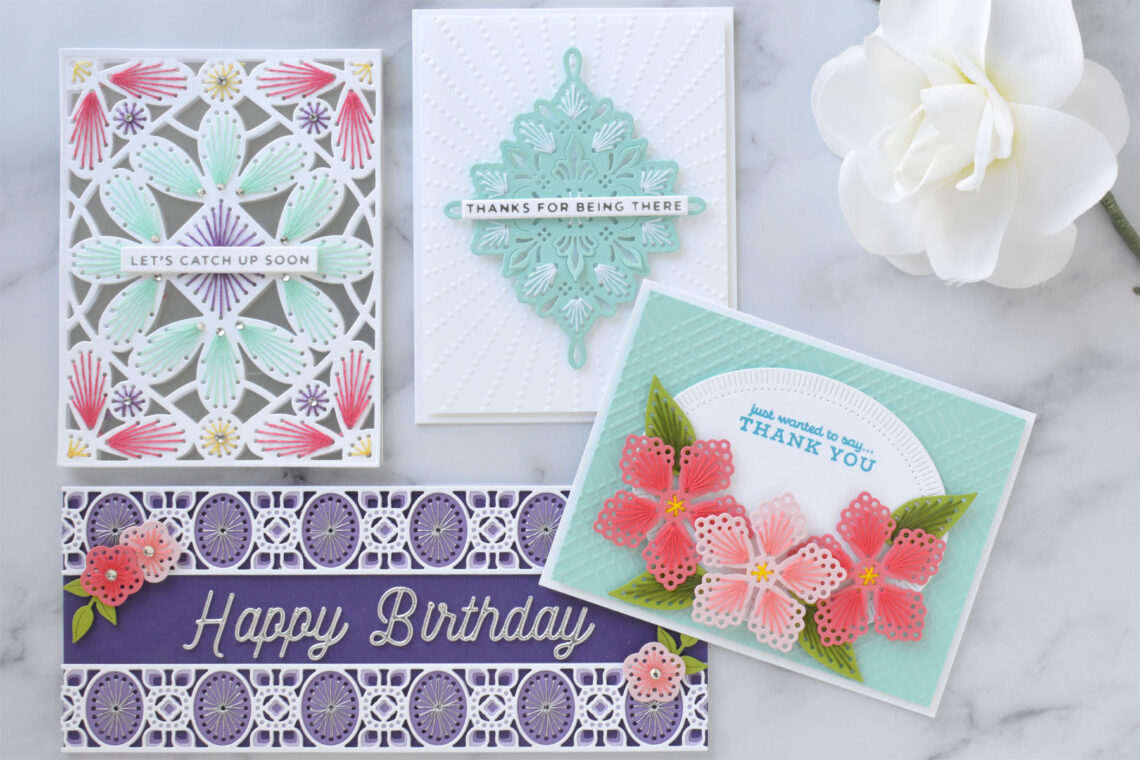
Hi there, this is Annie Williams and I’m excited to be back on the blog today to share a couple of projects using the new Spring Into Stitching Collection from Spellbinders. The beautiful designs in this collection can be stitched for a unique, show-stopping card or simply die-cut for an equally gorgeous look. I was inspired to create four bright springtime cards for all different occasions.

Stitched Medallion
The Stitched Medallion Die Set is the perfect design to start with if you are a beginner and looking to jump into stitching dies. It has beautiful ornate details, but doesn’t require a ton of stitches!
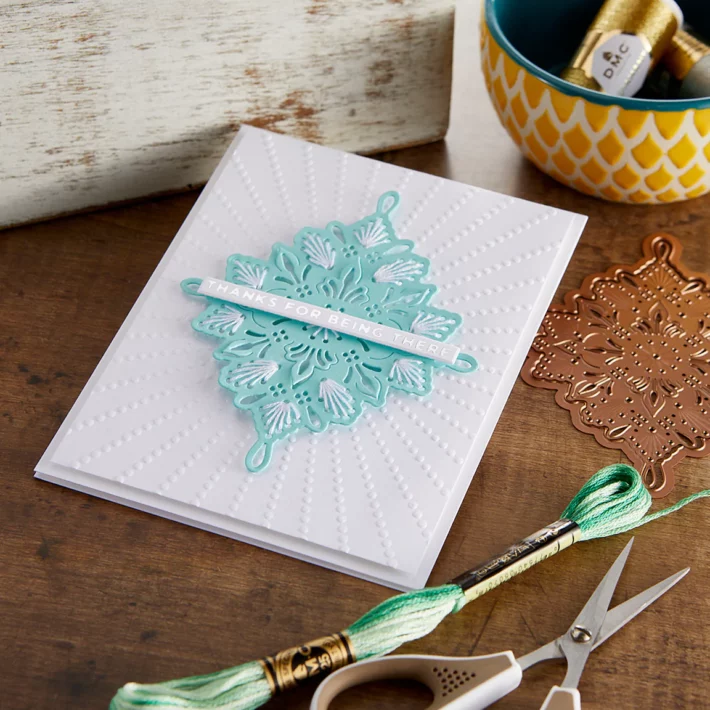
- Die-cut Waterfall Cardstock using the medallion outline and insert dies in the Stitched Medallion Die Set.
- Stitch the design with just white thread for a bright and fresh look.
- Apply Silver Hot Foil to white cardstock using one of the sentiments from the Mini Sincere Sentiments Plate Set and the Glimmer Hot Foil Machine.
- Cut it out into a strip using the coordinating die.

- Trim a piece of white cardstock to 4” x 5.25” and emboss it using the Sun Rays Embossing Folder.
- Mount the embossed background onto a top-folding A2-sized white card base with foam adhesive.
- Add the stitched medallion and sentiment to the center of the card with more foam adhesive.
Stitched Flowers
Florals are great for so many occasions, and the special little details on the Stitched Flowers Die Set can really take any card up a notch. Here I’ve stitched tone-on-tone with colored cardstock and thread for a bright and pretty springtime thank you card.
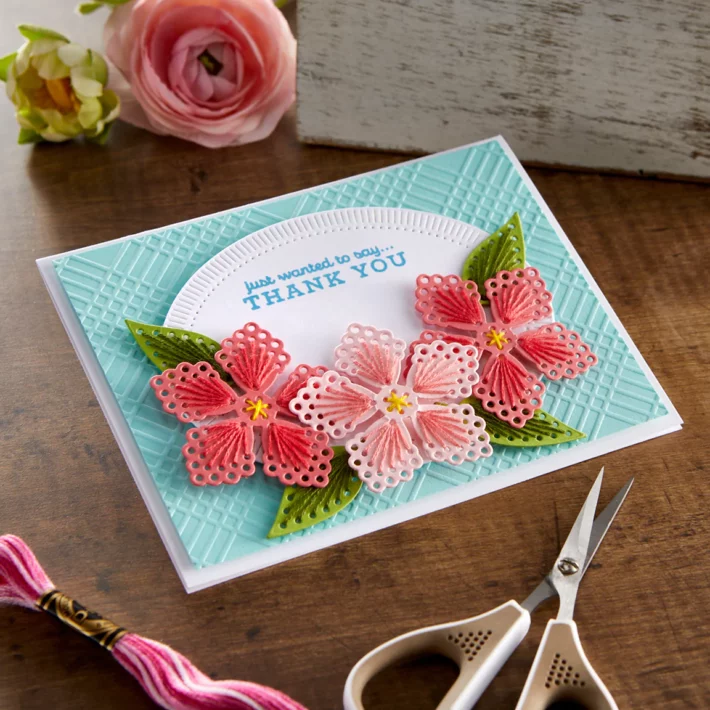
- Die-cut Pink Sand, Dahlia, and Rainforest Cardstock using the Stitched Flowers Die Set.
- Stitched the flowers and leaves with coordinating embroidery thread for a tone-on-tone look.
- Trim a piece of Waterfall Cardstock to 4.25” x 5” and emboss it using the Diamond Plaid Embossing Folder.
- Stamp a sentiment from the Sentiments For You Stamp Set in teal ink onto white cardstock.
- Die-cut the sentiment out using the medium oval outer rim and insert dies from the Fluted Classics Ovals Die Set, positioning the sentiment towards the top of the die-cut.
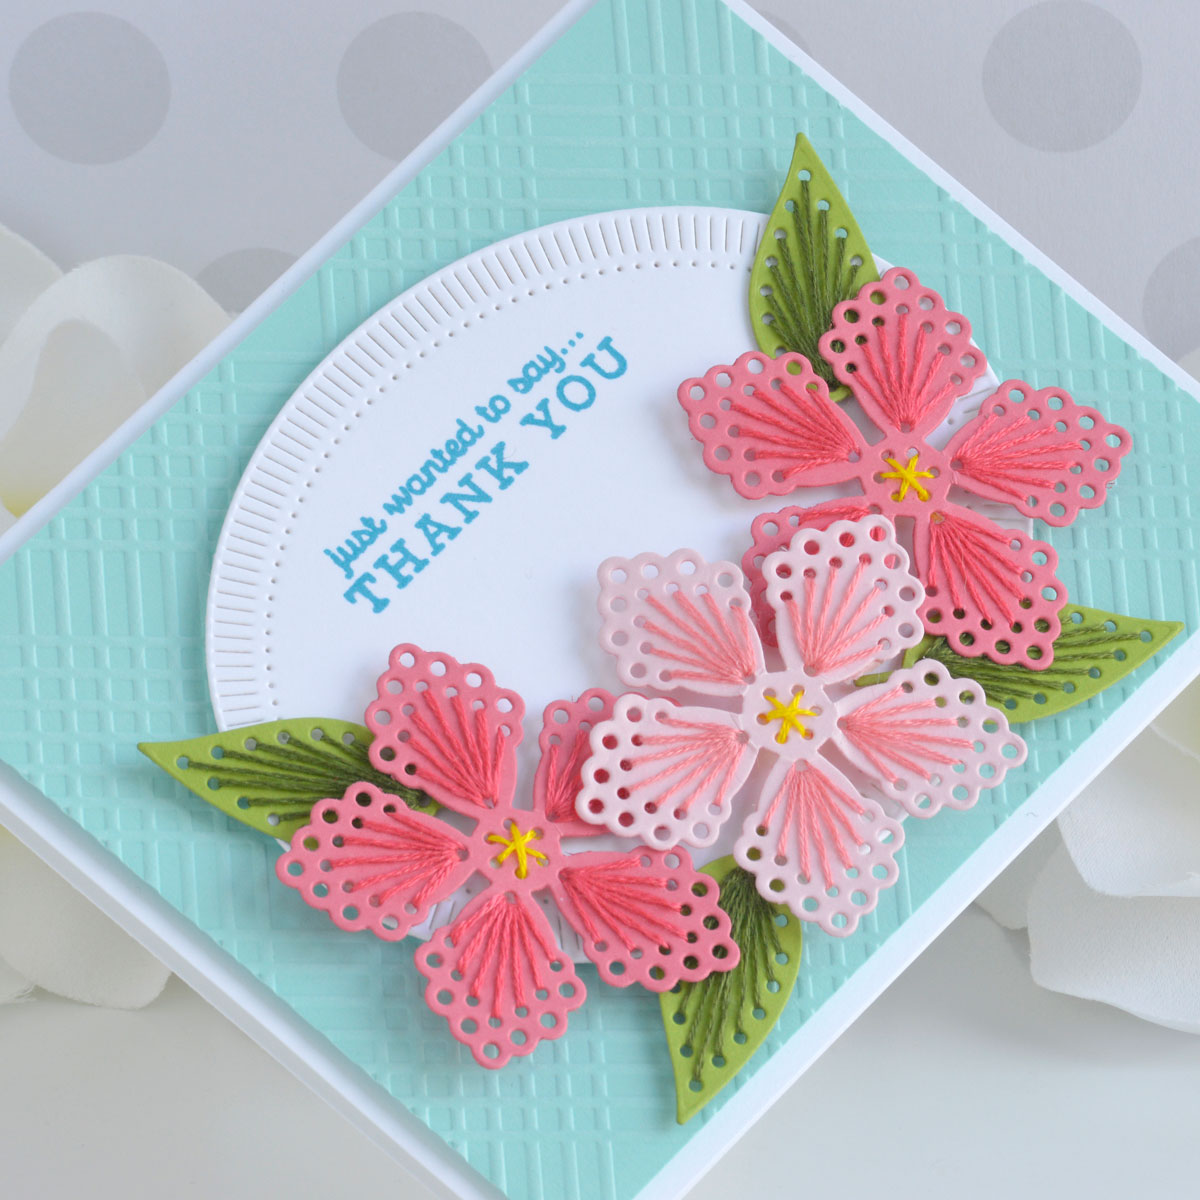
- Mount the embossed panel onto a top-folding A2-sized white card base with foam adhesive.
- Pop the sentiment oval up in the center of the card front.
- Arrange the flowers and leaves around the base of the oval and secure them down with liquid glue and foam adhesive.
Stitched Kaleidoscope Strip
Talk about versatility…the Stitched Kaleidoscope Strip can be layered up in different colors, trimmed to fit all kinds of card sizes, and added in multiples for an infinite number of possibilities! Here I used two full-length strips to create a border for this bright slimline birthday card.
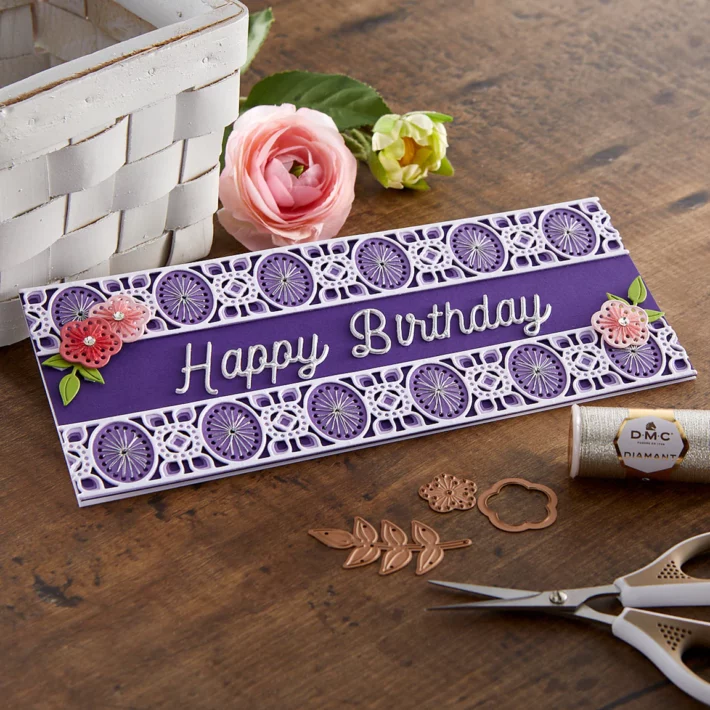
- Die-cut the different layers of the Stitched Kaleidoscope Strip Die Set out of white, Purple Mist, and Lilac Blossom Cardstock.
- Stitch the bottom layer with silver metallic embroidery thread.
- Adhere all of the layers together using liquid glue.
- Die-cut Pink Sand, Dahlia, and Rainforest Cardstock using the small flower and sprig dies from the Stitched Flowers Die Set.
- Stitch the flowers with coordinating embroidery thread.
- Die-cut the sentiment from Mirror Silver Cardstock once and white cardstock three times using the Smooth Lines Mix and Match Sentiments Die Set. Adhere to the white layers behind the silver die-cuts for a dimensional sentiment.
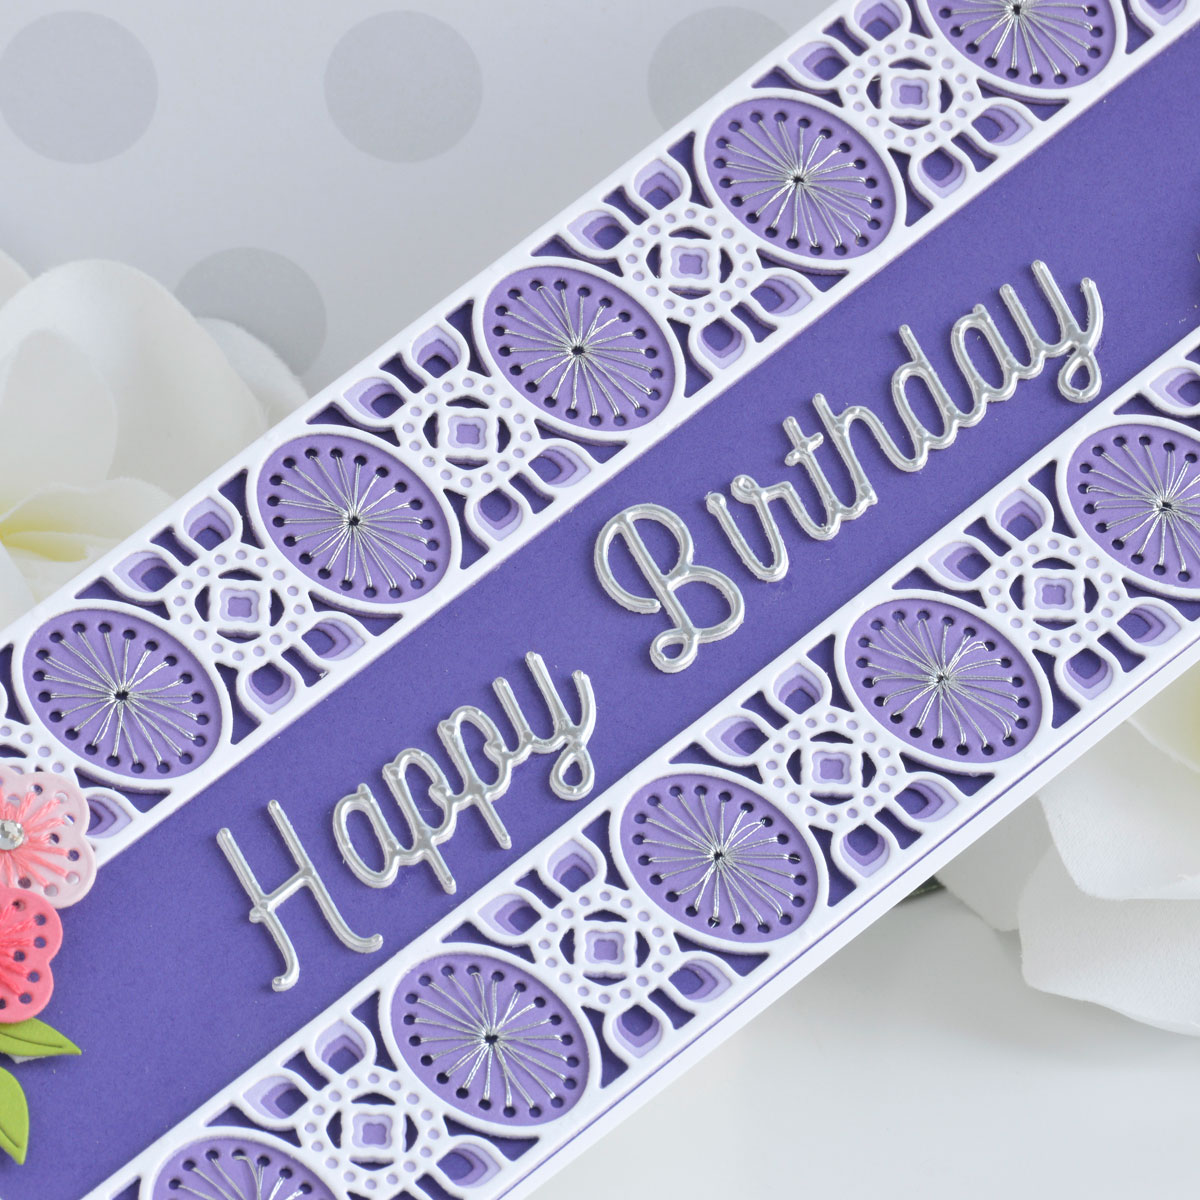
- Trim a piece of Royal Amethyst Cardstock to 3.5” x 8.5” and adhere it to a top-folding slimline-sized white card base.
- Glue the stitched stripes on the top and bottom of the card front with liquid glue and add the sentiment in between.
- Pop the flowers and sprigs up in the corners of the card with foam adhesive.
- Embellish with Silver Mix Gems.
Stitched Petal Frame
The Stitched Petal Frame Die Set is an amazing design if you really love stitching, but also creates the most beautiful textured background for any kind of card when left as-is. I enjoyed adding some soft springtime colors to this design for a simple friendship card.
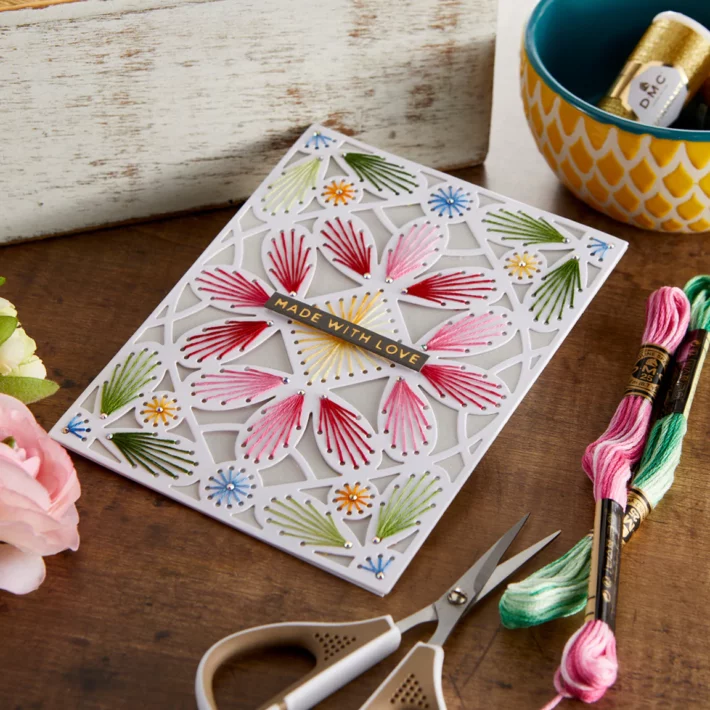
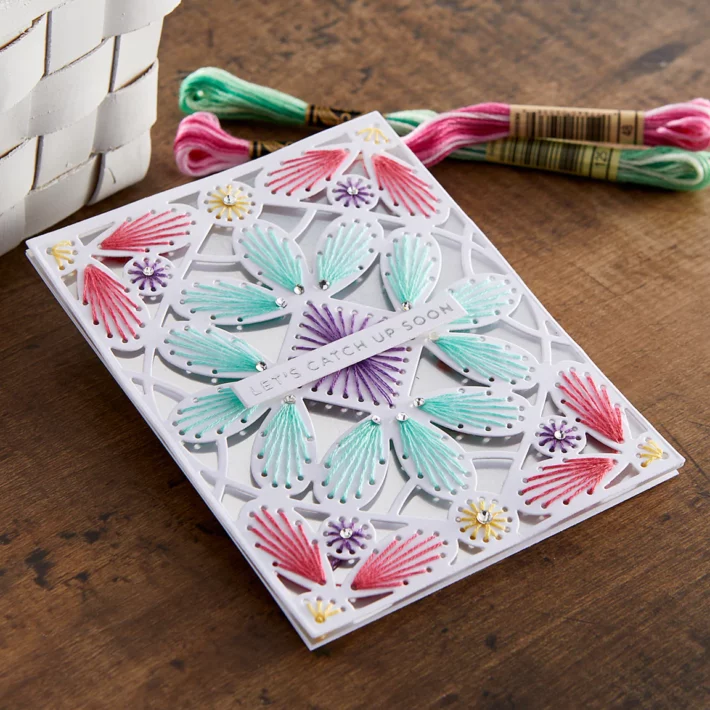
- Die-cut white cardstock using the frame outline and insert from the Stitched Petal Frame Die Set.
- Stitch the entire design using purple, pink, yellow, and teal embroidery thread.
- Apply Silver Hot Foil to white cardstock using one of the sentiments from the Mini Sincere Sentiments Plate Set and the Glimmer Hot Foil Machine.
- Cut it out using the coordinating die.

- Die-cut Mirror Silver Cardstock using the frame outline die from the set and adhere it to a top-folding A2-sized white card base with tape runner.
- Pop the stitched background design up on top using foam adhesive.
- Add the sentiment strip to the center of the card front with more foam adhesive.
- Embellish with Silver Mix Gems.
Spellbinders Supplies:

Other supplies
Versafine Clair Warm Breeze Ink, white heavyweight cardstock, pink, purple, yellow, silver metallic, white and teal embroidery thread, tape runner, foam adhesive.
I hope you enjoyed this bunch of springtime stitched cards and thanks so much for stopping by today. You can find more inspiration over at my blog AnnieBWills.com.
One Comment
Barbara Kohn
Such beautiful cards that are a creative gift from the heart!