Open Road Collection – Card Inspiration with Annie Williams
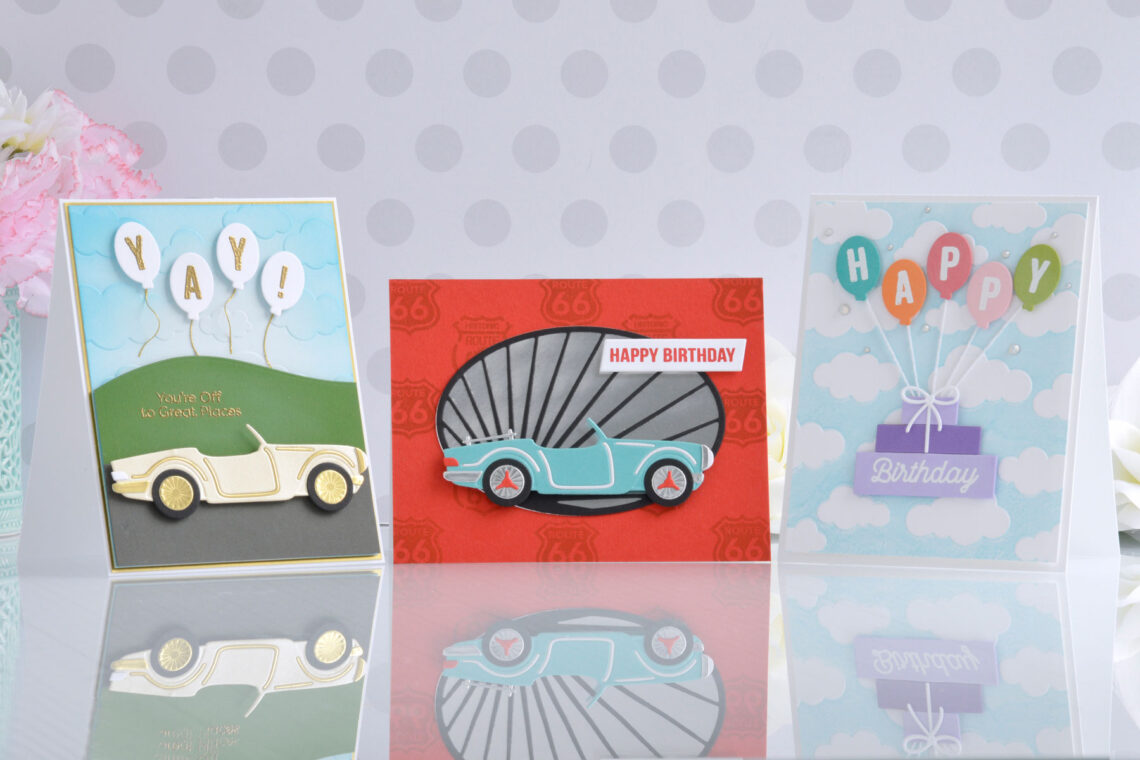
Hi there, this is Annie Williams and I’m thrilled to be back on the blog today to share a couple of projects using the new Open Road Collection from Spellbinders. The unique dies and versatile sentiments in this collection inspired me to create three fun cards perfect for birthdays and graduations.
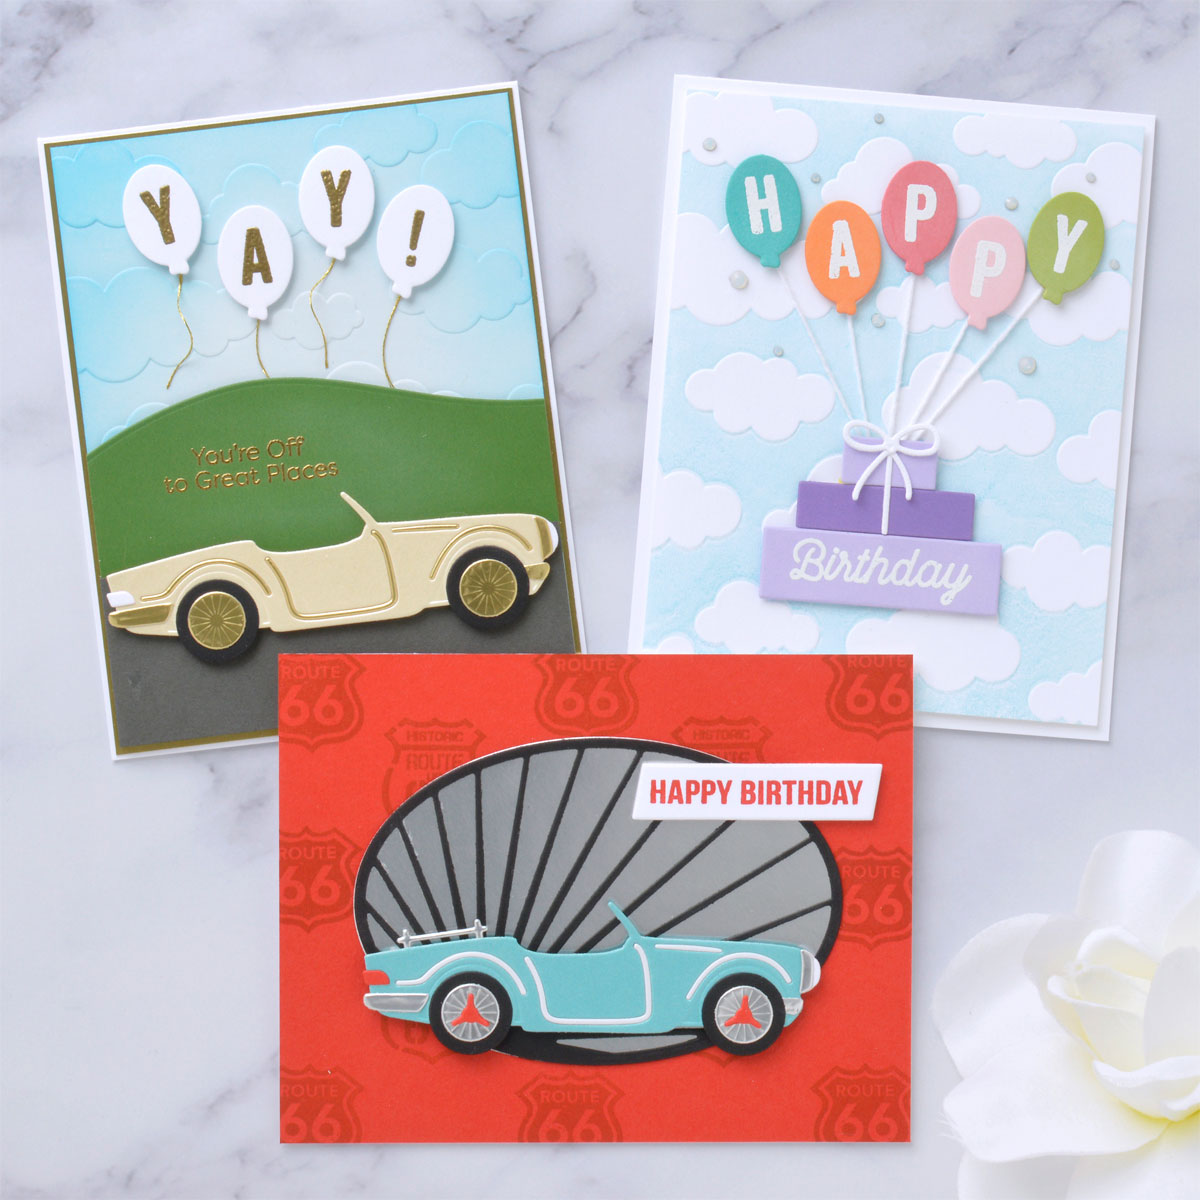
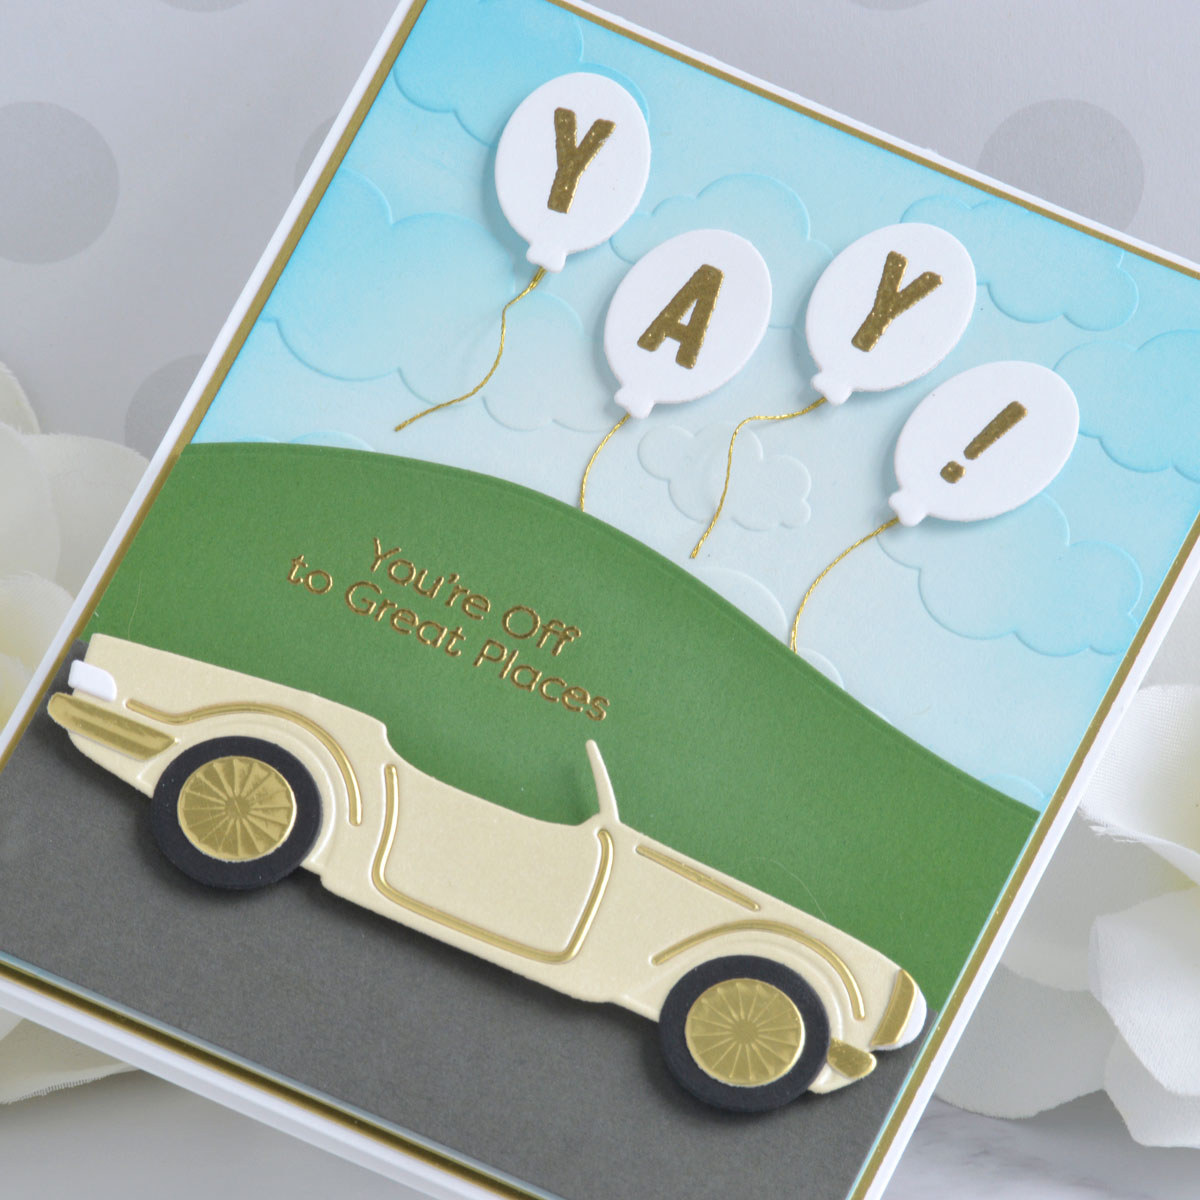
Graduation Card
I love how the cute convertible in the Open Road Die Set can be customized with all of the little details included in the set. Here I added gold accents and kept it extra classy for an easy and fun graduation card.

- Die-cut gold shimmer, Mirror Gold, Snowdrift, and Onyx Cardstock using the car and tire dies from the Open Road Die Set. Assemble as shown with liquid glue.
- Stamp the letters from the Open Road Sentiments Stamp Set to spell out “YAY!” onto white cardstock using embossing ink, add gold embossing powder, and melt with a heat tool.
- Cut the letters out using the balloon dies from the Open Road Die Set.
- Trim a piece of Glacier Cardstock to 4” x 5.25” and emboss it using the Head In The Clouds Embossing Folder.
- Blend Salty Ocean Distress Ink around the edges of the panel with a blending brush to add some depth.
- Die-cut Fern Cardstock using one of the hill dies from the Color Block Scenic Scape Die Set. Trim it to 4” wide.
- Stamp a sentiment from the Open Road Sentiments Stamp Set onto the hill panel with embossing ink, add gold embossing powder, and melt with a heat tool.
- Trim a piece of Graphite Cardstock to 4” x 1.5”.
- Mat the embossed background with Mirror Gold Cardstock and adhere to a top-folding A2-sized white card base with a tape runner.
- Pop the hill and road panels up on the card front with foam adhesive and add the car on top with more foam adhesive.
- Adhere the balloons to the sky with foam adhesive and then attach a small length of gold metallic thread behind the balloons with liquid glue, twisting the balloon string for some movement if desired.
Spellbinders Supplies:

Other Supplies
Heavyweight white cardstock, gold shimmer cardstock, Salty Ocean Distress Ink, blending brush, tape runner, foam adhesive
Masculine Birthday Card
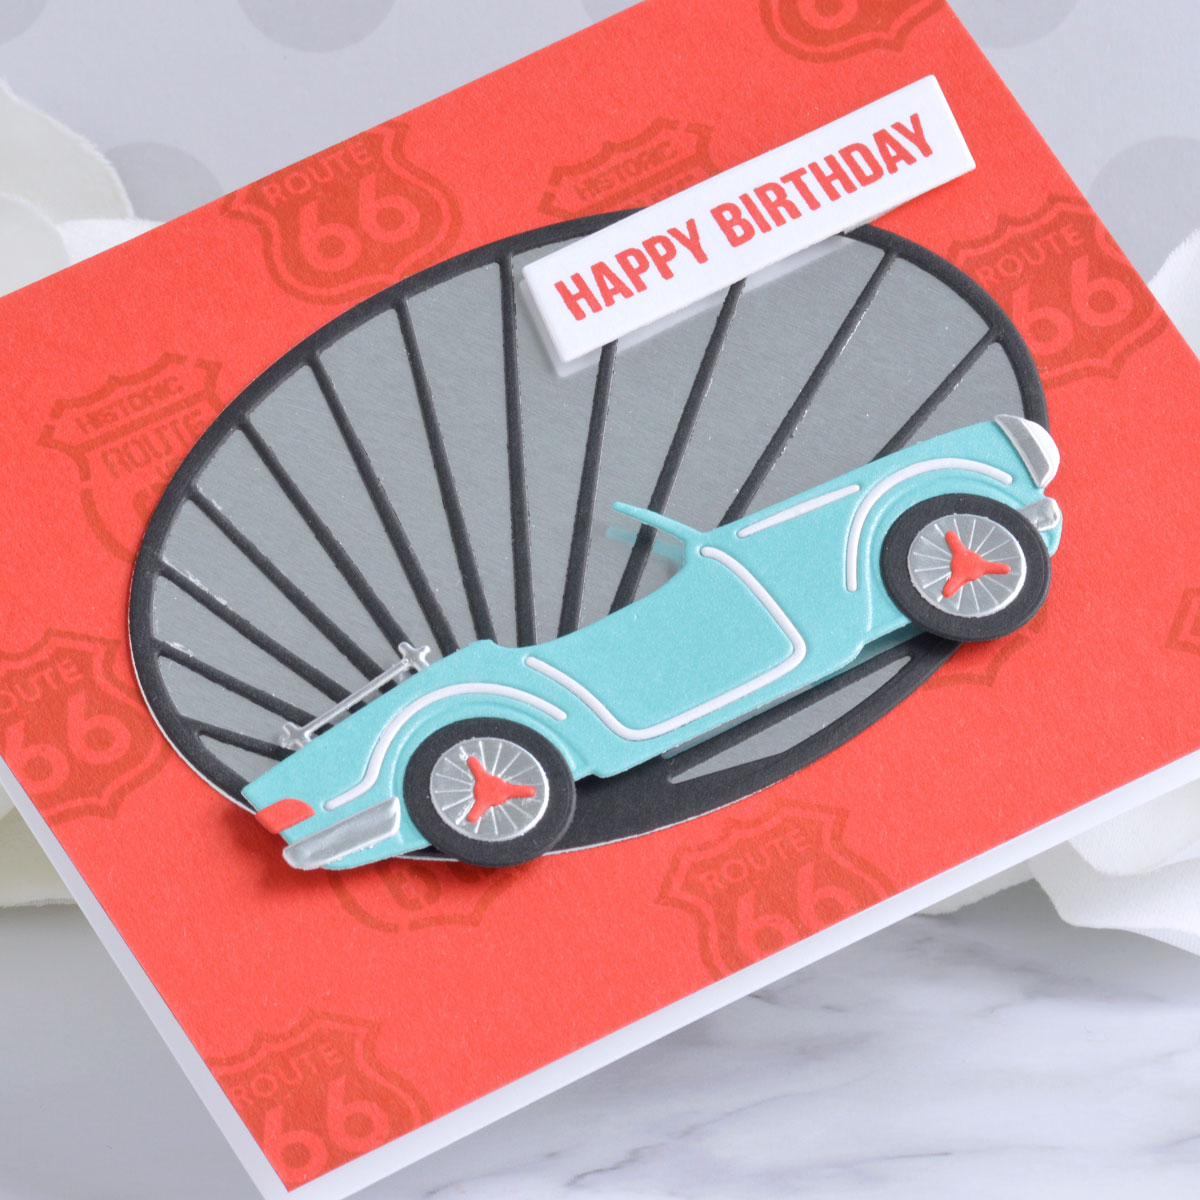
Next, I wanted to change that classy convertible into something more fun and vintage for an easy masculine birthday card.
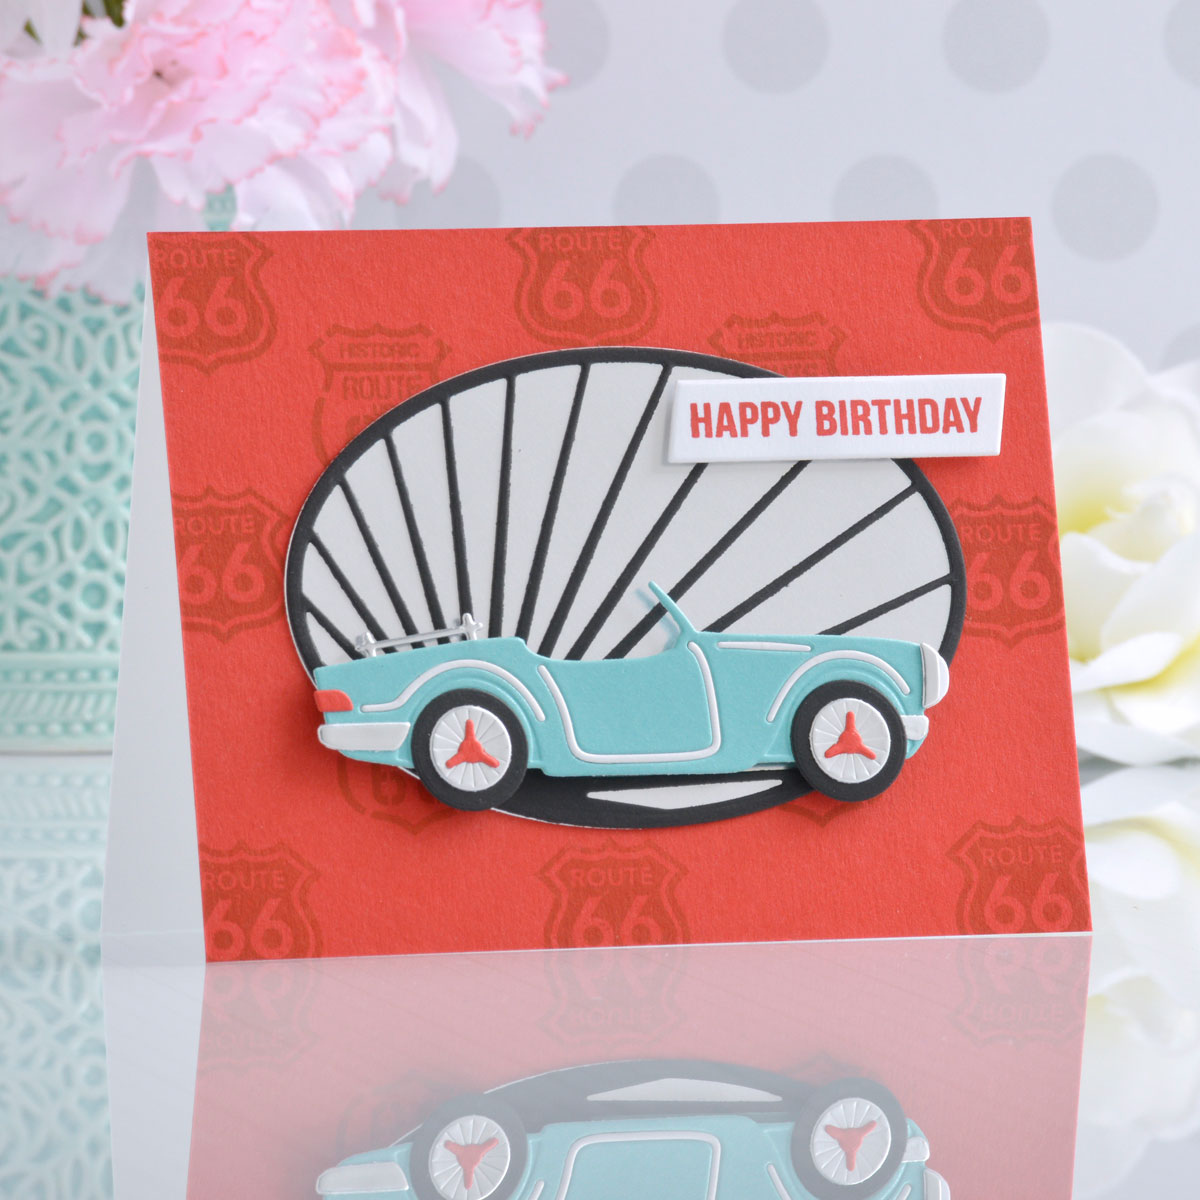
- Die-cut aqua shimmer, white shimmer, Onyx, Poppy Field, and Mirror Silver Cardstock using the Open Road Die Set. Assemble the car as shown with liquid glue.
- Die-cut Onyx and Mirror Silver Cardstock using the Radiant Oval Die Set and adhere together with liquid glue.
- Trim a piece of Poppy Field Cardstock to 4.25” x 5.5”.
- Stamp the sign images from the Hit The Road Stamp Set all over the panel in matching red ink to form a tone-on-tone pattern.
- Stamp a sentiment from the Hit The Road Stamp Set onto white cardstock using red ink. Cut it out using one of the banner part dies from the Sentiment Banner Glimmer Plate & Die Set.
- Mount the stamped panel onto a top-folding A2-sized white card base with a tape runner.
- Adhere the oval die-cut in the center with liquid glue.
- Pop the car and sentiment up on top of the card front with foam adhesive.
Spellbinders Supplies:
Other supplies
White heavyweight cardstock, aqua and white shimmer cardstock, Stampin’ Up Poppy Parade Ink, tape runner, foam adhesive
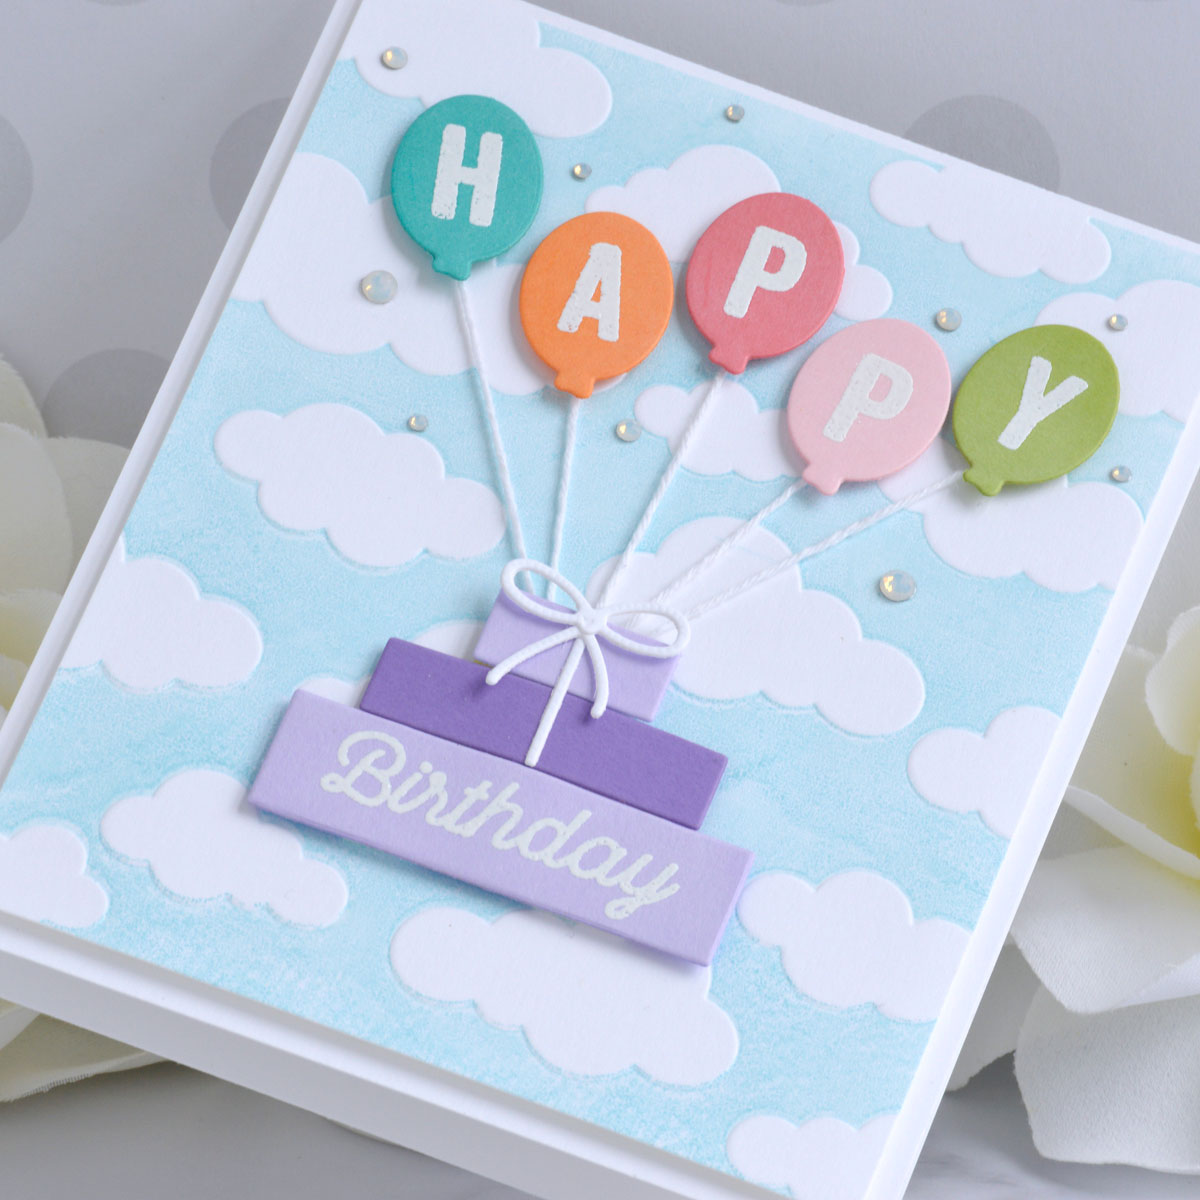
Birthday Gifts Card
Lastly, I thought the balloons and clouds would be fun all on their own, so I added a pretty stack of presents for this easy birthday card.
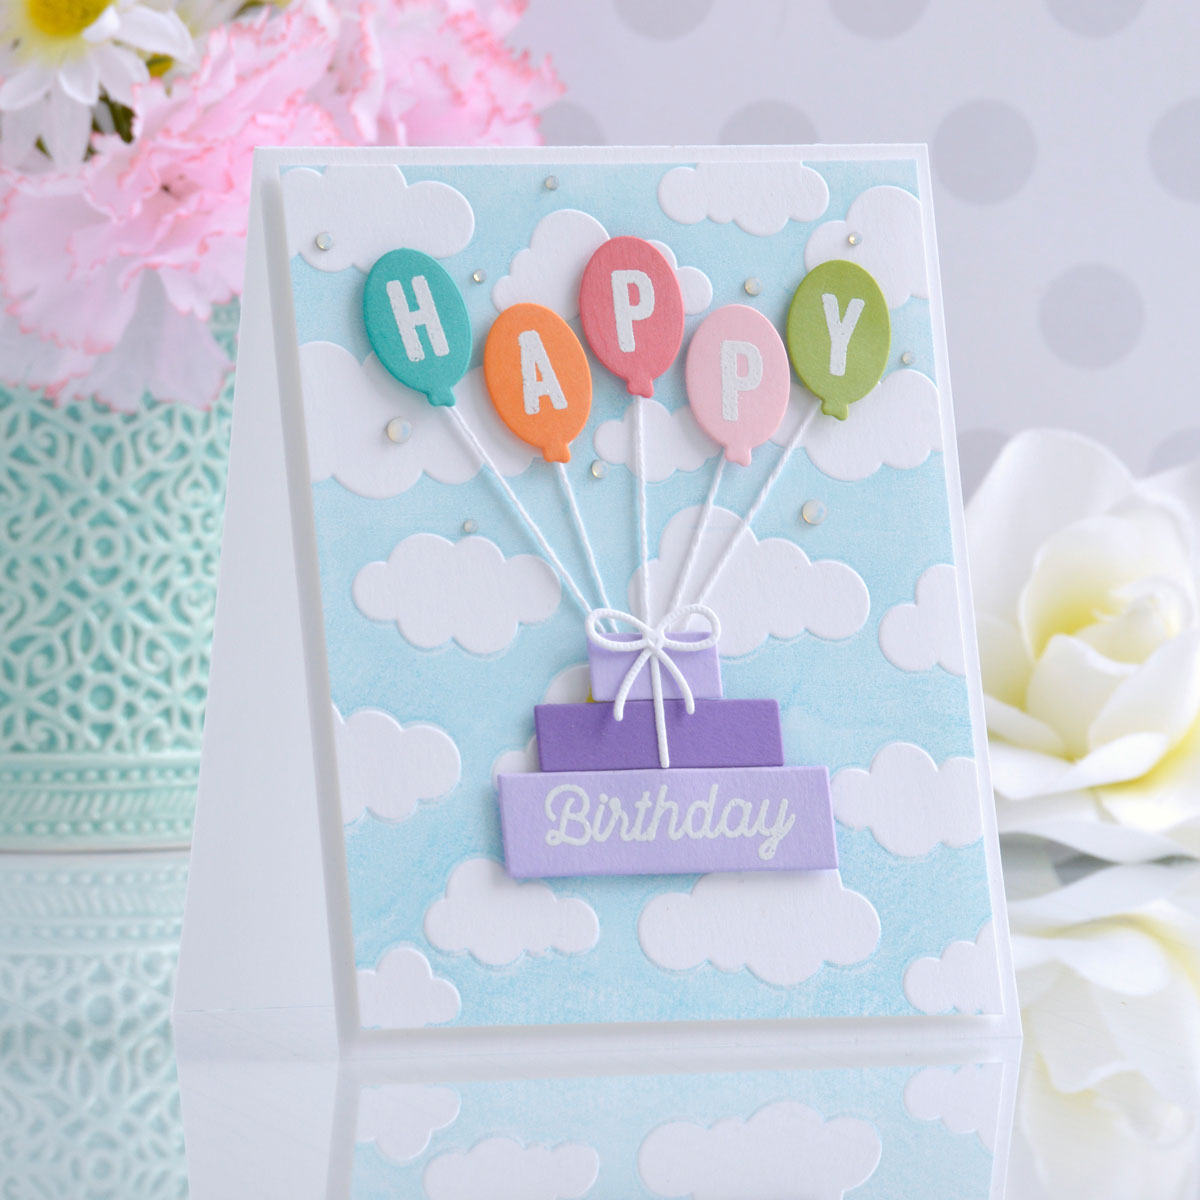
- Trim a piece of white cardstock to 4” x 5.25”.
- Apply Tumbled Glass Distress Oxide Ink to one side of the Head In The Clouds Embossing Folder with a brayer and emboss the white panel for a pretty letterpress sky background.
- Stamp the letters and birthday sentiment from the Open Road Sentiments Stamp Set onto Teal Topaz, Persimmon, Dahlia, Pink Sand, Rainforest, and Purple Mist Cardstock with embossing ink, add white embossing powder and melt with a heat tool.
- Die-cut the letters out using the balloon dies from the Open Road Die Set.
- Trim the birthday sentiment out in the shape of a rectangle to resemble a gift box.
- Die-cut Purple Mist, Lilac Blossom, and white cardstock using the package and bow dies from the Shopping Spree Die Set.
- Adhere the background panel to a top-folding A2-sized white card base with foam adhesive.
- Add the balloons to the card front with foam adhesive, tucking one end of a short length of white twine behind the adhesive to hold it in place.
- Gather all of the balloon strings together in the center of the card and secure them down with a small piece of tape before placing the stack of gift boxes on top to hide the tape.
- Embellish with Crystal Mix Gems.
Spellbinders Supplies:
Other supplies
White heavyweight cardstock, Tumbled Glass Distress Oxide Ink, brayer, white twine, tape runner, foam adhesive.
I hope you enjoyed these fun celebration cards and thanks so much for stopping by today. You can find more inspiration over at my blog AnnieBWills.com.
Spellbinders Exclusive Collection Inspiration with Jean Doeringsfeld
3D Vignettes | From 3D to Flat & Fabulous