-
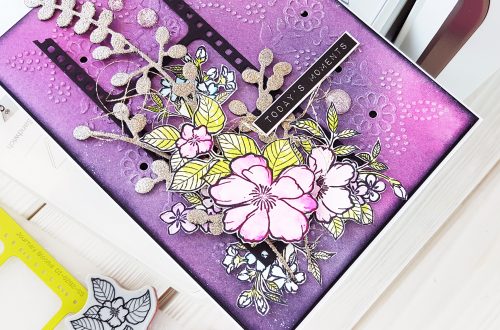
STENCILS: Multiple Ideas and Creations from ONE Product
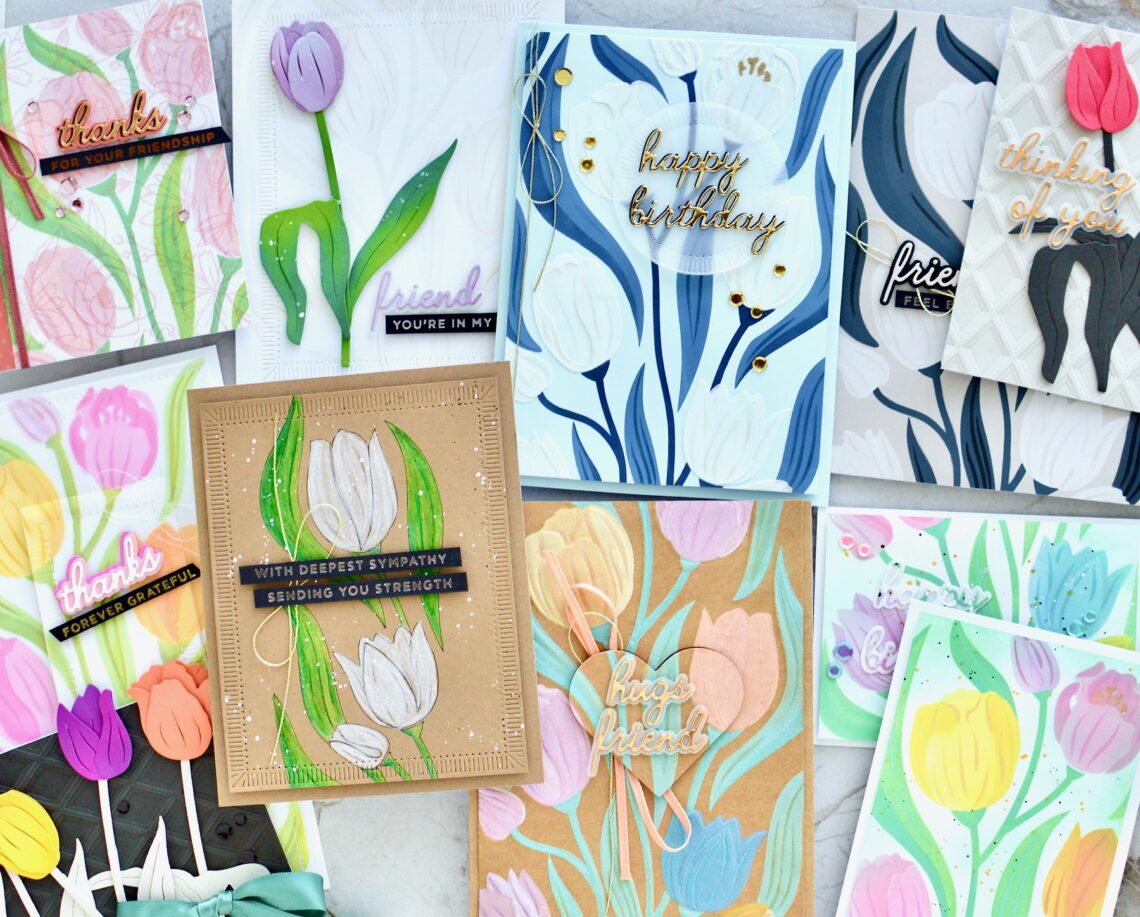
Hello, friends! It’s Savannah O’Gwynn from Savannahland2. I’m honored to be sharing some of my ideas using the Spellbinders Tulip Garden Collection by Simon Hurley. #SAVfact: I have MORE ideas than I have time to create! Be sure to check out all 11 of my projects using the Tulip Garden Collection and all the tips and bonus ideas throughout this post!! When I saw all of these products from the collection, I was drawn to the STENCILS! That’s typically NOT me!! I am a fussy cutter, patterned paper user, that loves loves loves to add layers and dimensions using stamps, dies, and embellishments. Stencils and ink blending actually scared me!…
-
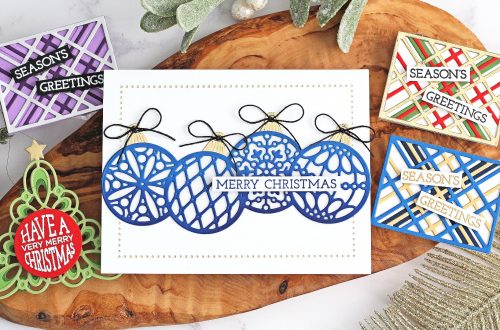
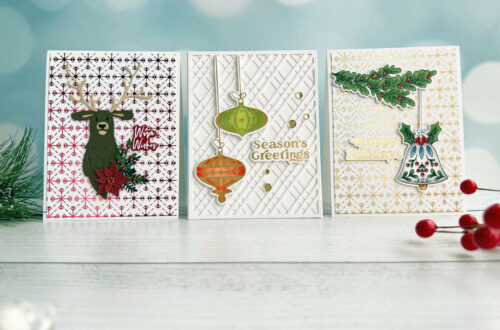
Santa’s Here Die 3 Ways!
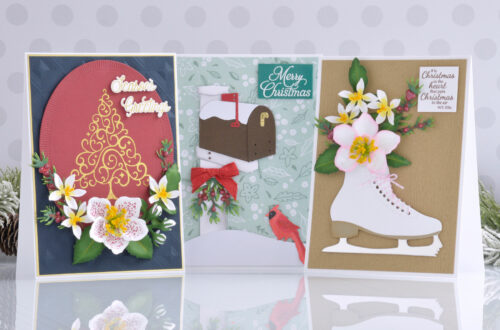
Hi friends, Angela here. Welcome to Spellbinders blog. I had the pleasure to create a few cards with the fun new die Santa’s Here from Christmas Classic collection and I am very happy to share them with you! Before starting with the cards, let me tell you a story. Do you know that Santa Claus originates from the Dutch Sinterklaas? And do you know that he dresses also green? Sinterterklaas is the Dutch name of the fantastic character derivate from St. Nicholas, also called Sint Nicolaas. This explains the existence of several English variants of the name, like Santa Claus, Saint Nicholas, St. Nick. His green suit color is a…
-
Playing with Postage Edge Shapes
Hello crafty friends! It’s Angela Tombari here, from I Need Confetti, and today I would like to show you what I created with the new Postage Edge Shapes dies by Becca Feeken. I focused on the different shapes of postage dies and created three projects: a DIY ornament and two cards, plus a bonus one that I’ll show you at the end of the post, so keep on reading. DIY Christmas Ornament The first project I would like to share is a fun one and very easy to make: a Christmas ornament made with Postage Edge Circles dies. I cut 6 different sizes of card-stock circles, alternating the circle dies.…
-
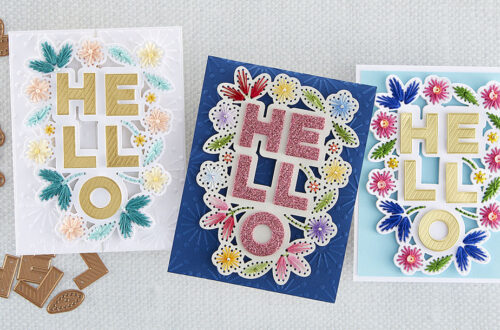
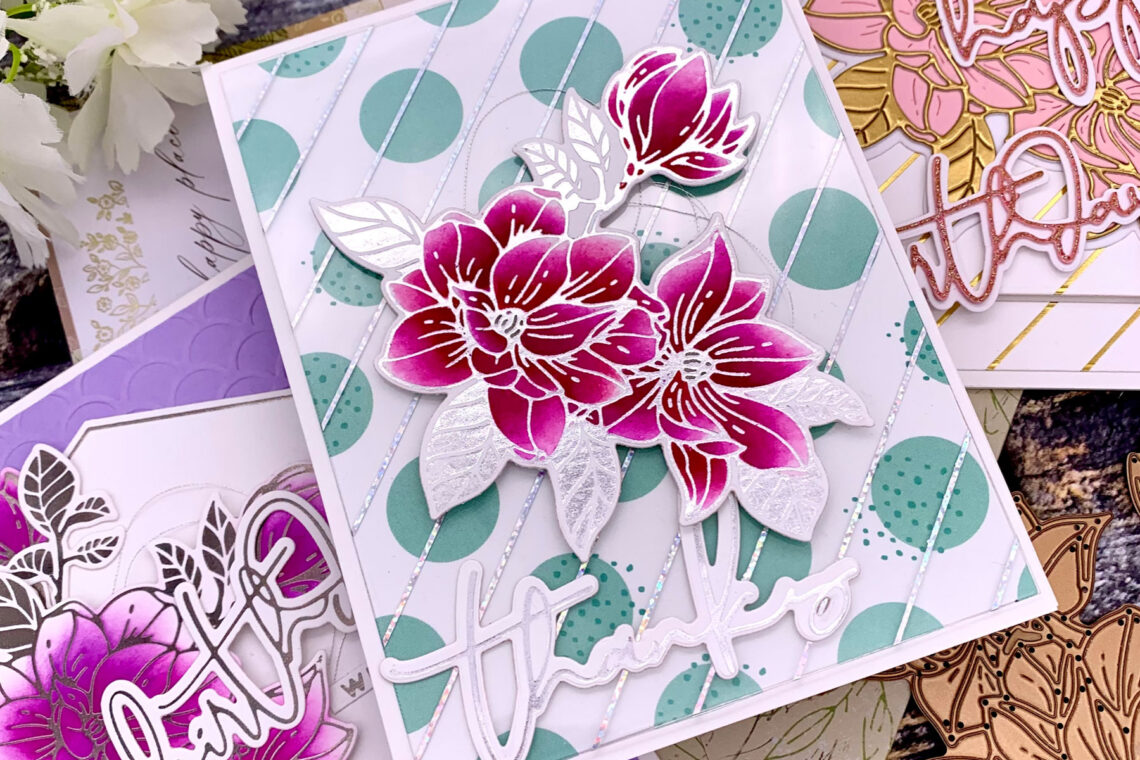
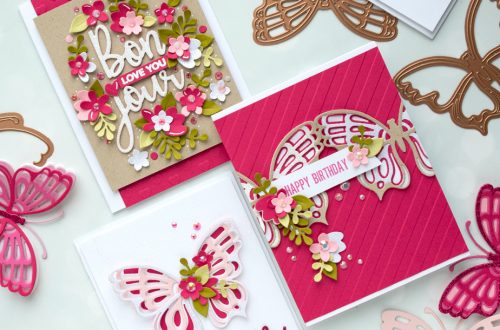
Spring into Glimmer Collection Inspiration with Natasha Vacca
Hi, my name is Natasha Vacca and I am so excited to be a guest designing on the Spellbinders blog today! I have had an amazing time working with the new release – Spring into Glimmer Collection. I fell in love with everything in this new collection and it was a pure joy to work with! You can also find me on my personal blog. I would love it if you stopped by there too! Glimmer Edge Butterflies For my first card I am using 3 new glimmer die sets from this beautiful collection: Glimmer Edge Butterflies, Glimmer Be Bold Sentiments, and Glimmer Edge Flowers. I love combining sets! I started…
-
Yana’s Blooms Inspiration with Natasha Vacca
Hi, my name is Natasha Vacca and I am so excited to be a guest designing on the Spellbinders blog today! I have had an amazing time working with the new release – Yana’s Blooms. I fell in love with everything in this new collection! Yana’s work is truly AMAZING and to be asked to create with her new Yana’s Blooms collection is a dream come true! You can also find me on my personal blog. I would love it if you stopped by there too! Magnolia Blooms For my first card, I am sharing a card using the Magnolia Blooms die set. This large die is the perfect bouquet…
-
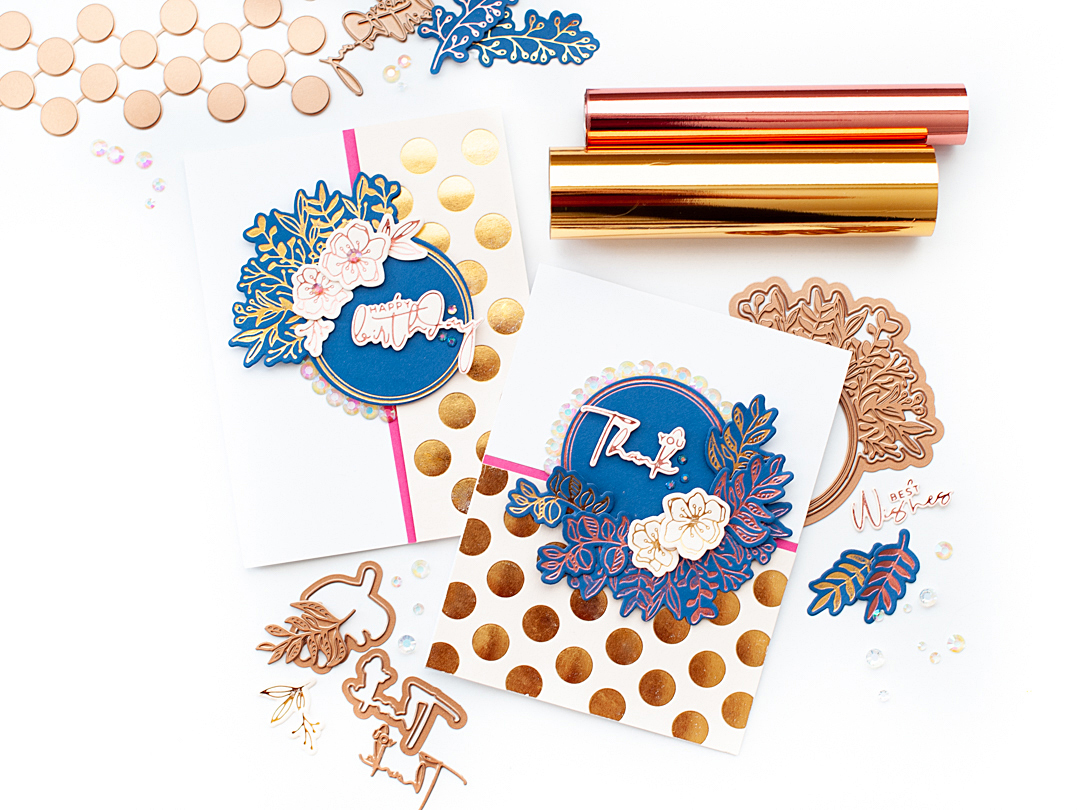
Yana’s Foiled Basics Inspiration | Classy Card Set Featuring Foiled Basics with Lea Lawson
Hi Spellbinder’s friends! This is Lea Lawson, and I’m excited to be sharing a couple of cards I’ve made featuring the new Foiled Basics Collection by Yana Smakula. When Yana shared these new foiling products with me, the first thing that came to mind was the classy & bold colors that are often used in Kate Spade collections. So that was the jumping off point for my inspiration for my card set. Instructions: Create (2) A2 top folding card base out of white cardstock. Foil light pink cardstock in Polished Brass using Polka Dot Strip, then cut into two strips Foil navy blue & light pink cardstock in Rose Gold…