The Perfect Match Inspiration | Twisted with Gemma
Hello everyone, this is Gemma from mygirllollipop.com. Thank you for joining me again today, for my 2nd guest post highlighting the Perfect Match Collection by Debi Adams. Here’s a link to my first post, in case you missed it.

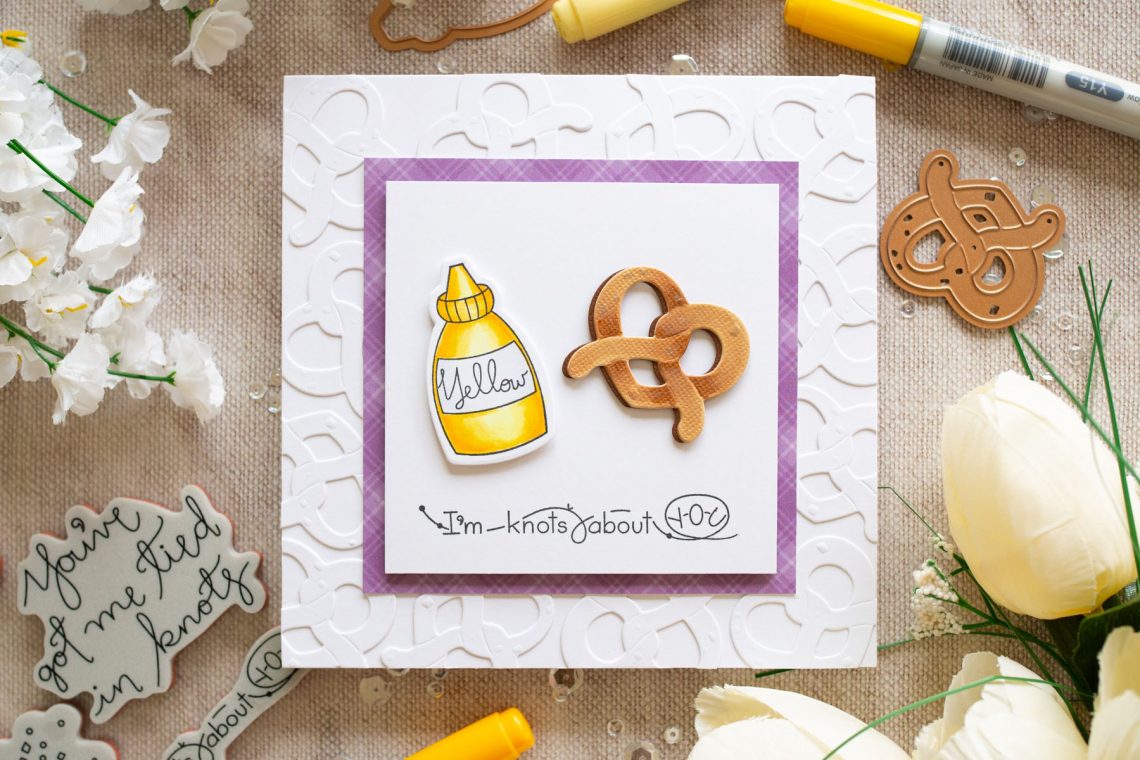
My card today features the fun Twisted stamp and die set. I decided to make a card for my nephew, who loves pretzels! I also included some purple on the card, which is his favourite colour.
I love to add texture to my cards, whilst still keeping the design clean and simple. Adding tone on tone die cuts to a background is a great way to do this. I die cut lots of pretzels from white card, and adhered them all over the front of a square card base. Although some of them will eventually be covered up by other elements, it helps to have an even background layer.

I cut a smaller square from white card, then stamped a sentiment from the stamp set at the bottom. I layered this with foam adhesive over a piece of purple patterned paper to give a nice border edge of colour.
Next, I stamped the mustard bottle image from the stamp set, coloured it with copics, and die cut it with the coordinating die.

I die cut three more pretzels – two from light brown card and a third from a darker shade. I layered these together, offsetting the darker brown layer slightly to give a shadow effect. On the top layer, I added some shading with copic markers and a touch of sparkle to the embossed sprinkles with a glitter pen. I then added the bottle and pretzel to the card with foam tape to finish.
Spellbinders Supplies:
Other Supplies:
Copic markers; Lawn Fawn Perfectly Plaid Rainbow 6×6 paper; white cardstock; various brown cardstock; MFT Extreme Black hybrid ink; Gelly Roll Clear Stardust pen; Lawn Fawn glue tube; Foam adhesive.
Thank you for joining me today. I’ll be back for one last post at the end of the week, so I hope you’ll join me then. Have a great day.
Elegant Simplicity – Circlet Doily Cards with Jean Manis

Stitched Card Tutorial | Spellbinders Live