October 2019 Glimmer Plates Inspiration | Beautifully Foiled Cards with Marie
Hello, Spellbinder’s friends! It’s Marie here from Marie Nicole Designs. I am excited to share a few glimmered cards with you featuring the October Glimmer Plates from Spellbinders! There are several fun new sets to work with, and I love that some of the sets also have coordinating dies so you can Glimmer and then die cut to arrange on a card.
Thank You So Very Much Card
I’ll be sharing several cards with you today, but my first card features the Glimmering Layered Flowers set.

I started this card by Glimmering all the flowers and leaves onto some Bristol smooth cardstock using Copper foil from Spellbinders. Then, I used the coordinating dies to cut out the flowers. Once I had enough flowers foiled and cut, I colored them using my Zig clean color real brush markers. The Bristol paper is perfect with Zigs, as it allows you to move the color around with a waterbrush, which is what I did here.
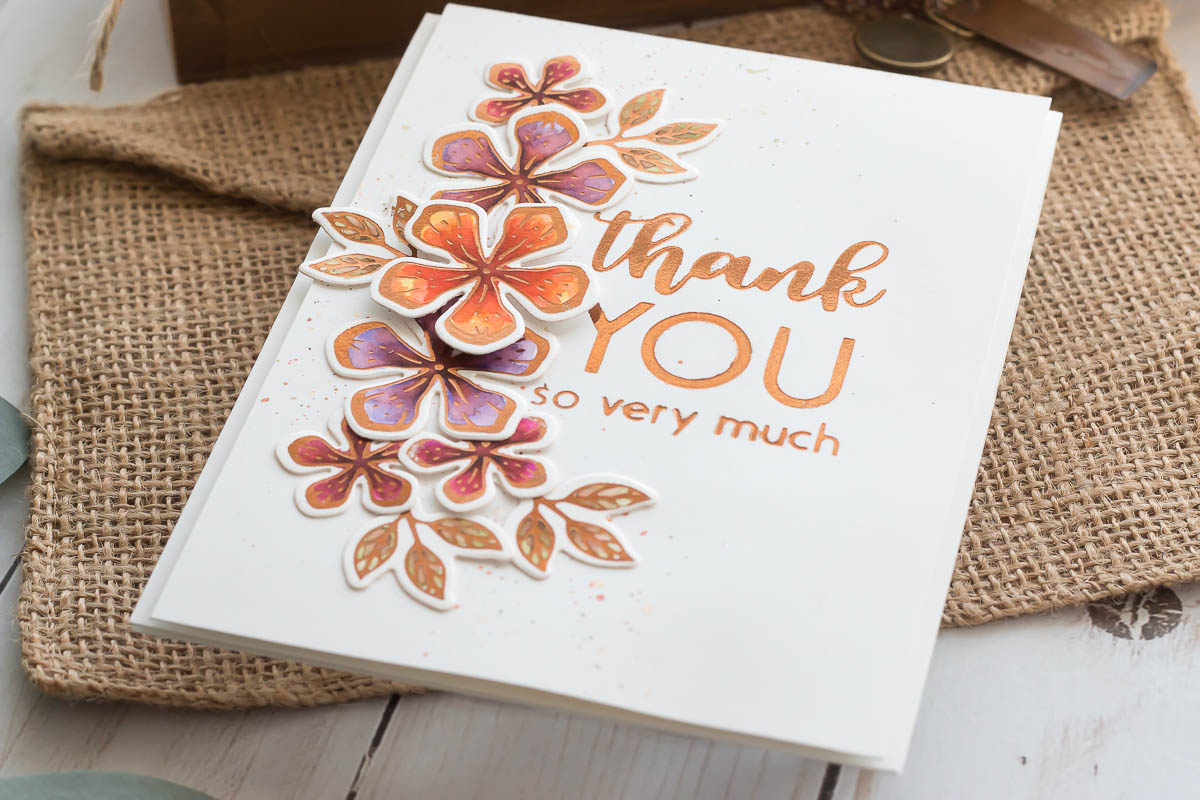
I added several layers of color, blending it out with my water brush. I love that you can add color over your foil. The foil acts as a resist, so you can use gentle mediums over the foil to color those foiled images and designs. I was going with an Autumn palette here, so I used warm colors with some browns for shading.
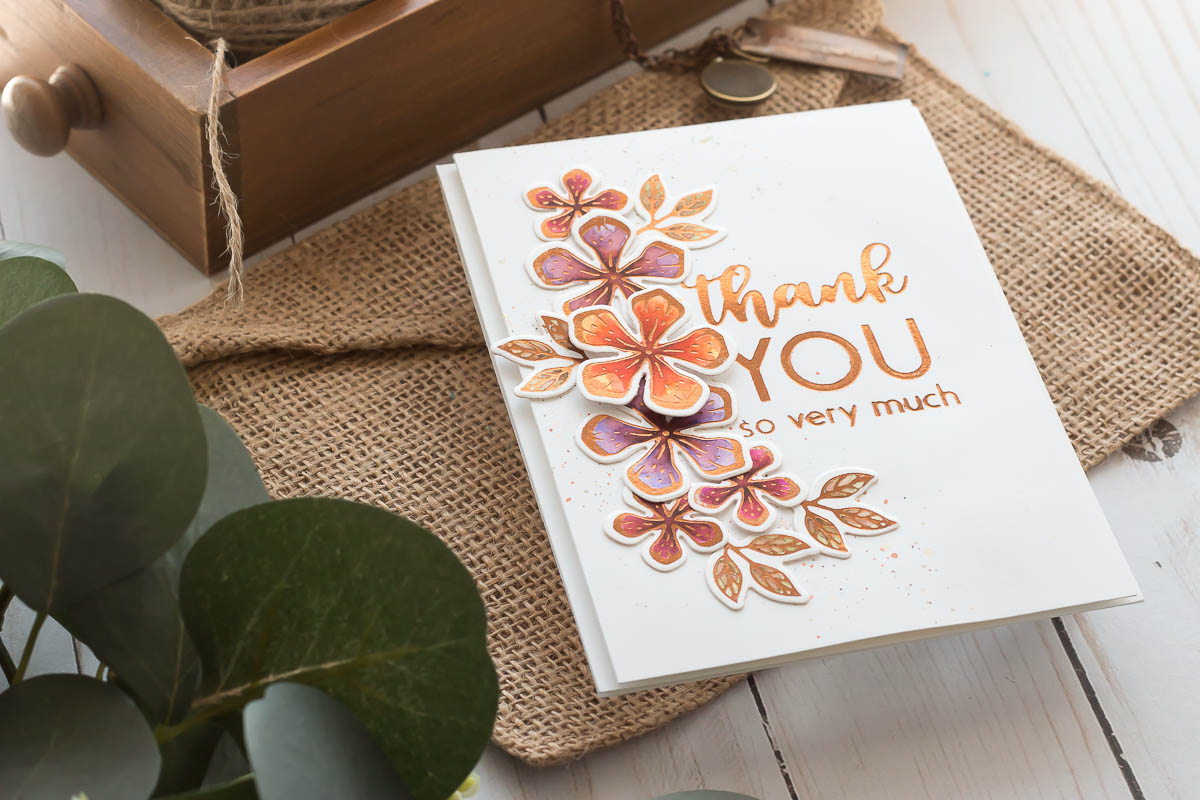
I also foiled the sentiment using the same copper foil, and the Thank You Combo Glimmer Plate Set. I foiled this on a white card base, which I then splattered with some more color from my Zigs. Then, I arranged the flowers along one side and adhered with both liquid glue and foam adhesive.
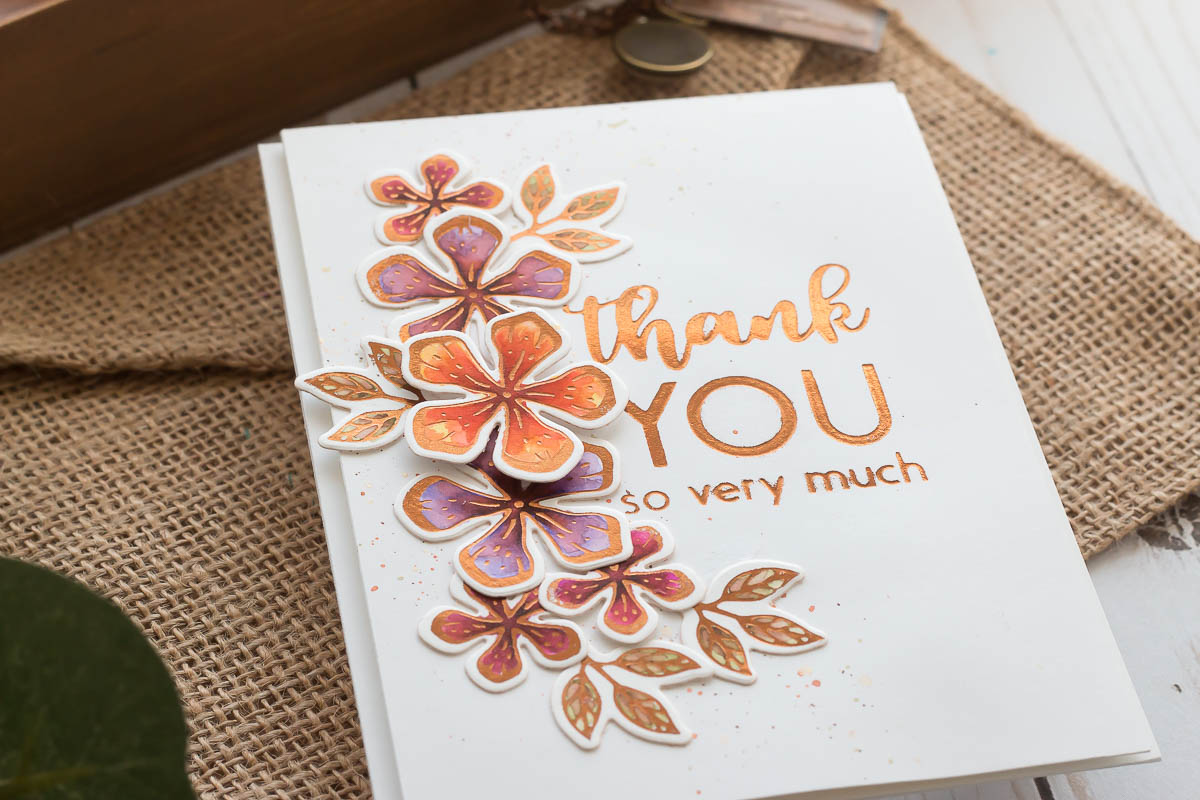
I then took the whole front card panel and mounted it with foam adhesive onto a white card base. Simple design, but I love the warm coloring over the glimmered flowers.
Spellbinders Supplies:
OTHER SUPPLIES
Zig Markers, Waterbrush, Bristol Smooth Cardstock, White cardstock, Nuvo Liquid Adhesive, Craft perfect foam adhesive
Glimmering Butterflies Card
For my next card, I used the Glimmering Butterflies Glimmer Plate set. This set has the Glimmer plates as well as the dies, also. I think you can get so much use out of these plates and die combos! I went ahead and Glimmered a number of these butterflies onto orange cardstock. Then, I added some sharing and detail with a few colored pencil colors. Adding some red to the inside of the wings gave these butterflies just a little more depth. I also took a white gel pen and added white dots along the sides of the wings.
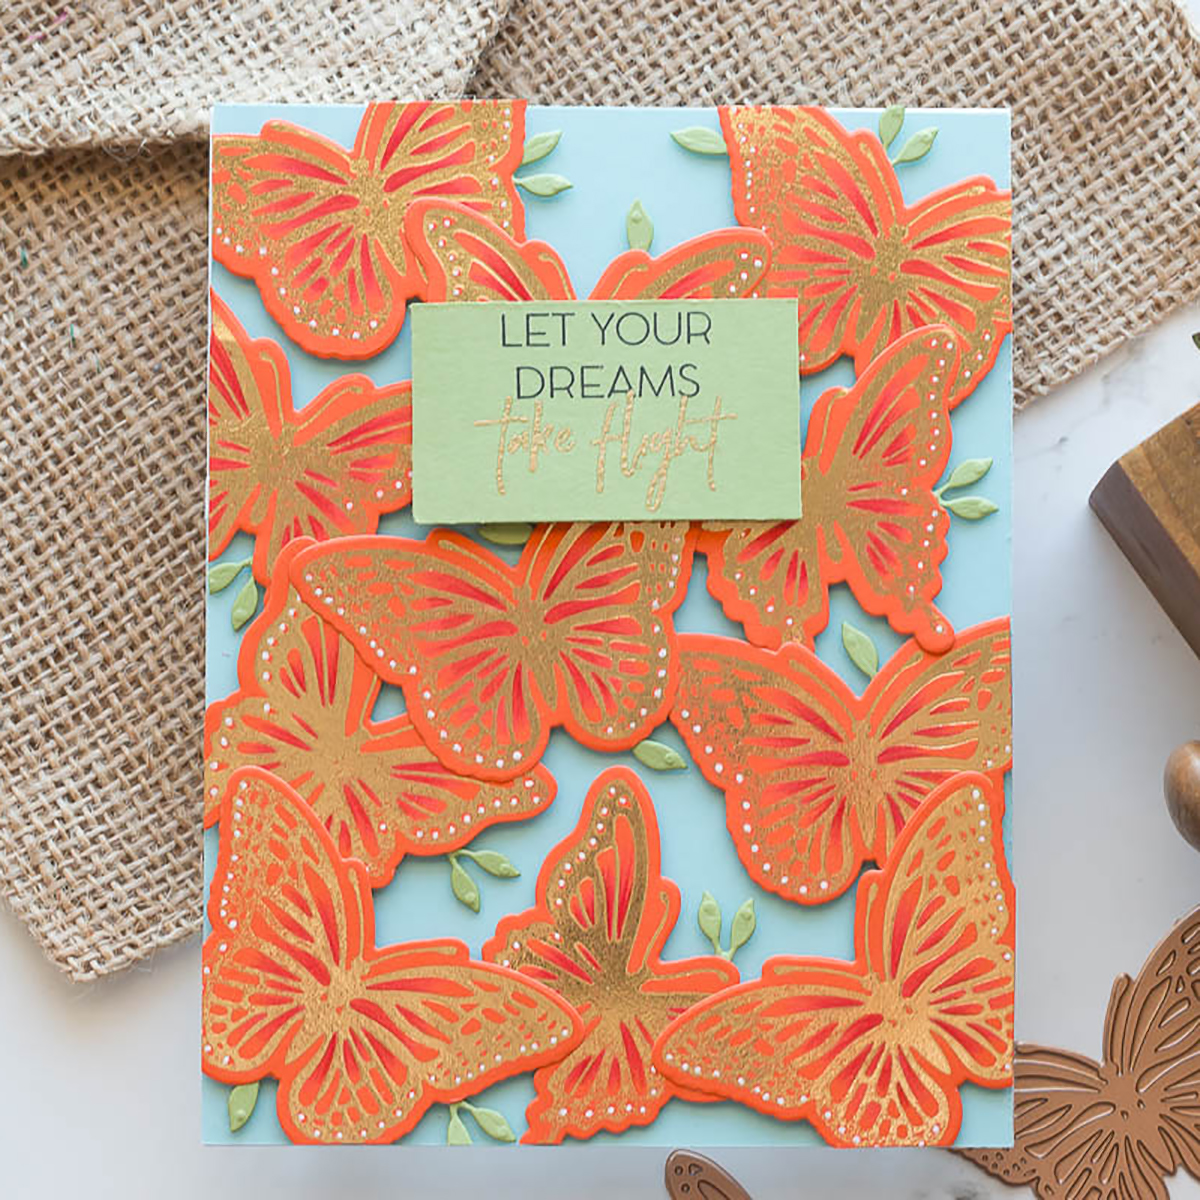
This set comes with little flower and leaf dies, as well, so I used the leaf die to cut out a number of green leaves that I could tuck into my design. I grabbed some light blue cardstock, and then layered all my butterflies over it.
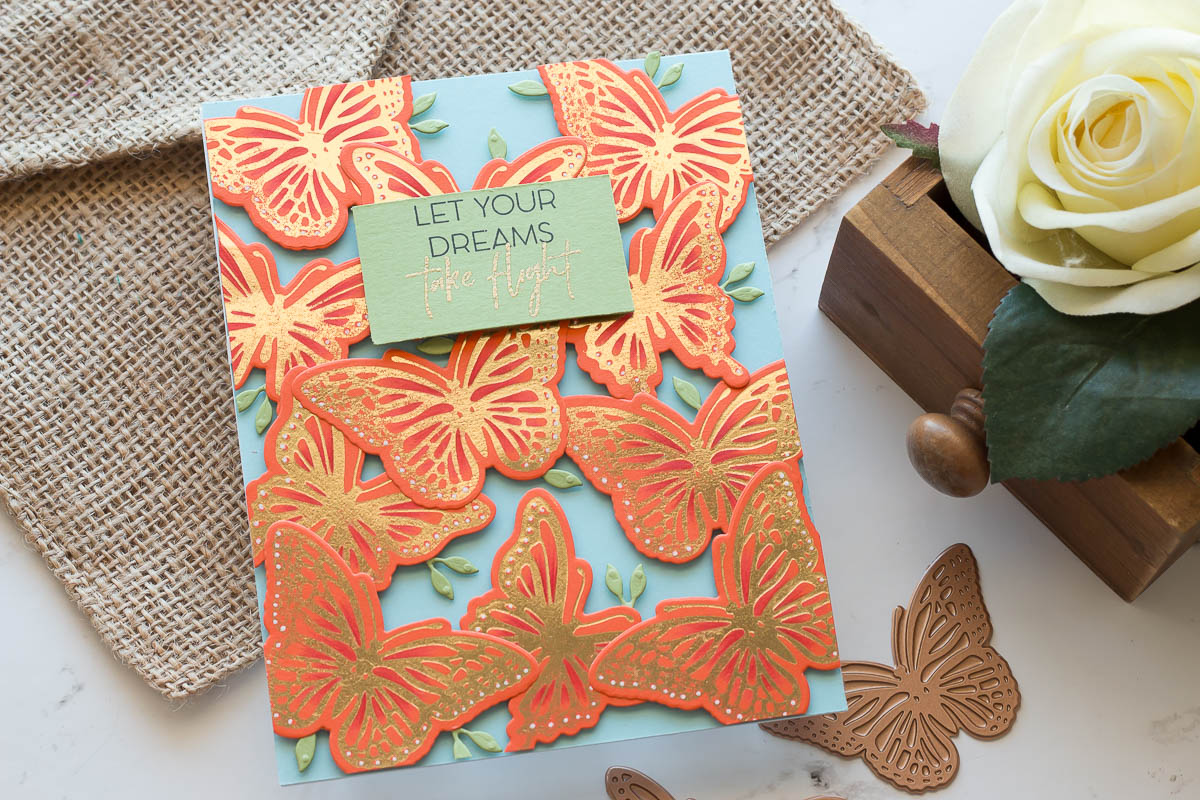
I made sure to have each butterfly touching each other, so that I could adhere them all together to create a die cut panel. Then, I loaded up the backside of all the die cuts with foam adhesive and adhered them to the blue card base. I trimmed off any edges hanging over the side to create a nice, clean A2 sized card.
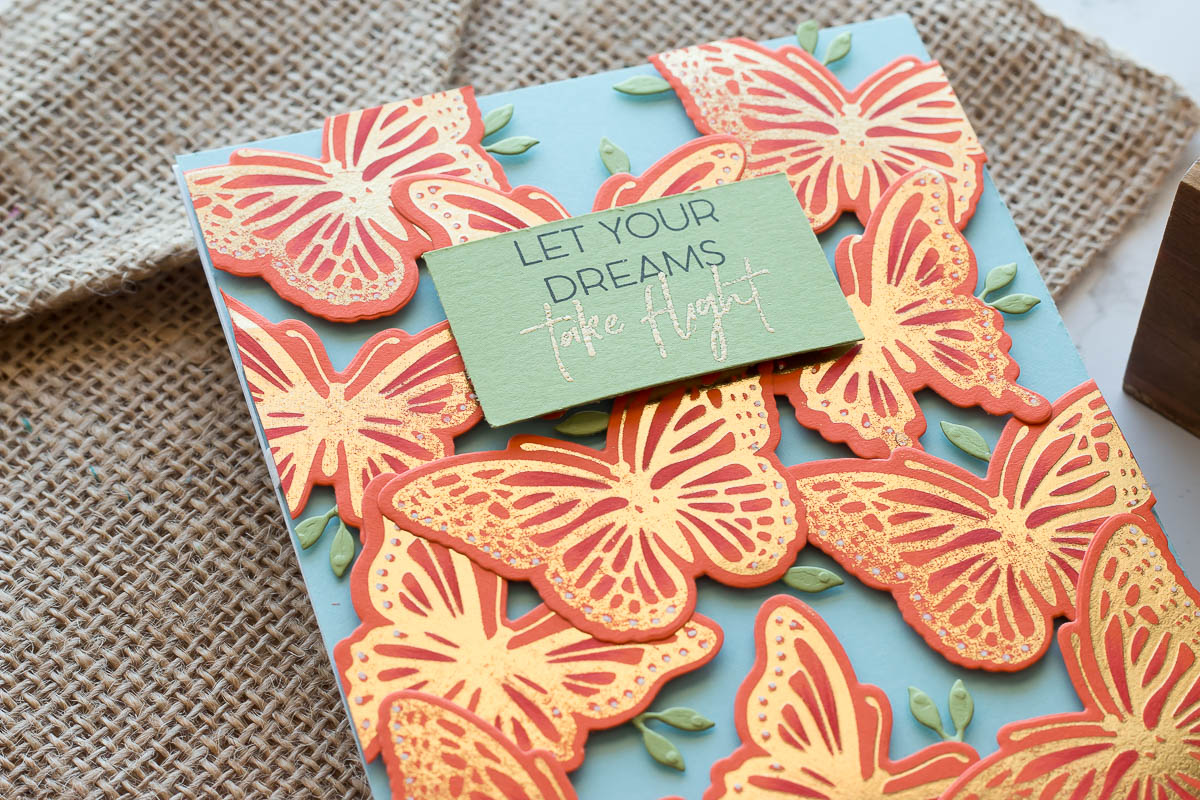
The sentiment is stamped and embossed using the sentiment from the Layered Butterflies Clear Stamp set from Spellbinders.
Spellbinders Supplies:
OTHER SUPPLIES
Foam Adhesive, Colored Pencils, White Gel Pen, Liquid Adhesive, Orange, Blue, and Green Cardstock, Black Ink, Embossing Ink, Gold Embossing Powder
Floral Thank You Card
My third card today features the Thank You Glimmer set again along with the Art Deco Borders Glimmer Plate Set. This set has four border plates that you can use to add some foiled accents to your projects, or add a striped background, like I did here.
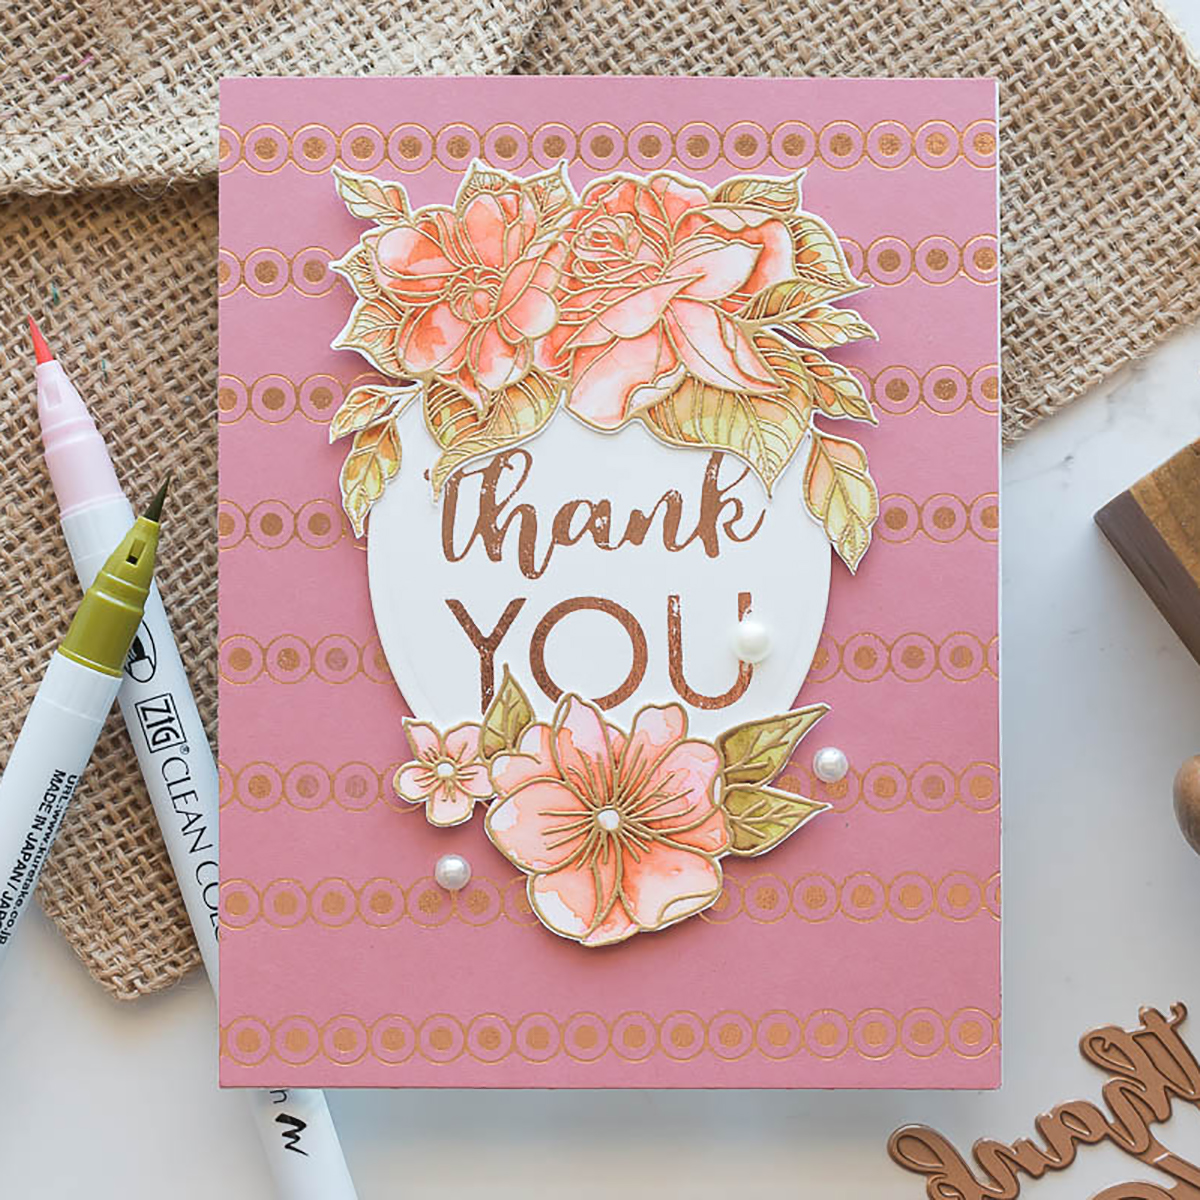
To foil my background, I used the border plate along with some blush foil. I used some low tack tape to tape the glimmer plate into place and make sure it was straight and even. Then, I flipped the plate up while it was still taped down on the top, like a hinge. I added my foil underneath the plate, and then flipped the plate down again over the foil. This way, I could make sure that my plate would be in the right place for foiling, and that I could achieve straight stripes in the background.
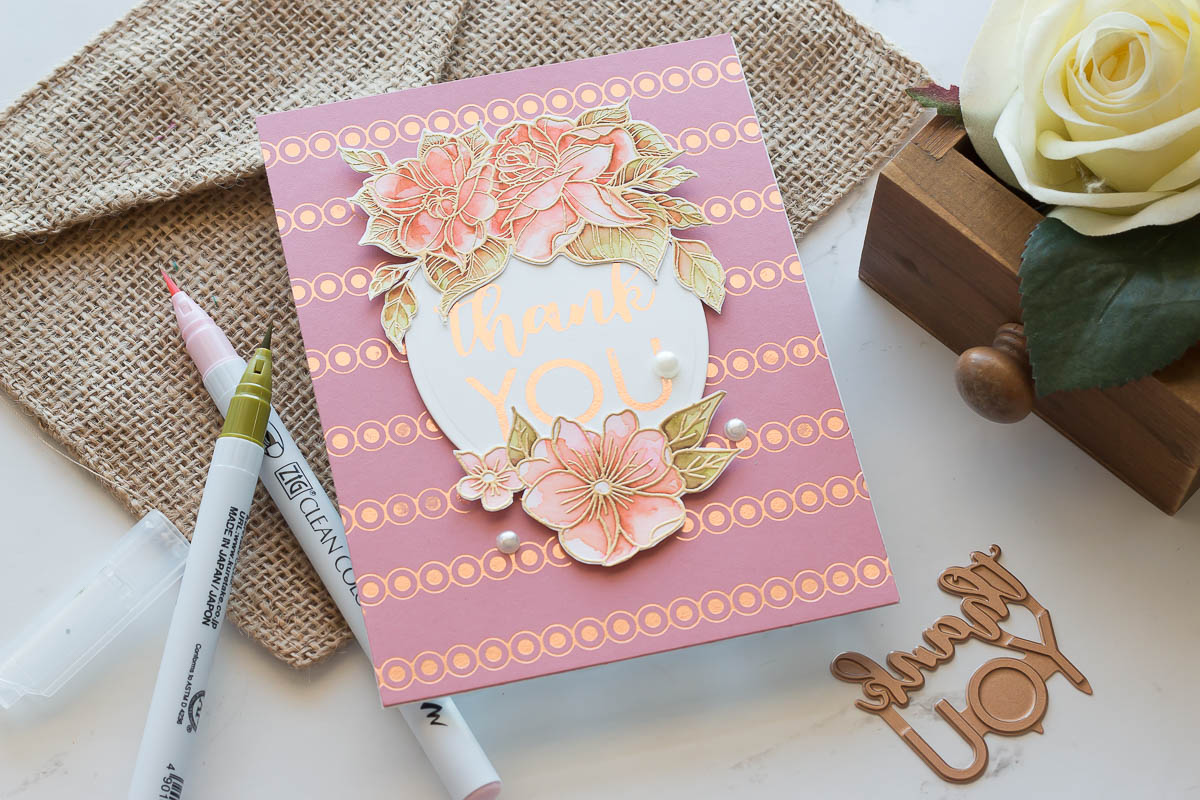
After my background was all glimmered, I used the Thank You set to glimmer the sentiment onto some plain white cardstock and die cut it into an oval. To decorate the oval, I stamped and colored in some florals from the Mandala Bouquet and Peonies Blossoms cling stamp sets from Spellbinders. I embossed these floral images in gold, and then again used my Zigs to color them in. I fussy cut the images and adhered them around the oval sentiment.
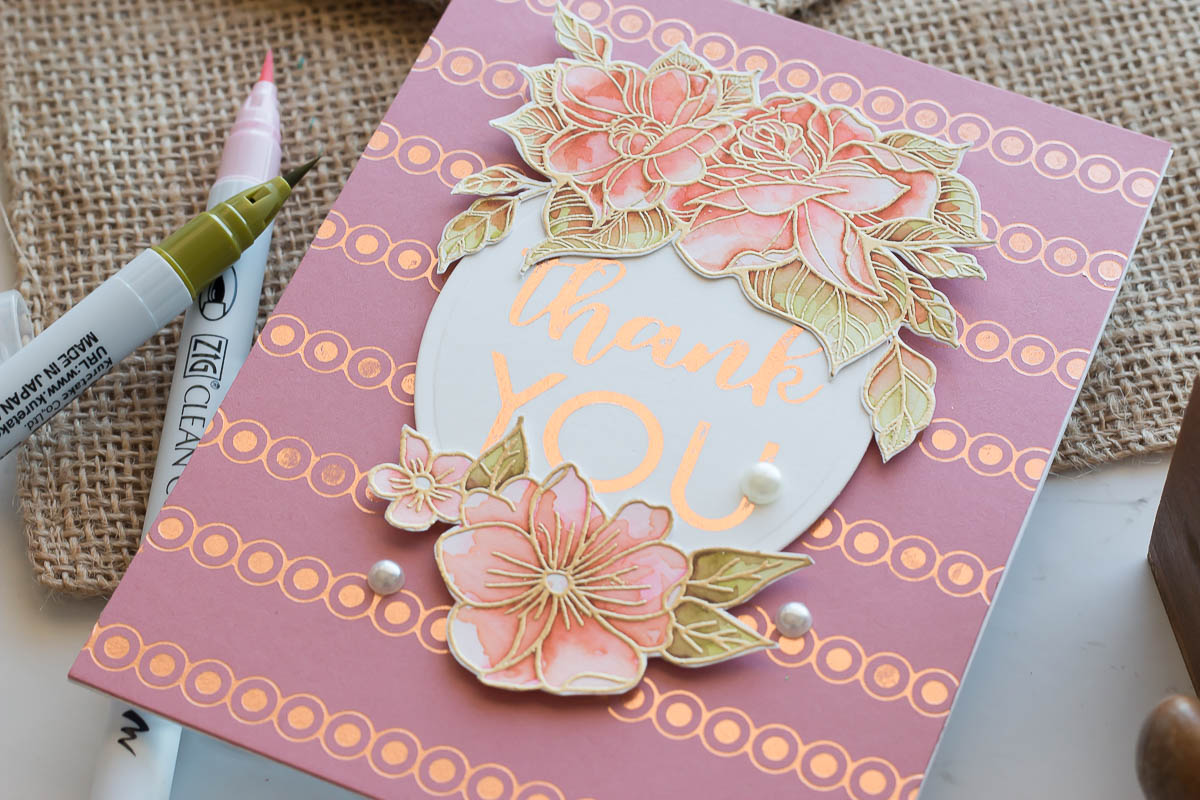
I finished this card off with just a few flat-backed pearls.
Spellbinders Supplies:
OTHER SUPPLIES
Pink Cardstock, White Cardstock, Zig Markers, Water Brushes, Bristol Smooth Cardstock, Embossing Ink, Gold Embossing Power, Liquid Adhesive, Foam Adhesive, Washi Tape, Flat Backed Pearls, Scissors
Thanks so much for stopping by the blog today! I have loved playing with these new Glimmer Plates, and I hope you will, too.
For more card-making inspiration, feel free to check out my blog at Marie Nicole Designs.
Until next time,
Marie Nicole
Becca Feeken Vintage Treasures Blog Hop + Giveaways (Now Closed)
STENCILS: Multiple Ideas and Creations from ONE Product