Stained Glass Bouquet Collection – Card Inspiration with Annie Williams
Hi there, this is Annie Williams and I’m thrilled to be back today to share a couple of projects using the new Stained Glass Bouquet Collection by Becca Feeken.
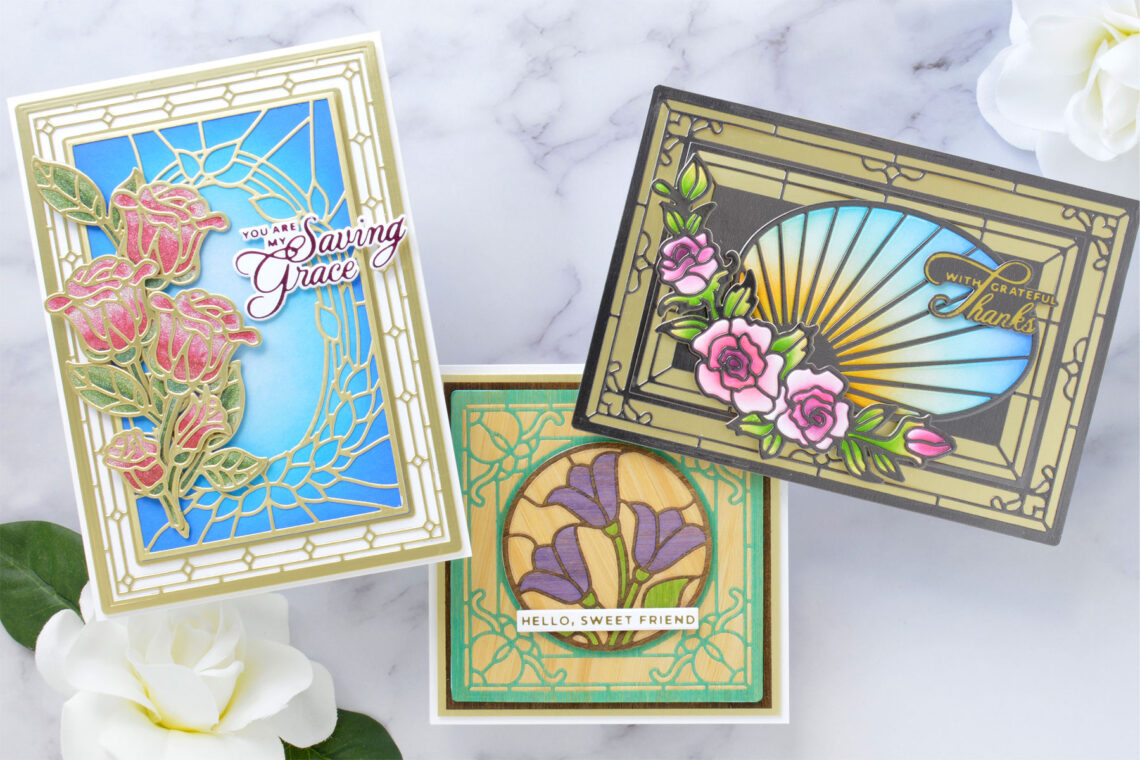
I was inspired by the intricate background patterns and gorgeous florals to try a few different materials to create three unique cards with tons of layers.

Elegant Thank You Card
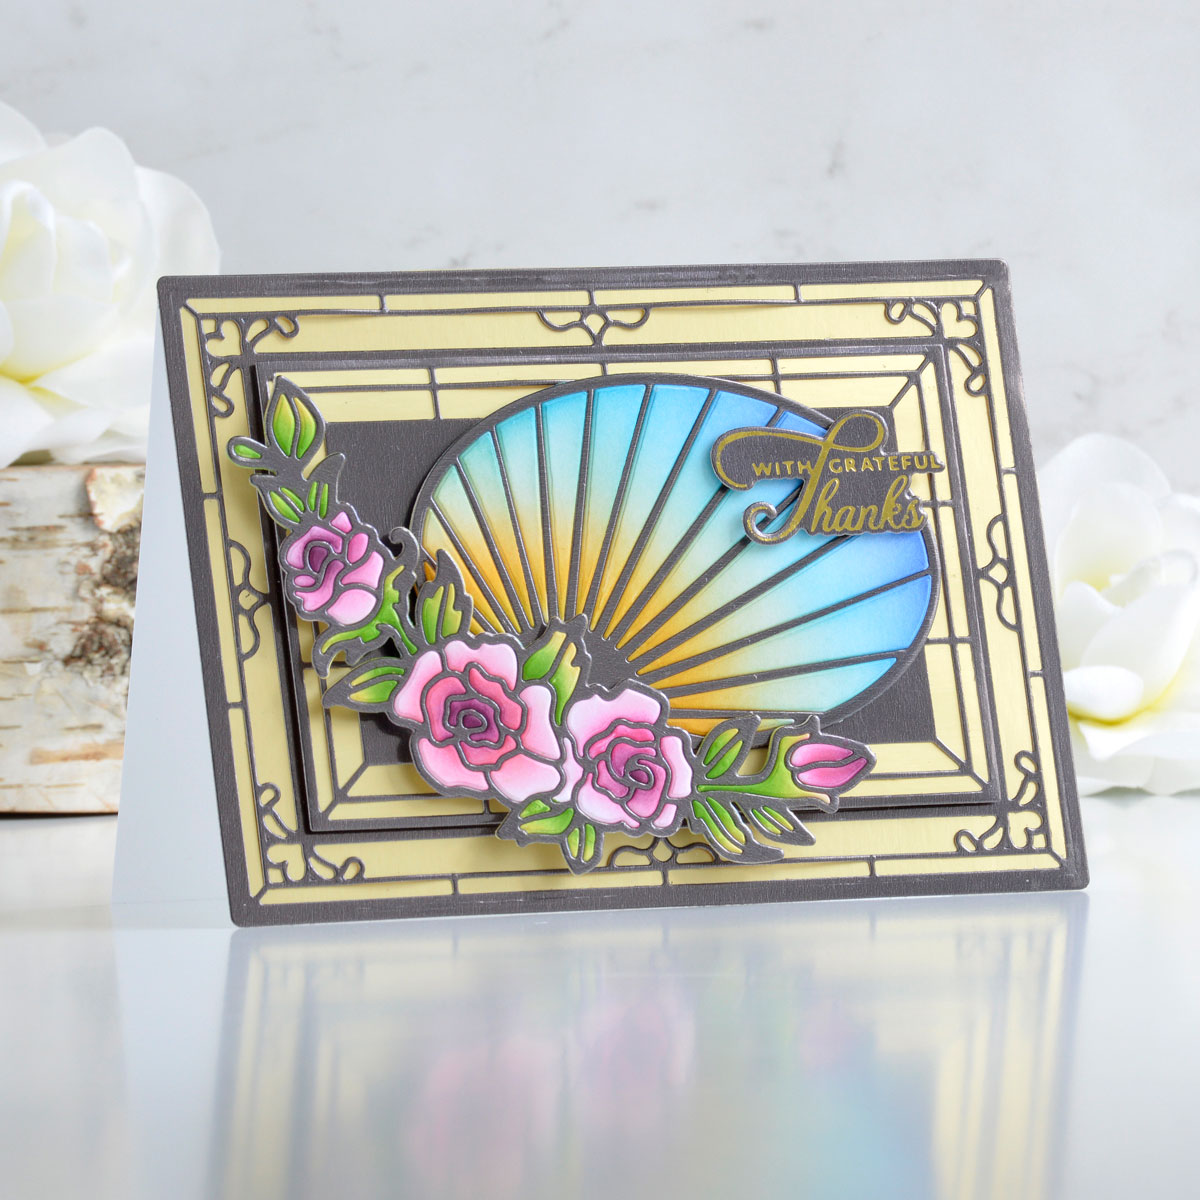
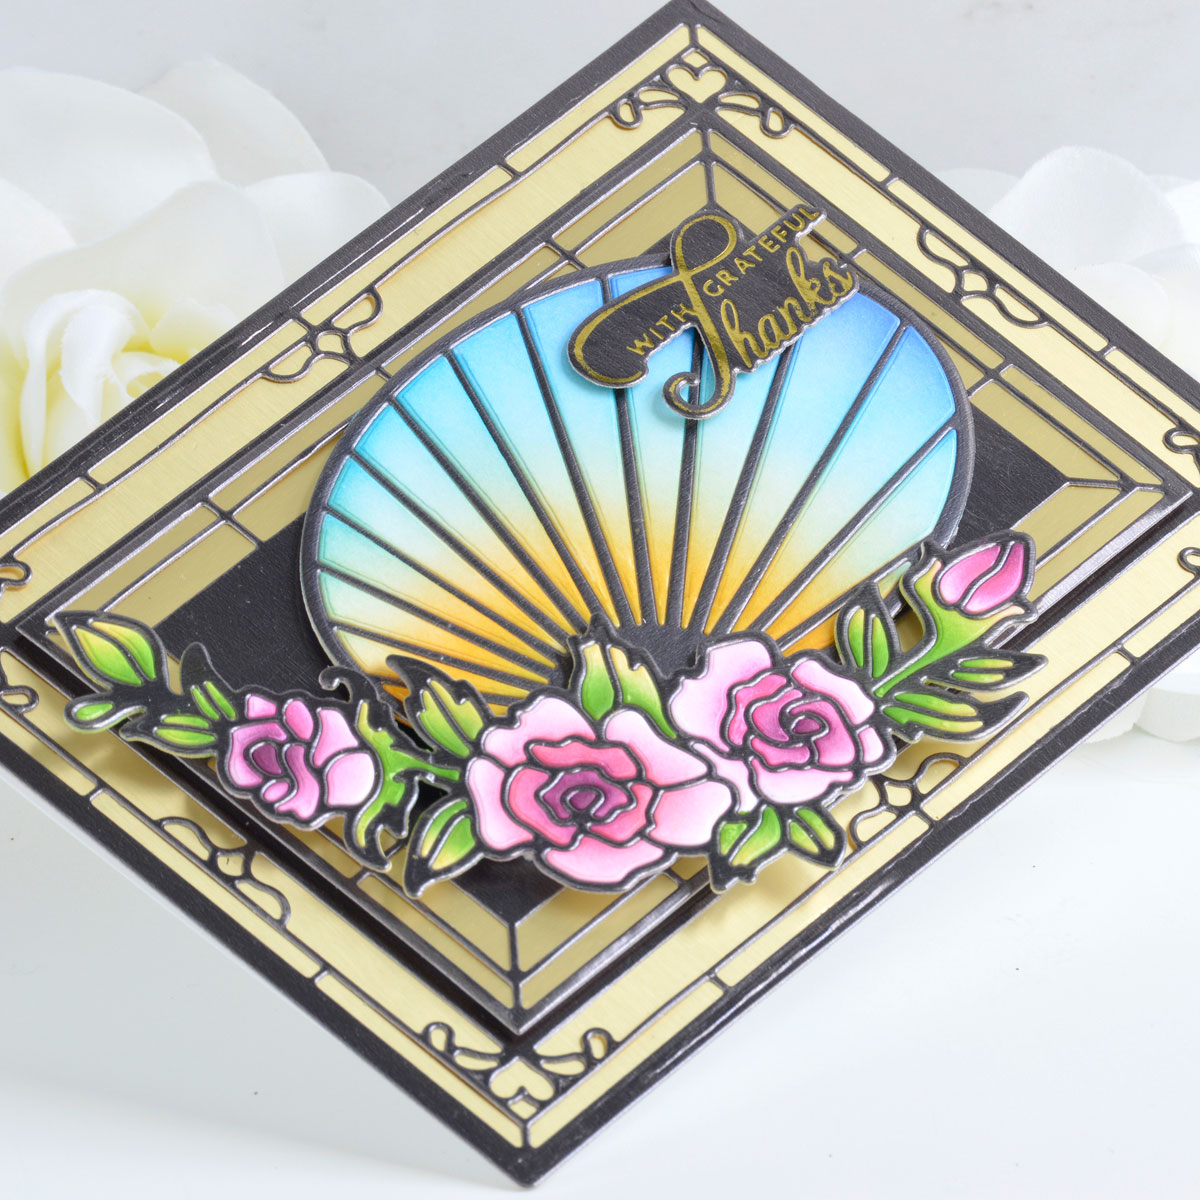
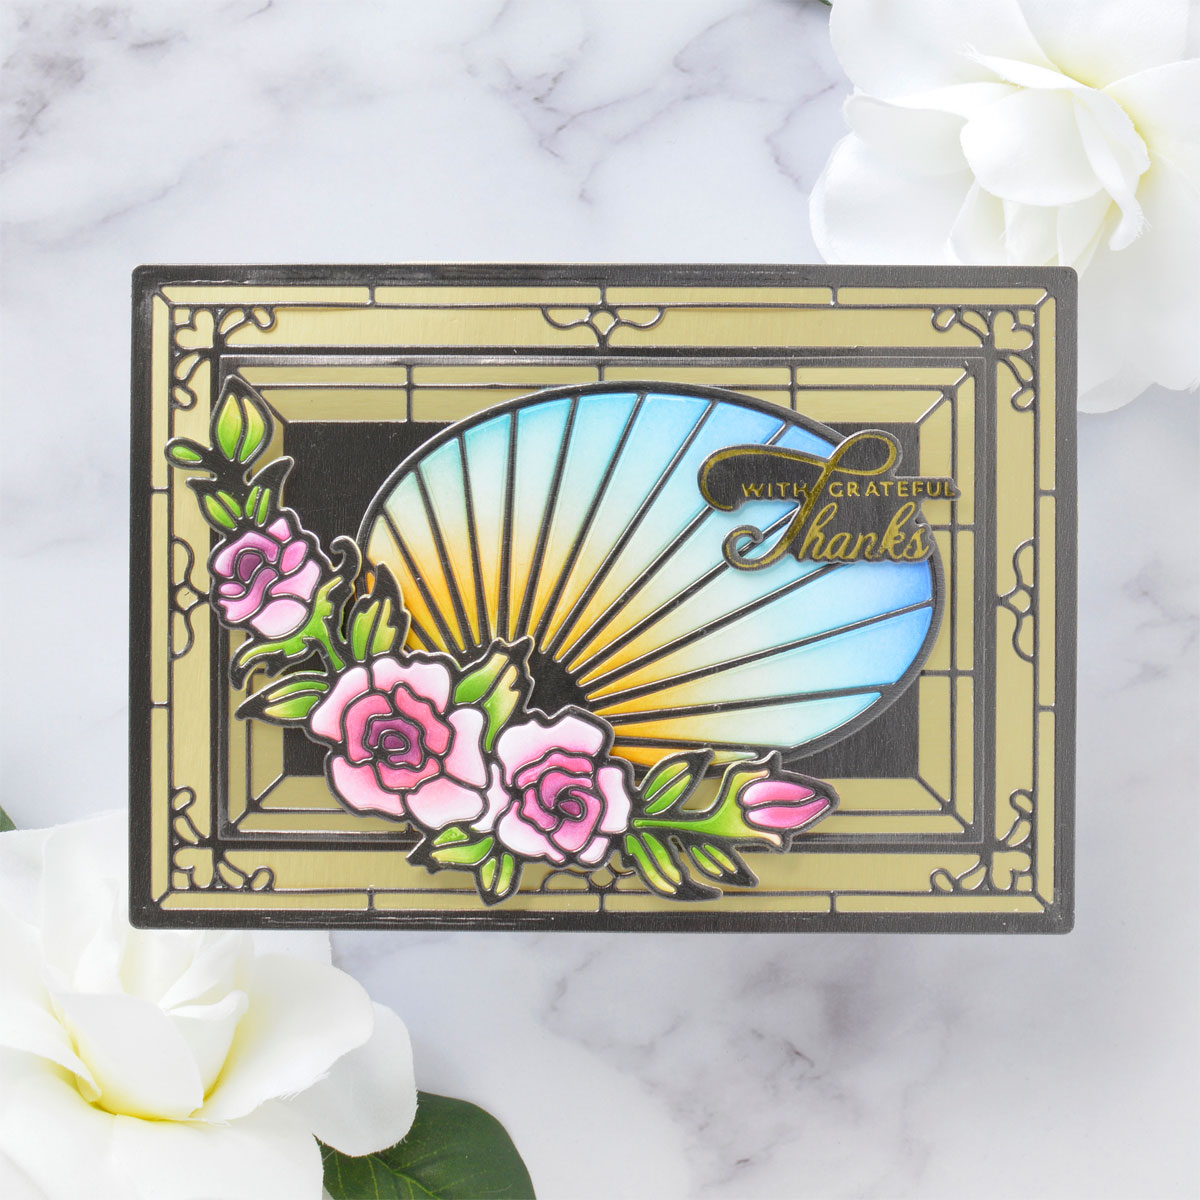
Since the collection is inspired by stained glass patterns, I wanted to create a card that had that same strong contrast you normally see between lead and glass. Using the Radiant Oval and Wistful Window die sets, I piled up the layers and added some bright pops of color for this elegant thank you card.
- Die cut plain white and black metallic cardstock using the oval and floral swag rim and insert dies from the Radiant Oval Die Set. Die cut scrap cardstock using the oval and floral swag rim dies.
- Adhere the black metallic oval and floral swag outline die-cuts to their scrap cardstock backer die-cuts with liquid glue. Piece the white cardstock insert pieces into the black outlines until you have reassembled both shapes.
- Blend inks over the reassembled die-cuts with blending brushes and sponge daubers to color the white cardstock (the black metallic cardstock will resist dye inks). I used Distress Inks to create pink roses and a sunset-inspired oval window.
- Die cut black metallic cardstock using the outer frame rim and insert dies from the Wistful Window die set. Die cut gold metallic cardstock using the only the outer frame rim die.
- Die cut black metallic cardstock using the medium frame rim and insert dies from the Wistful Window die set. Die cut gold metallic cardstock using only the medium frame rim die.
- Adhere the black metallic layers to their gold backers using liquid glue.
- Apply Gold Hot Foil to black metallic cardstock using one of the sentiments from the Heart Felt Sentiments Glimmer Plate Set and the Glimmer Hot Foil Machine. Die cut it out using the coordinating die.
- Adhere the largest layered background panel to a top-folding white card base measuring 4.75” x 6.75” using tape runner. Pop the layered medium frame up on top using foam adhesive.
- Adhere the oval window, floral swag, and sentiment to the card front with more foam adhesive.
Spellbinders Supplies:

Other Supplies
Heavyweight white cardstock, Tim Holtz Black Metallic Kraft-stock, Seedless Preserves, Picked Raspberry, Spun Sugar, Squeezed Lemonade, Mowed Lawn, Carved Pumpkin, Tumbled Glass, Salty Ocean, Blueprint Sketch Distress Inks, tape runner, liquid glue, foam adhesive
Saving Grace 5×7 Card
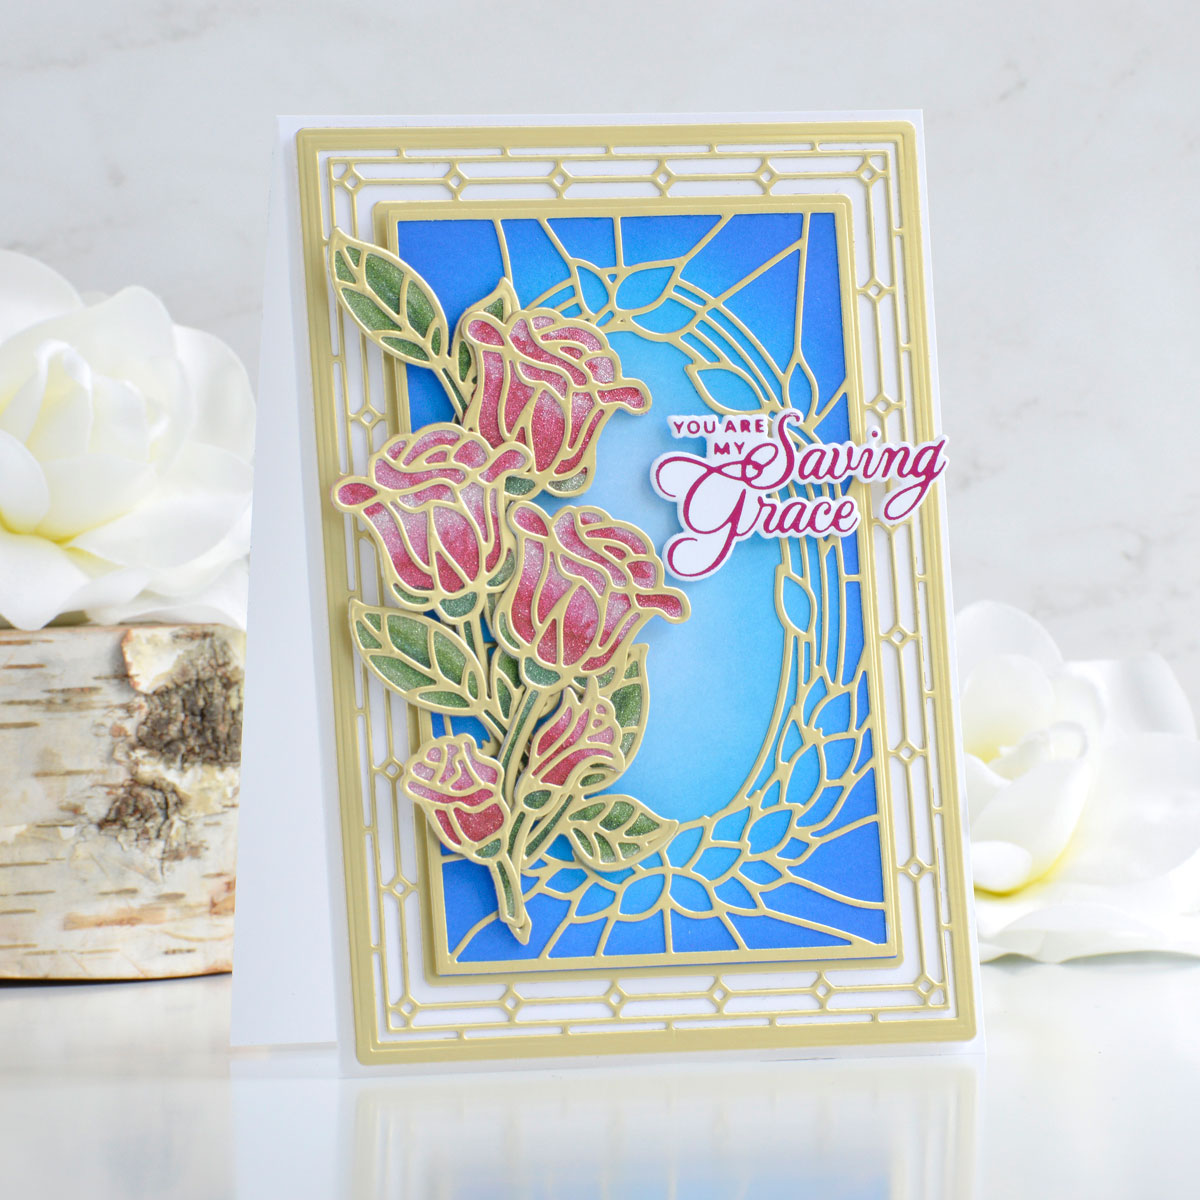
I wanted to create a little “textured glass” for my next card, so I pulled out some glitter cardstock to stain with alcohol ink for a bunch of roses. The gorgeous wreath design from the Deco Bloom die set made the perfect background for this beautiful bouquet.
- Die cut gold cardstock using the rose and leaves outline and insert dies from the Sweet Rondure die set. Die cut silver glitter cardstock using only the outline dies.
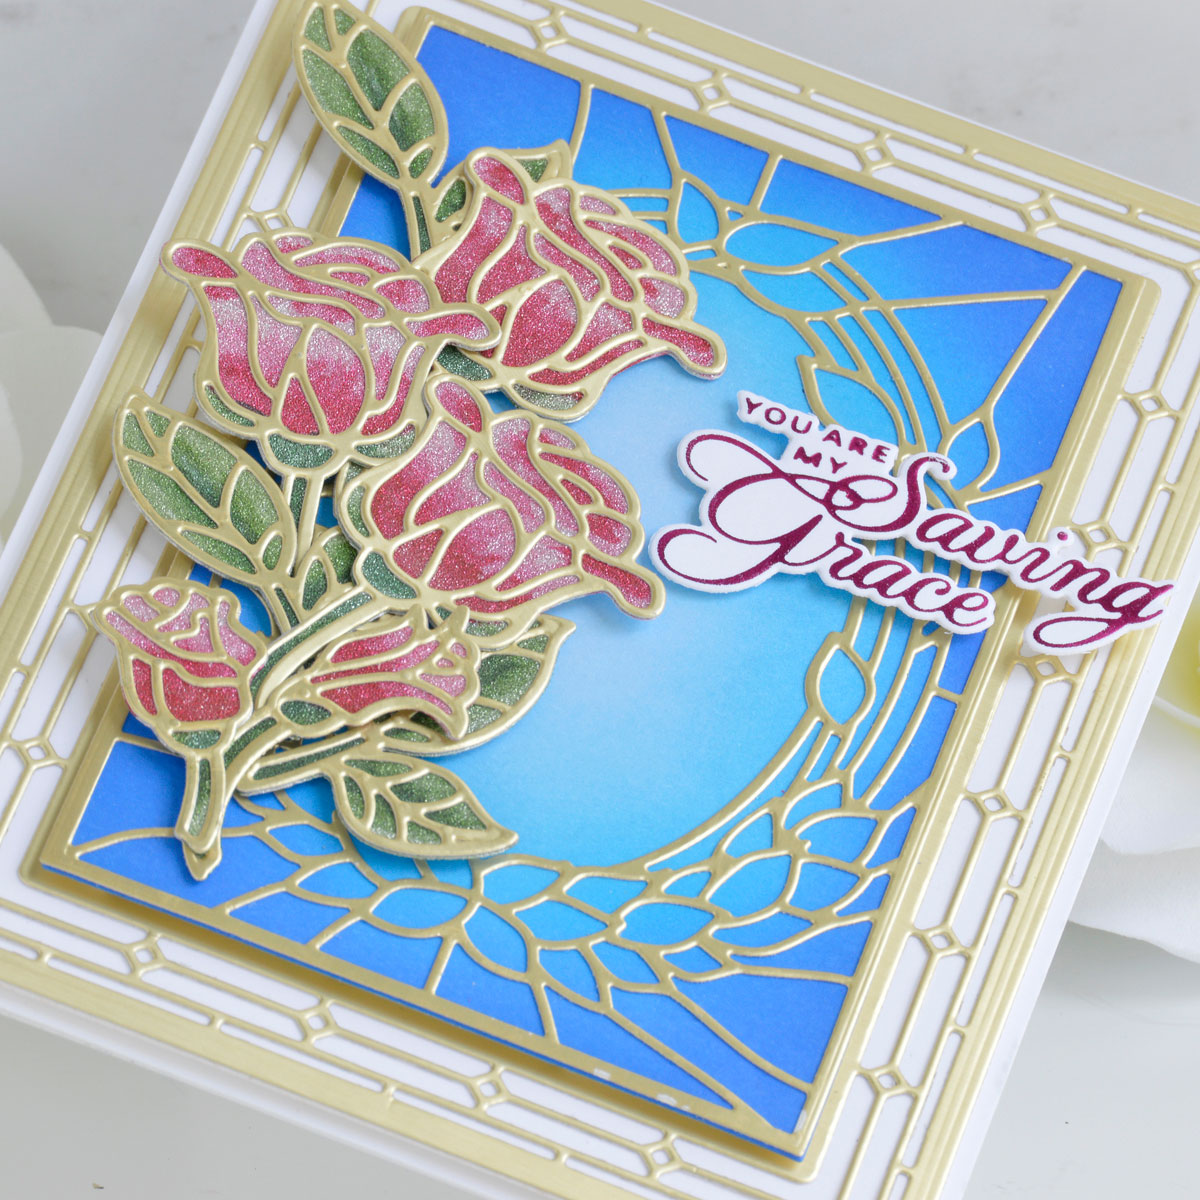
- Quickly add several shades of green and pink ink to the glitter cardstock layers using Copic markers (smoother glitter cardstock works better so that your marker nibs don’t fray). I added darker areas for some contrast but kept the coloring loose and easy.
- Adhere the gold outline layers on top of the glitter layers using liquid glue (not all glues will work on top of glitter cardstock, but Bearly Art Precision Craft Glue held my die-cuts together perfectly!).
- Die cut gold cardstock using the outer frame rim and insert dies from the Deco Bloom die set. Die cut white cardstock using only the outer frame rim die.
- Die cut gold cardstock using the leaf frame rim and insert dies from the Deco Bloom die set. Die cut white cardstock using only the leaf frame rim die.
- Blend Tumbled Glass, Salty Ocean, and Blueprint Sketch Distress Inks over the white leaf frame background die-cut, concentrating the darker shades toward the edges and leaving the middle of the die-cut light.
- Adhere the gold outline die-cuts to their white or inked backers using liquid glue.

- Apply Magenta Hot Foil to white cardstock using one of the sentiments from the Heart Melt Sentiments Glimmer Plate Set and the Glimmer Hot Foil Machine. Die cut it out using the coordinating die.
- Adhere the largest background frame to a top-folding A7-sized white card base using tape runner. Add the leaf frame on top with foam adhesive.
- Arrange the rose bouquet on the left side of the leaf frame and adhere down with liquid glue and several layers of foam adhesive for lots of dimension.
- Pop the foiled sentiment up next to the bouquet with foam adhesive.
Spellbinders Supplies:
Other supplies
White cardstock, gold cardstock, DCWV Silver Glitzy Cardstock, Copic markers, blending brushes, Tumbled Glass, Salty Ocean, Blueprint Sketch Distress Inks, tape runner, foam adhesive
Stained Glass Sweet Friend Card
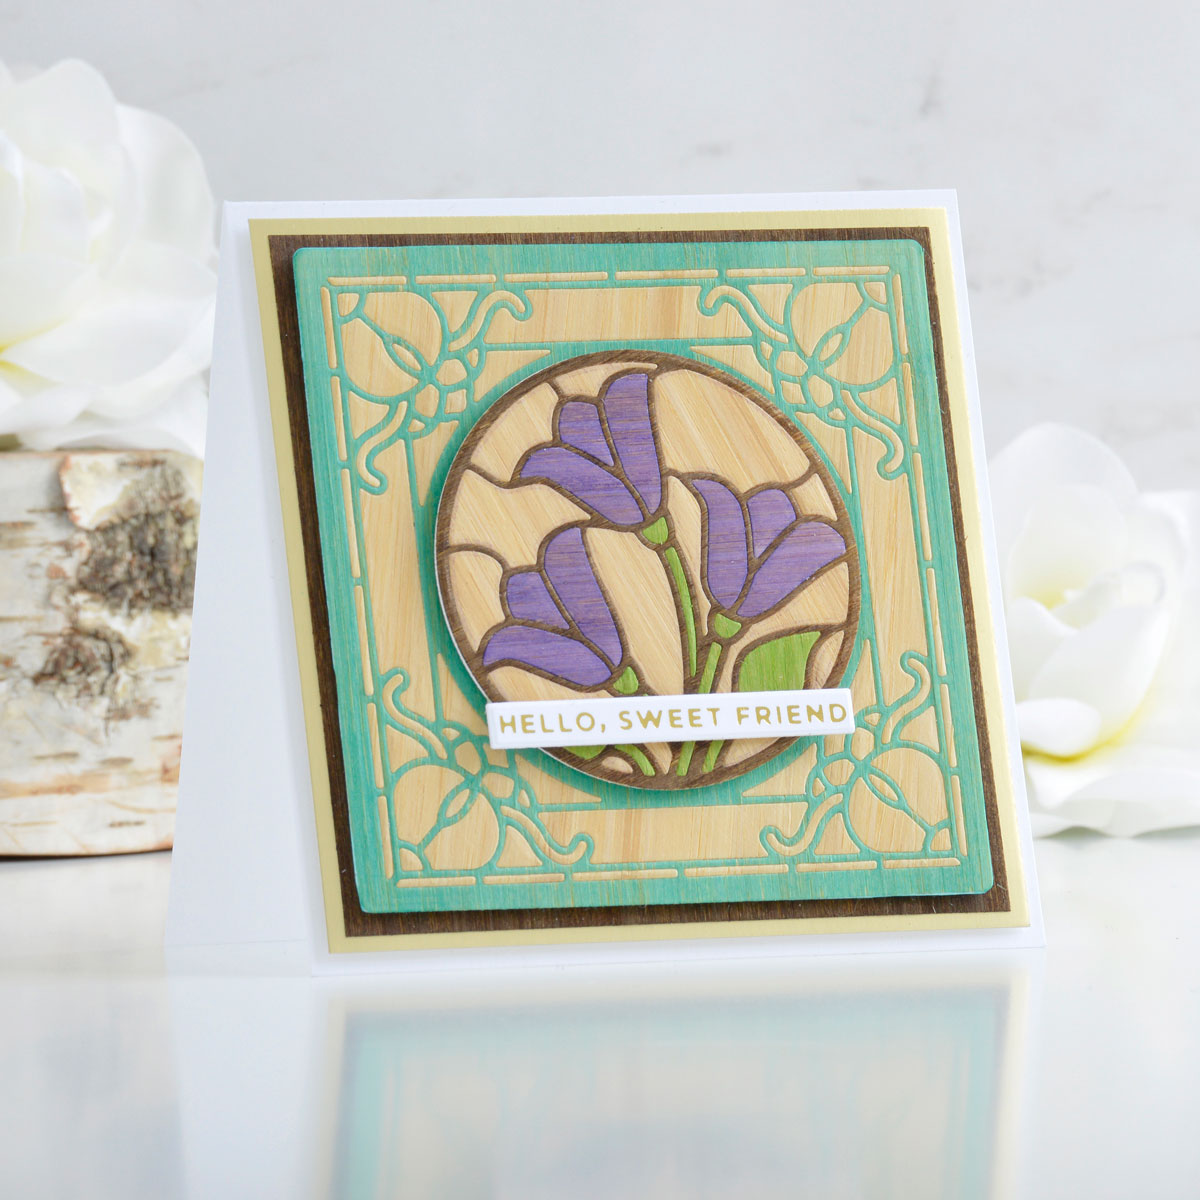
I have always loved the look of wood inlay furniture and thought that this collection of dies would be perfect for replicating that look in a card. The Tulip Trio die set was the perfect design to create this easy and unique hello card.
- Blend Peacock Feathers, Wilted Violet, and Mowed Lawn, and Ground Espresso Distress Inks onto wood veneer paper with a blending brush, making sure the inked areas are large enough to die cut with each die in the next steps. Set aside to dry.
- Die cut plain and Peacock Feather-stained wood veneer paper with the outer rim and insert dies from the Tulip Trio die set. Die cut scrap cardstock with just the outer rim die.
- Die cut plain, Wilted Violet-, Mowed Lawn-, and Ground Espresso-stained wood veneer paper with the Tulip Circle rim and insert dies from the Tulip Trio die set. Die cut scrap cardstock with just the rim die.
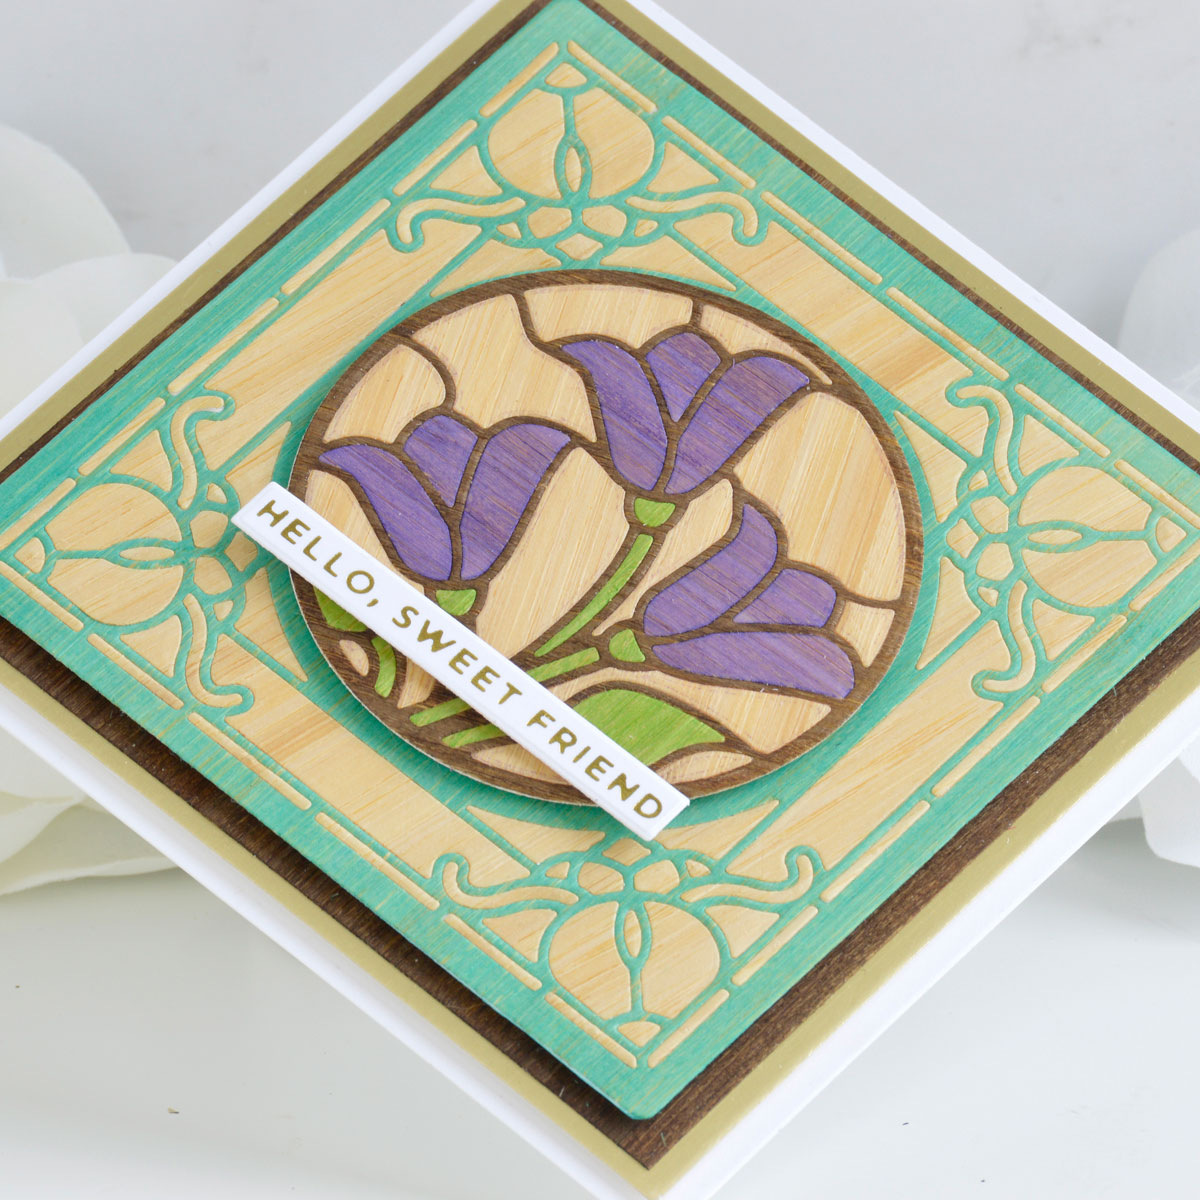
- Adhere the teal outer rim die-cut to the matching scrap backer (use liquid glue if your wood veneer paper is not self-adhesive). Piece the plain wood veneer insert pieces within the teal frame until you have completely reassembled the inlaid panel.
- Adhere the dark brown tulip circle rim die-cut to its matching scrap backer and piece the plain, purple, and green insert pieces within the frame until you have completely reassembled the inlaid panel.
- Apply Gold Hot Foil to white cardstock using one of the sentiments from the Mini Everyday Sentiments Glimmer Plate Set and the Glimmer Hot Foil Machine.

- Mat a 4.5” square panel of wood veneer paper stained with Ground Espresso Distress Ink with gold metallic cardstock and adhere it to a top-folding 5” square white card base with foam adhesive.
- Pop the teal wood background panel up on top using foam adhesive, and then add the tulip circle on top with more foam adhesive.
- Adhere the sentiment to the front of the card with a small strip of foam adhesive.
Spellbinders Supplies:
Other supplies
White heavyweight cardstock, gold metallic cardstock, Crafters Companion Self-Adhesive Wood Veneer Paper, Peacock Feathers, Ground Espresso, Wilted Violet, and Mowed Lawn Distress Ink, blending brush, tape runner, foam adhesive

I hope you enjoyed this trio of elegant die cut cards and thanks so much for stopping by today. You can find more inspiration over at my blog AnnieBWills.com.
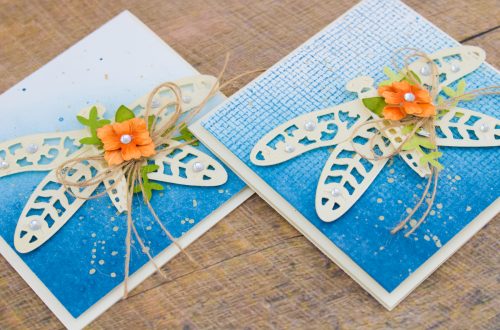
Flower Garden Inspiration | Botanical Dragonfly Card with Cynde. Video
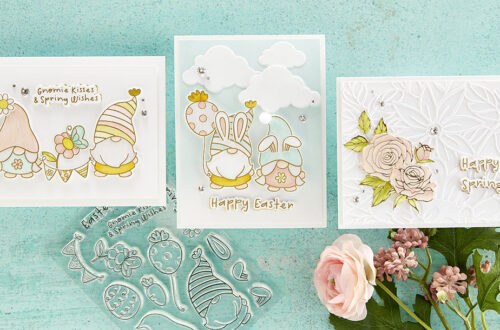
March 2022 Clear Stamp + Die of the Month Preview & Tutorials – Spring Gnomes