Sweet Serenade Notecards with Laura Evangeline
Hello again, crafty friends! I am Laura Evangeline, and I’m delighted to join Spellbinders as a returning guest blogger. I am a full-time nurse and live in the Nashville, Tennessee area along with my sweet hubby, our spunky middle schooler, and our two Yorkies, Max and Penny. Last time I visited with you here on the Spellbinders blog we made some Halloween favor boxes.

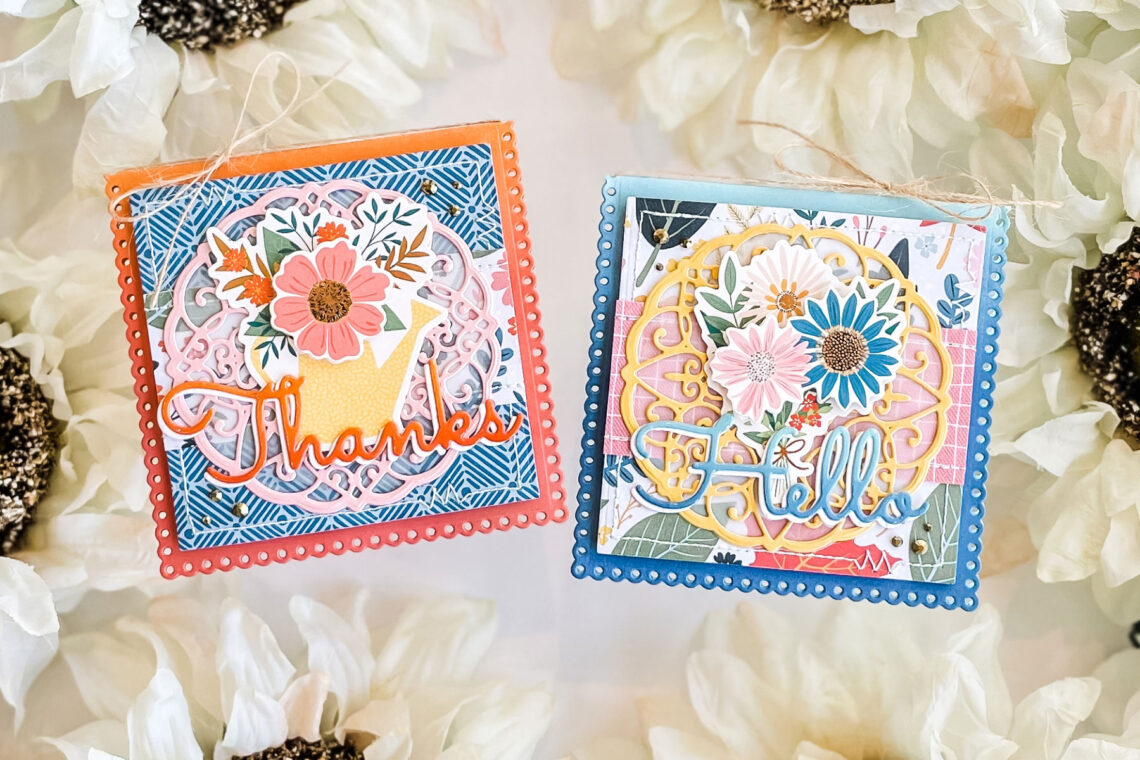
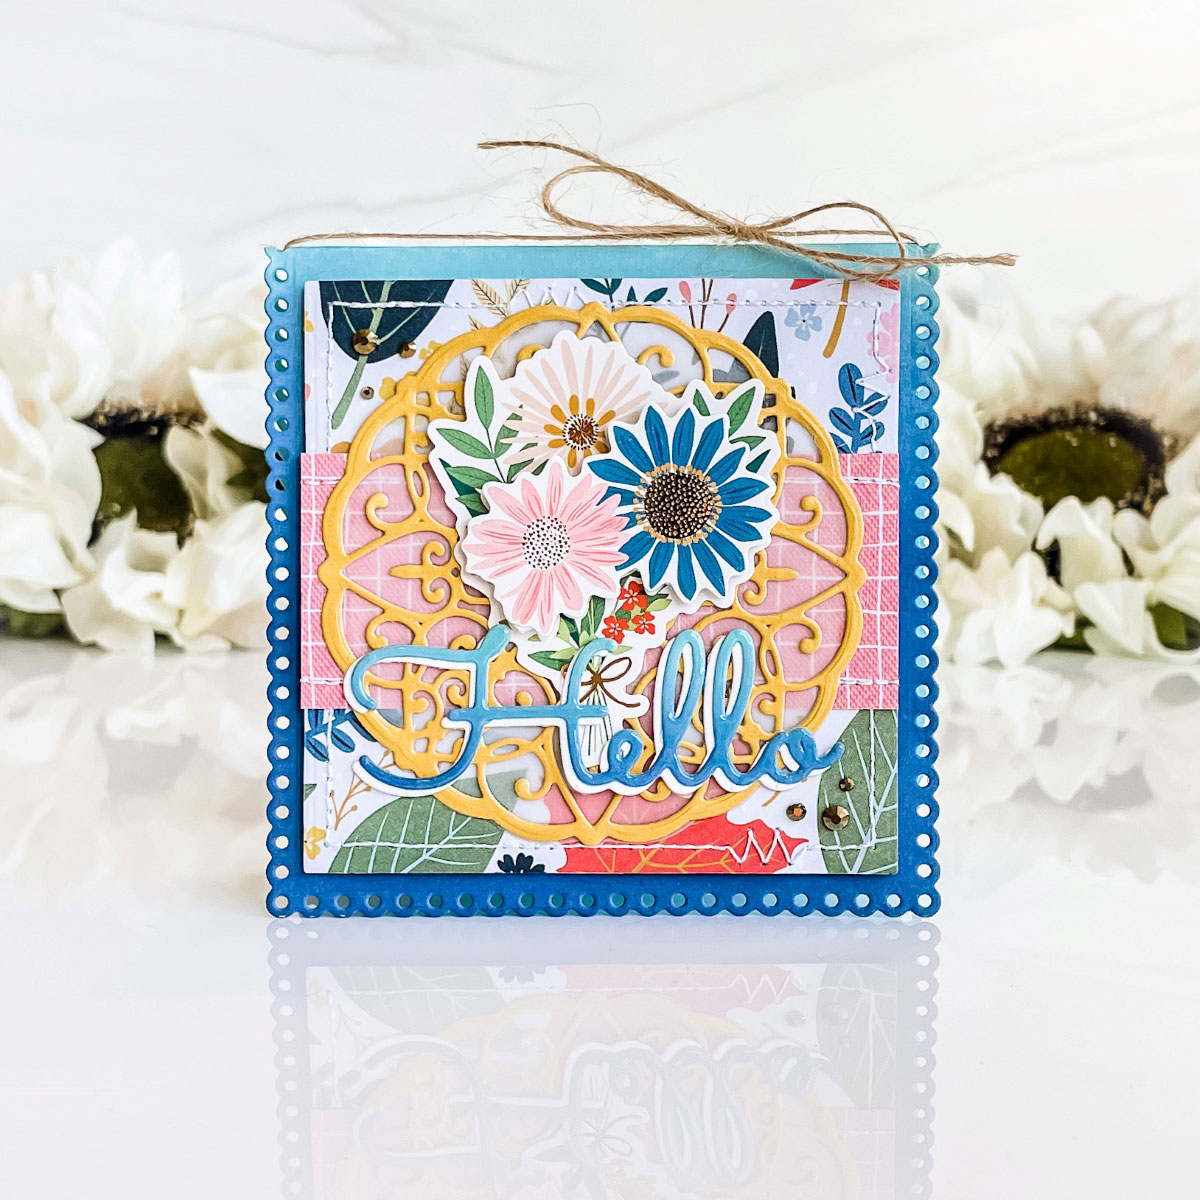
This time, I’m stopping by to share a set of autumnal note cards I created with the new Sweet Serenade Notecards collection. It’s a no-brainer die collection which makes the loveliest notecards you’ve ever seen. All you really need is cardstock to create something jaw-dropping. The dies themselves are so intricate, extra embellishments aren’t even necessary. However, I’m not here to show you the obvious. I came to play!

The first thing you’ll want to do is cut your card bases using the Scalloped Symphony Notecard die set. Be sure to use the scoring die included to transform the slimline background into a folding note card. (Isn’t that so genius?!)
Die cut a couple pieces of patterned paper with the square die in the set as well as the square or circle flourish in solid colors. (Note: If you find your patterned paper is competing too much with all the scrolls & swirls, try layering a piece of vellum under the flourish piece to soften the look like I did.)
I used the Sweet Sayings Notecard Sentiments die set to cut out “Hello” and “Thanks” from Snowdrift cardstock. These will serve as a shadow layer once we start assembling later.
Photos:
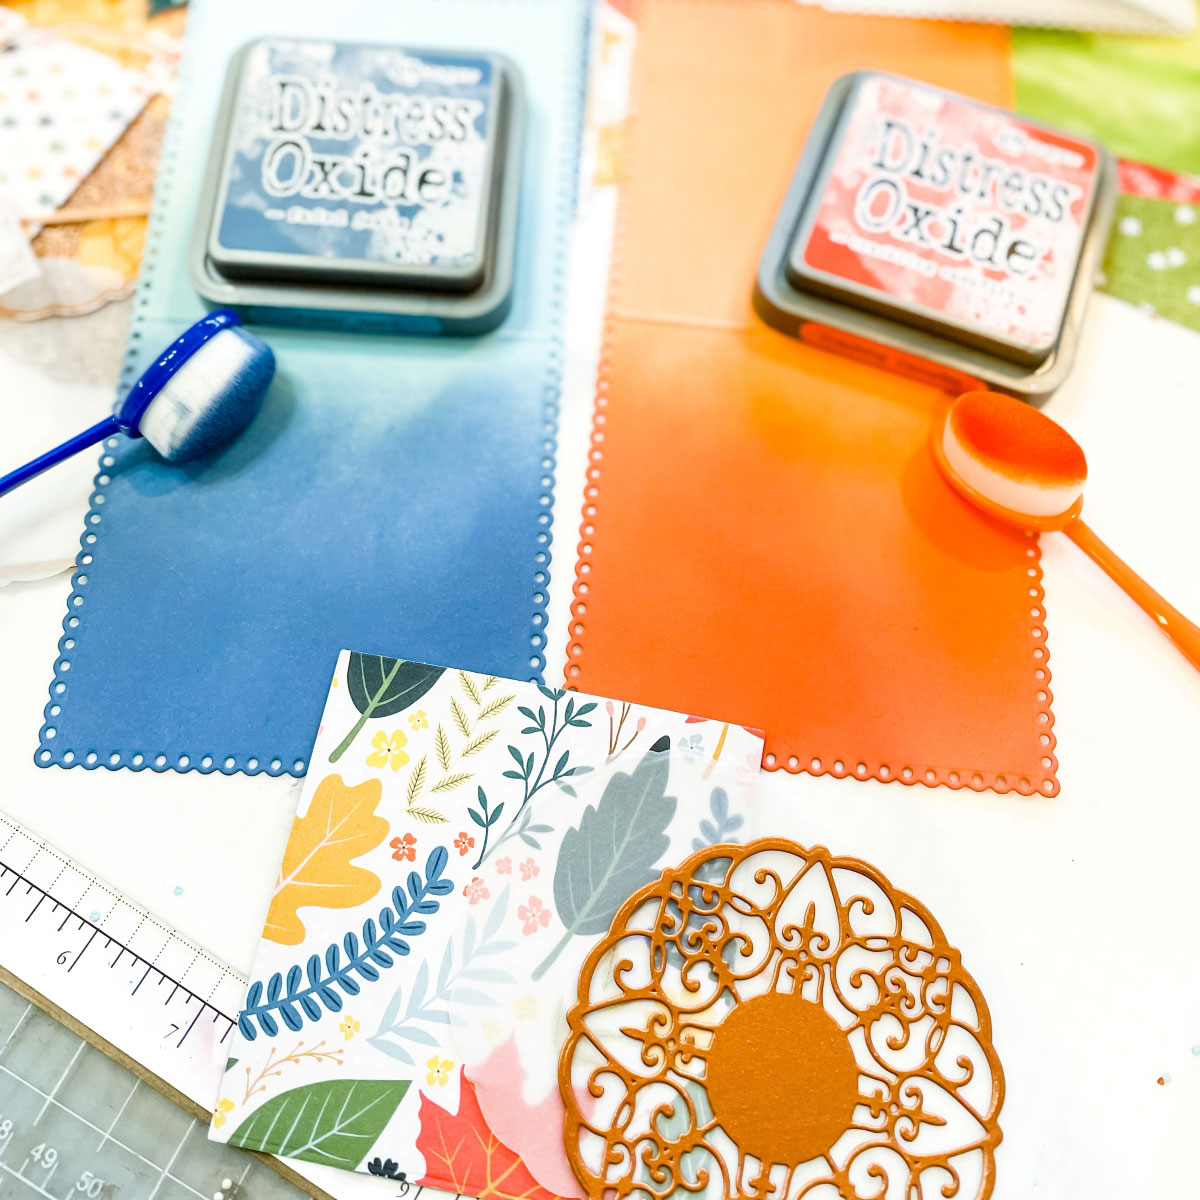

If you’d like an ombre background like mine, you’ll want to do your ink blending at this point. I used a similar, but deeper shade than my cardstock. The blending doesn’t need to be perfect because you’ll be layering over this piece later.
I also ink blended a couple scraps of coordinating cardstock, and die cut my sentiments. (Note: I opted to die cut after ink blending this time because the dies were so delicate. I didn’t want to risk tearing anything.)
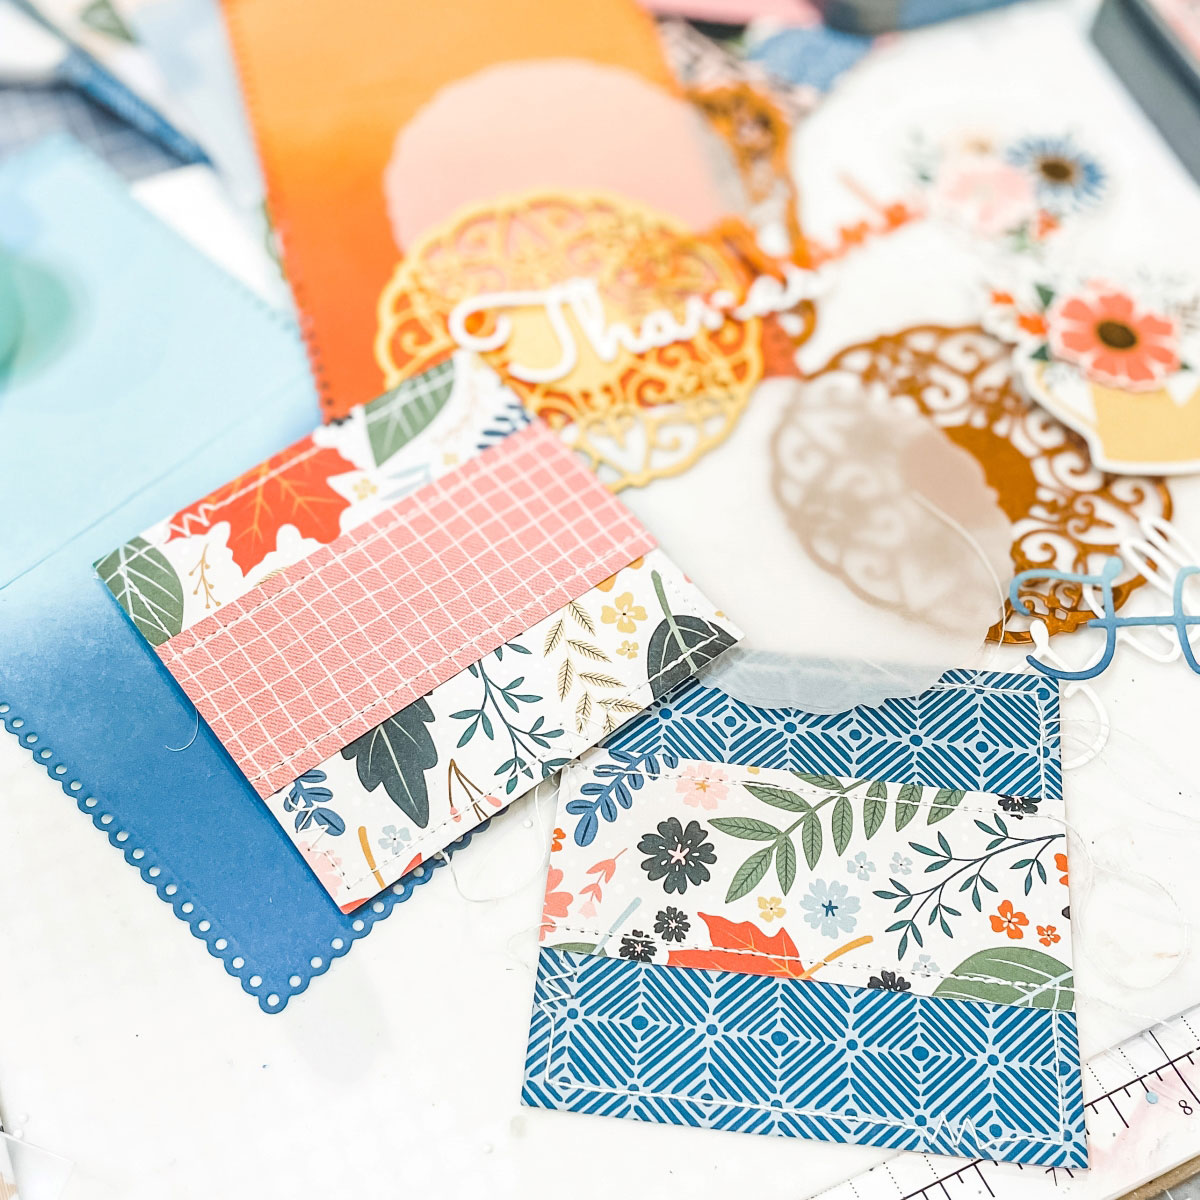
If you’d like to add a bit of stitching on your note cards, now is the time. I really don’t like my stitching to show through to the inside of my cards. I think it looks too messy, so I almost always sew all my card front elements before adhering to the card base.
It was here, I also thought my project needed some more color variety, so I added an additional 1.5” strip of patterned paper across the belly of each die cut square. (Note: I never put adhesive in areas where my sewing needle will go through, so it won’t’ gunk up my machine. I use the tiniest bit of dry adhesive to tack the piece in place to ensure it won’t move during sewing.)
Photos:
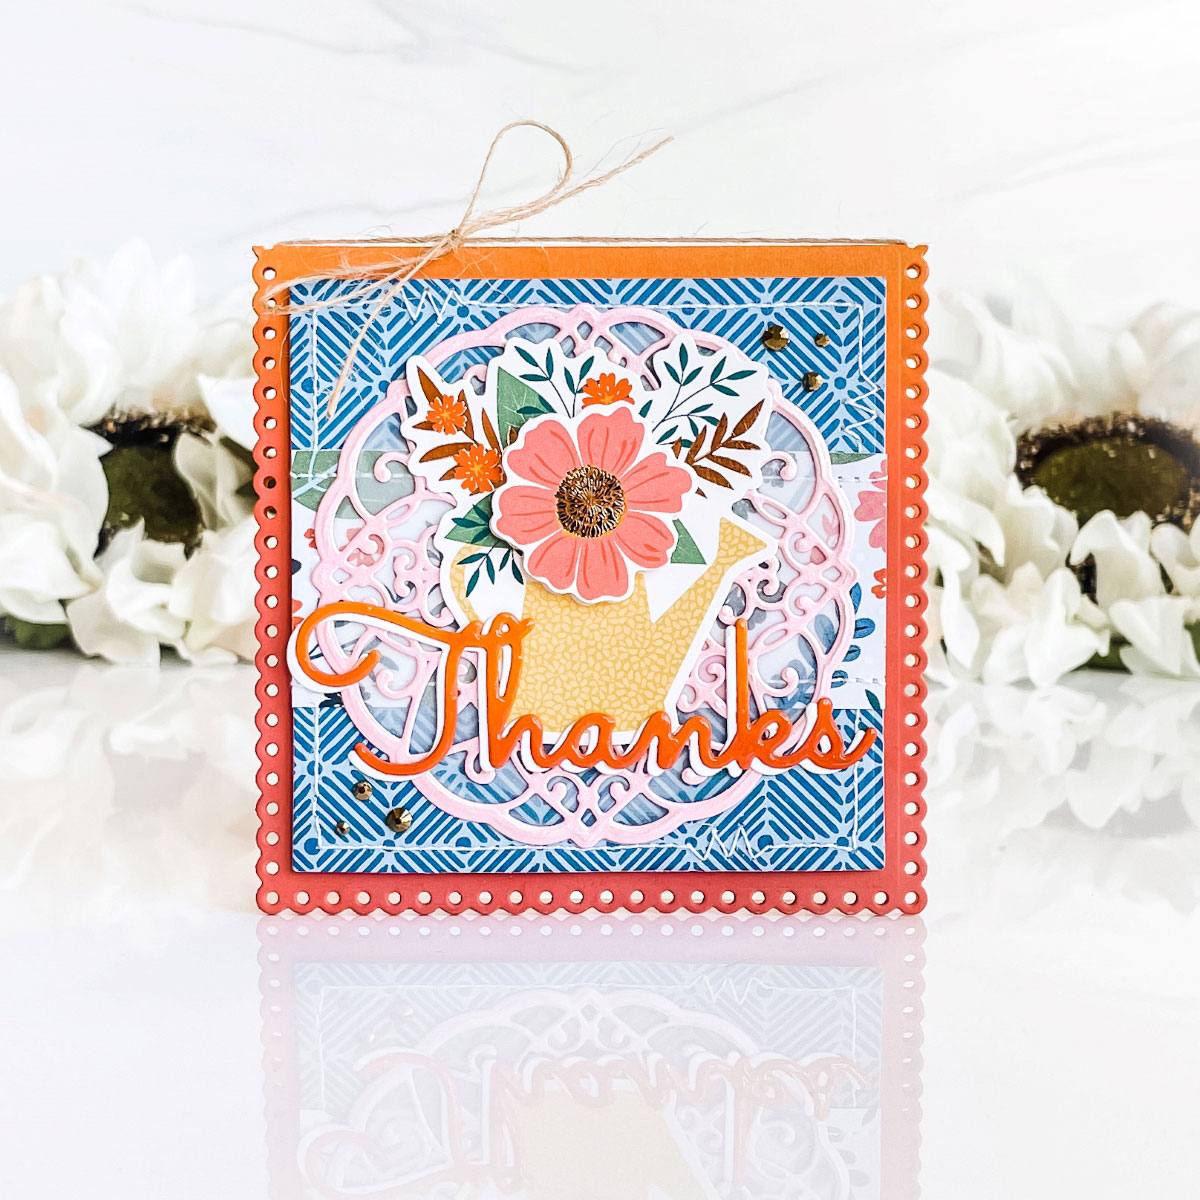
At this point, you are all ready to start adhering all the pieces together. I layered foam under the square pieces of patterned paper, and everything else is simply glued on top.

For the final touch, I added a few Gold Mix Color Essentials Gems, a bit of Glaze ‘n Glue over the die cut sentiments, and jute (which I threaded it through one of the eyelet holes so it wouldn’t slide around.)
Spellbinders Supplies:

Other Supplies
Tim Holtz Crackling Campfire Distress Oxide Ink Pad, May Arts Jute Twine, Paige Evans “Bungalow Lane” patterned paper & layered stickers.
Well, that does it for me again. I hope you’ve been inspired by this set of note cards I made for you today. If you’d like to check out more of my crafty creations, please join me over on my Blog, Instagram, Facebook, Pinterest, and YouTube.
Until next time… stay crafty! – Laura Evangeline
2 Comments
MaryH
I am glad you selected this wonderful die set as I love to see how creative and what lovely designs are displayed. I love your expert way you partnered the pattern paper together and your striking color palette! These bold choices are stunning!
Laura Evangeline
Thank you so much, Mary!